How I Got the Shot - Horseshoe Bend
Those of you who kindly follow my FaceBook, Twitter or Flickr pages may have seen this image recently appear:

It’s a shot of Horseshoe Bend in Arizona – the river is the Colorado River, that downstream flows through the Grand Canyon. I’m quite proud of the shot, and I hope you like it. It took me a 4-hr drive through some beautiful scenery to reach, and I must say I wasn’t in the best mood when I got there – I was a tired and hungry bear! A quick MacDonald’s pit-stop sorted me out though.
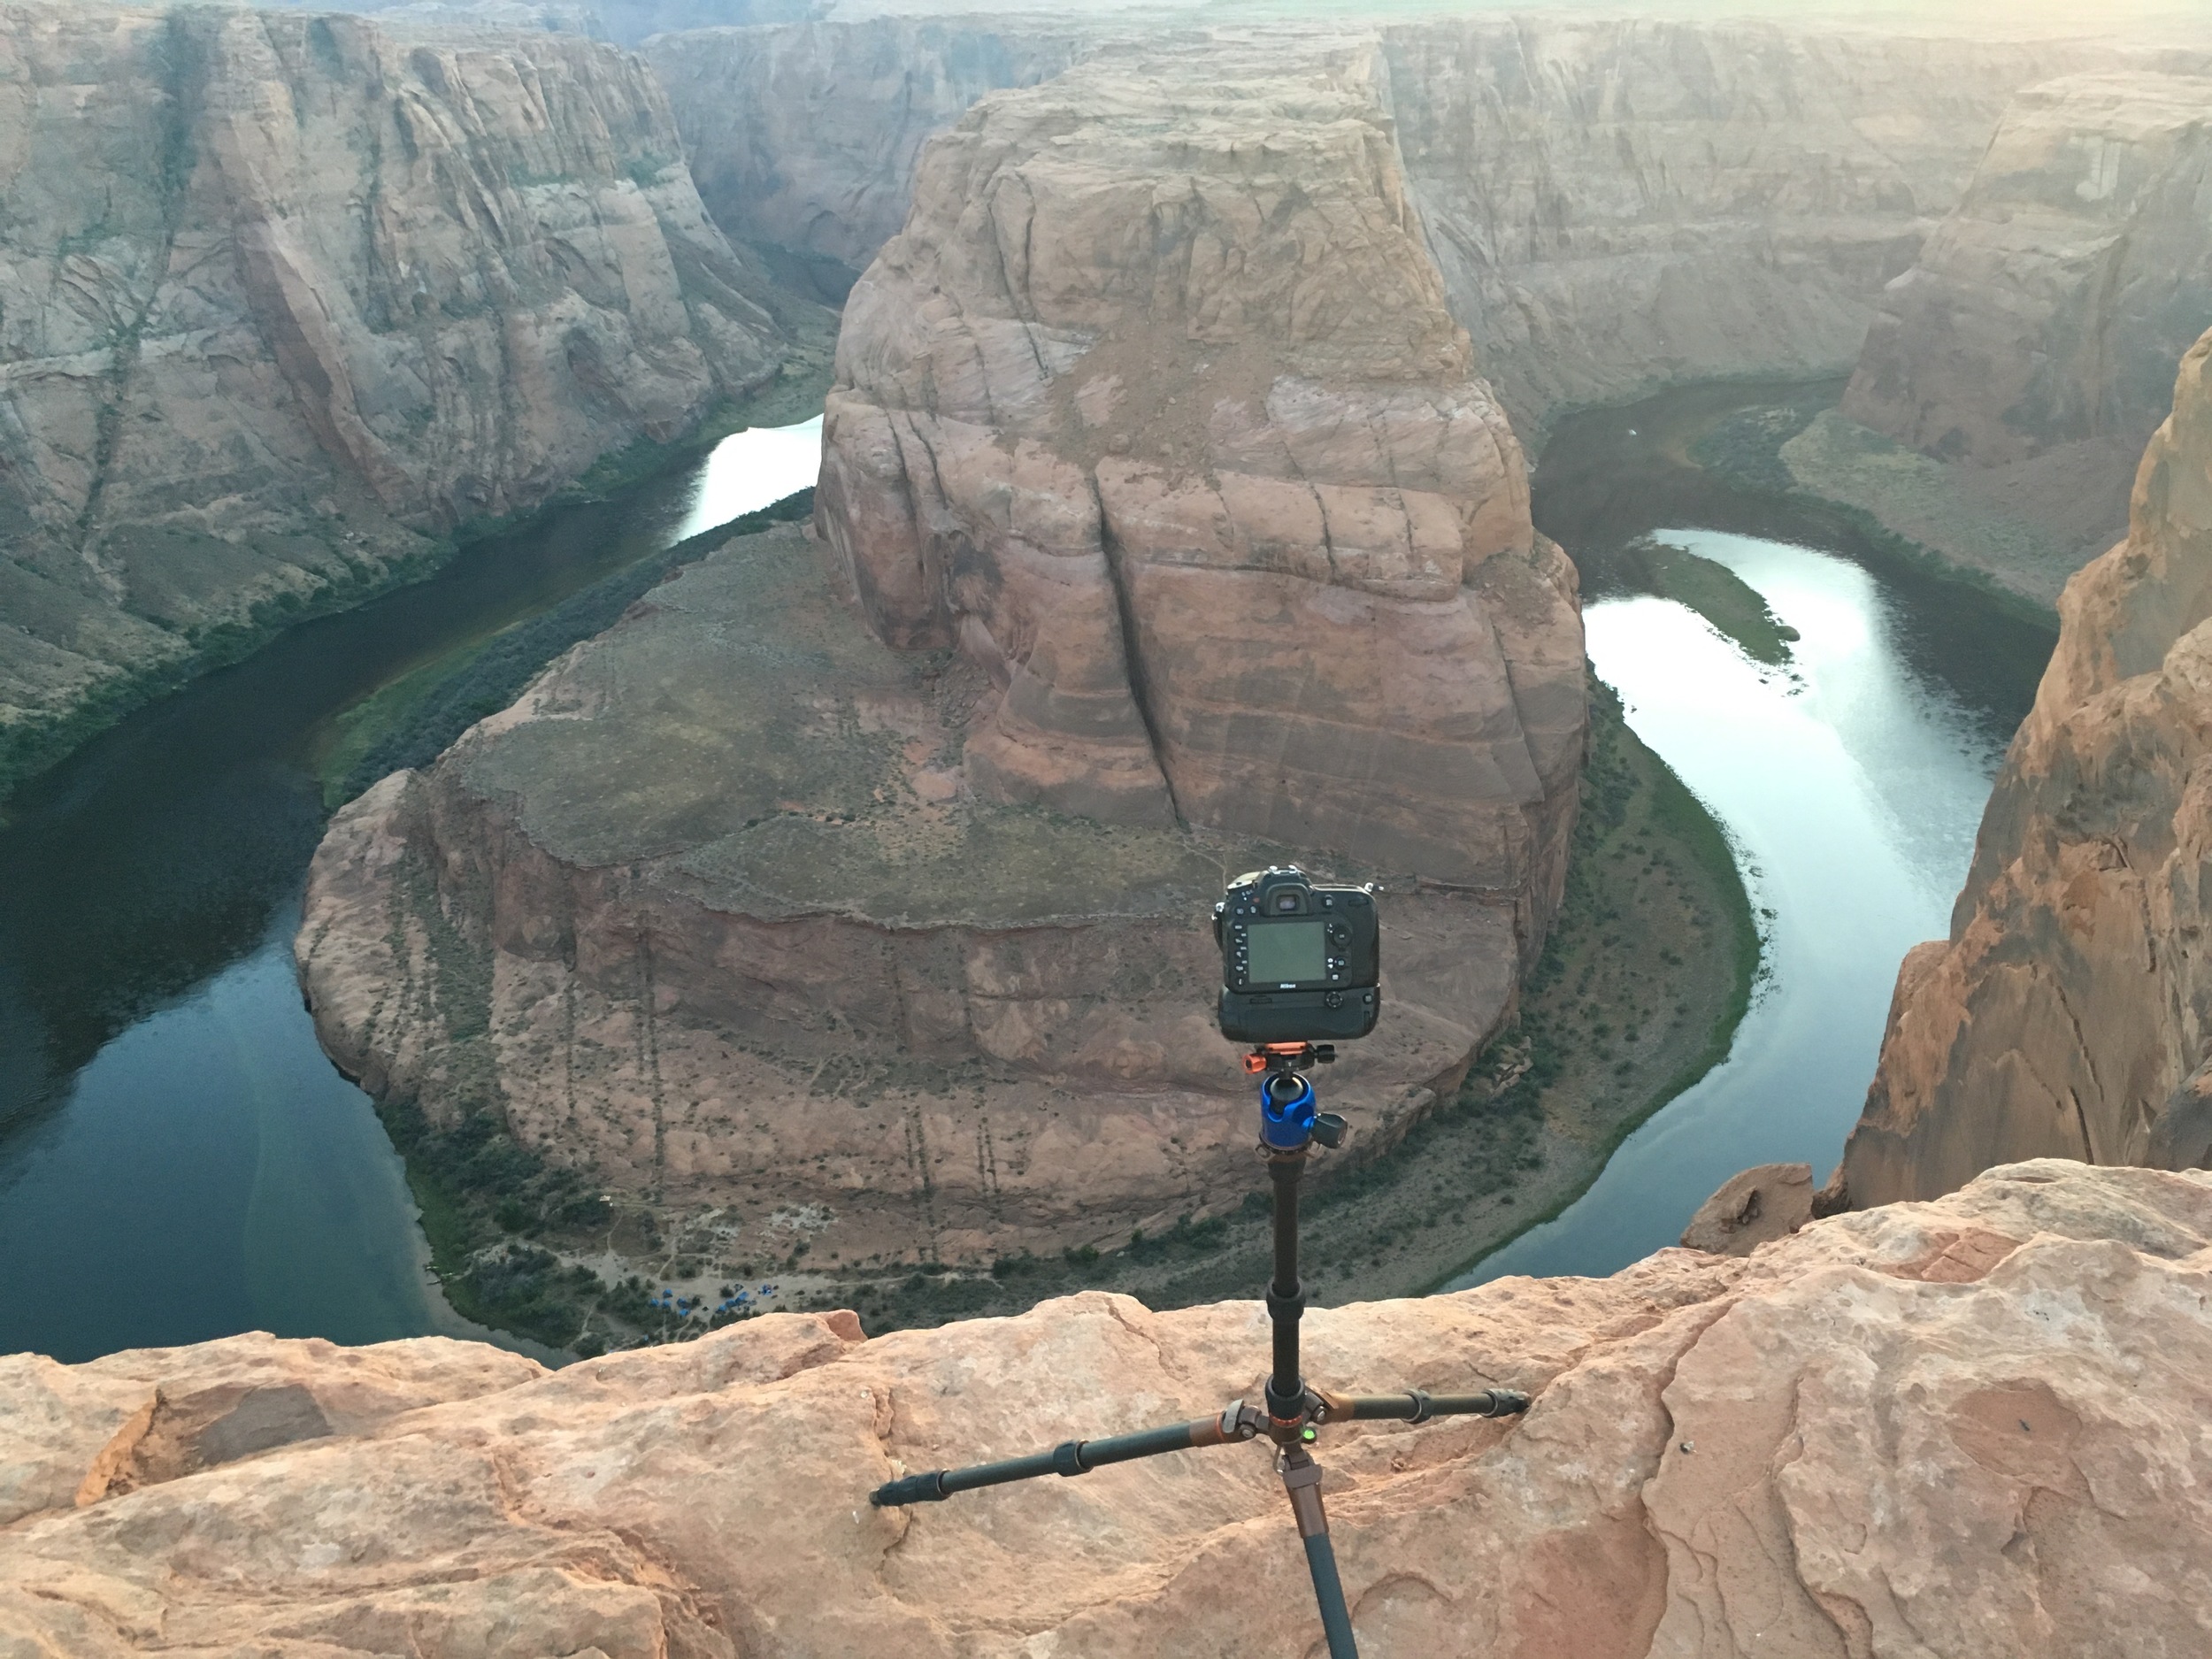
Once re-energised, I headed to the car park situated near the lookout point on the river, and walked the half a mile or so to the cliff edge. Even though it was mid-week, there were plenty of other people there to see what is an amazing piece of natural history. If you know me, you’ll know I have a certain dislike of heights, and the 1000 foot sheer drop made my pulse beat a touch faster than normal! Nevertheless, I put on my brave face and scouted the site for a good place to set up. I put my trusty Nikon atop my equally trusty (and still pretty new and shiny) 3 Legged Thing Brian tripod, and got as close to the edge as I dare!
As I hope you can appreciate, creating a great image isn’t (usually) a case of turning up, pointing the lens and pressing the shutter button (although it can sometimes work!) This particular shot was quite tricky, mainly because of the drastic difference in brightness of the sky, and the deep darkness of the river and canyon walls.
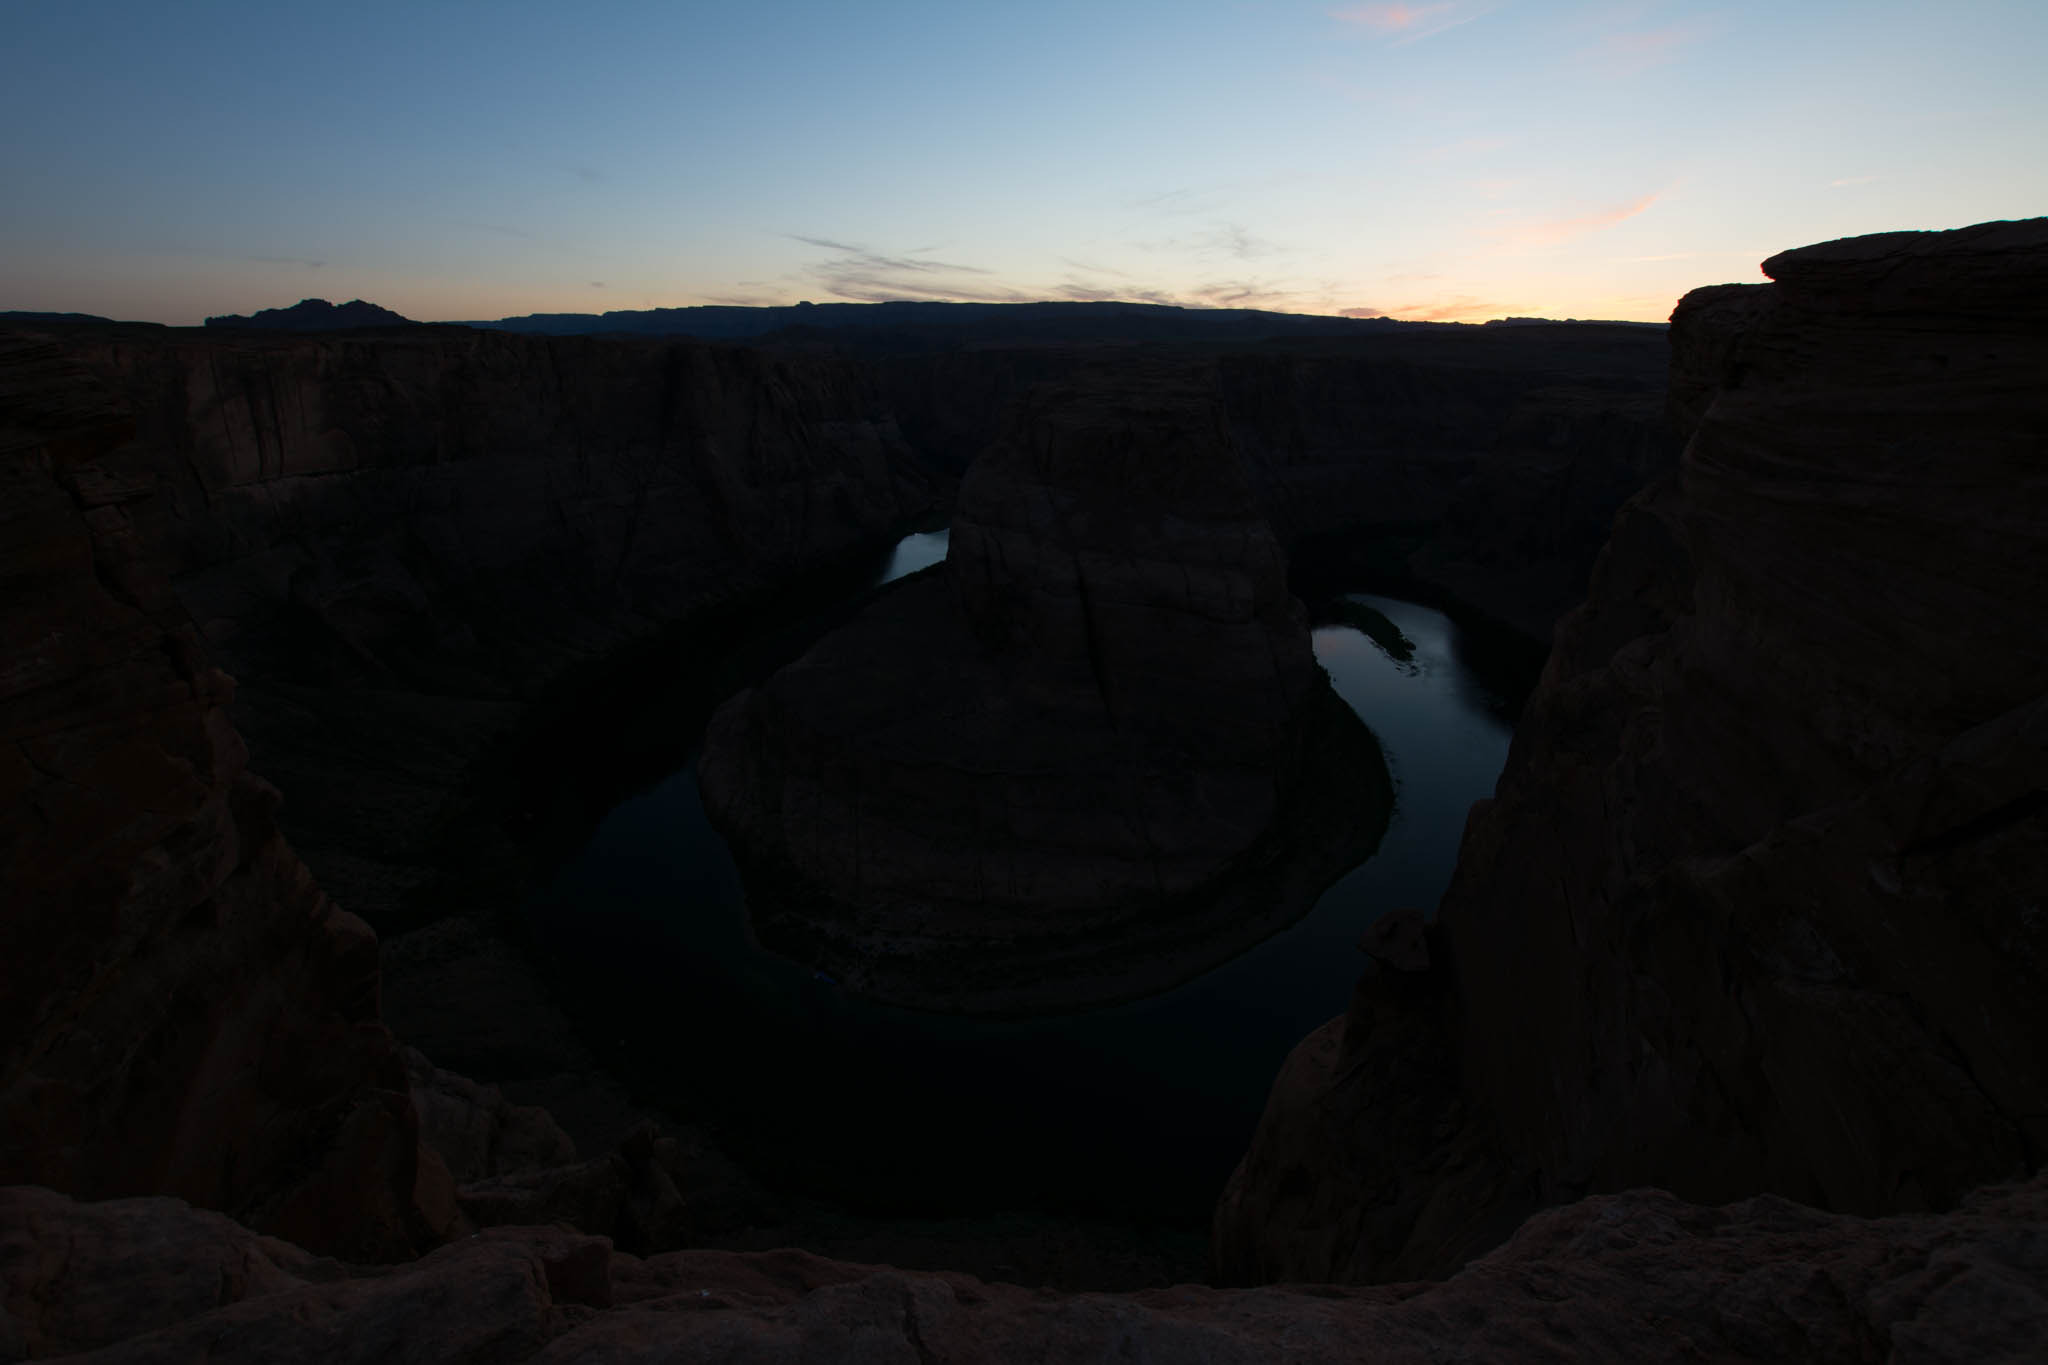
If I exposed for the sky, the canyon is essentially blackness:
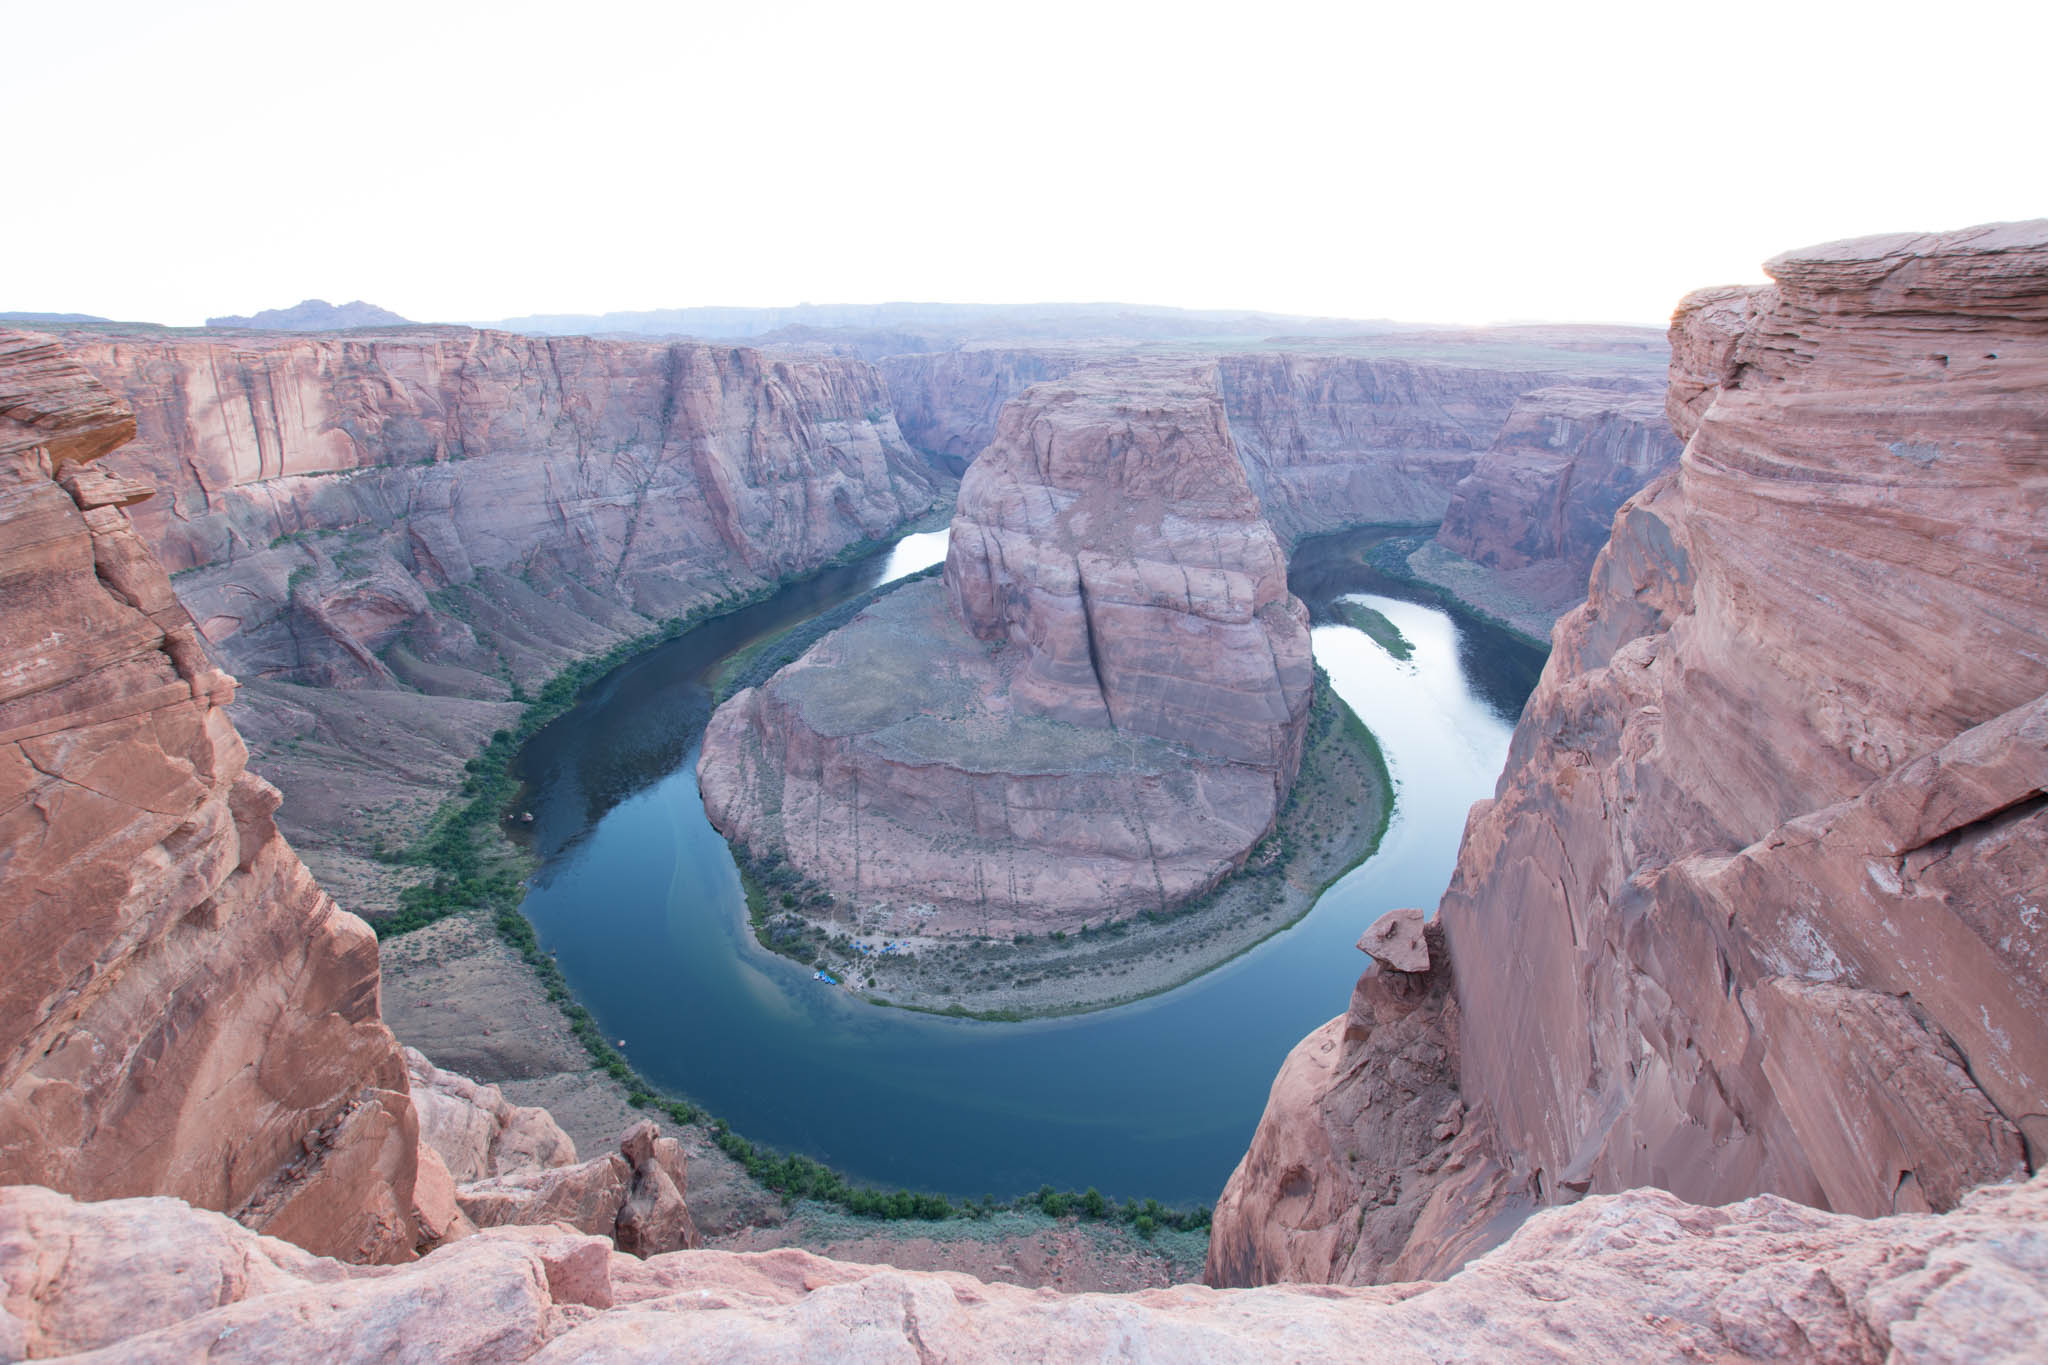
If I expose for the canyon, the sky is mostly white with no detail:
So, what to do? This is where a technique called ‘High Dynamic Range’ comes in. This a technique where you can merge a number of pictures to get a pleasing range of exposure in your subject. It has been over-done a great deal in the recent past, and has got something of a bad name; but if it’s done with restraint, the results can look pleasing and natural. To get the image at the top of this blog post, I took 5 separate exposures of differing shutter speeds (by leaving the shutter open for incrementally longer amounts of time gave me a progressively brighter picture each shot.) Once home and sat in front of my Mac, these 5 images were merged in Adobe Lightroom. From there I could tweak and edit to my heart’s content to bring out the amazing colours and details.
I hope this has been an interesting insight into the additional effort required to create this image.
Thanks for reading!