Holiday Escapes
If you have seen my Instagram stories in the last week or so, you'll see that Ive been on holiday on Ibiza. Not much clubbing to be done when you take the little ones - but we did manage to watch the sunset at Cafe Mambo on Sant Antonio's sunset strip.
Obviously I've come home with plenty of pictures of the kiddies splashing in the pool, I also lugged my tripod an Nikon out there to try and capture some of those dramatic sunsets.
My first attempt was thwarted by cloud, but I still captured the evening glow - I was hoping to get some stars too, but again the clouds were against me! Anyway, here's what I got that night:
Evening glow - and clouds!
However, on my walk back to the hotel in the darkness, the beach at Port Des Torrents was alive with loads of LEDs being thrown into the air - I think the local souvenir touts had a good day selling them to the kids! I popped the tripod back up, and tried a few long-exposures to capture the various flight-paths!
So, I was left with one more attempt on our last night on the island. I chose a slightly different vantage point and went for a vertical orientation with the plan for some stars. The sun actually went down behind a headland with a lighthouse on, but I think it still came out OK. I merged several different pictures together to ensure I had detail in the bright and dark areas. What do you think?
Ibiza Sunset.
Finally, I was rewarded by waiting and more and more stars began to appear, and I went for longer and longer exposures to capture them. I also tried some 'light painting' with my phone's torch to brighten the rocks in the foreground. Let me know which one you prefer.
Ibiza Sunset / Glow / Stars and iPhone lighting!
With my holidays now done, I'm heading into the busiest part of the year with loads of summer functions and a bevy of summer weddings - think I may need a break by the end of August!
Thanks for reading.
Gift Vouchers, Updated Albums and the Photography Show.
I recently shared a story on my FaceBook page about a survey of the costs couples regret splurging on for their wedding day; I’m pleased to say that the Photography wasn't one of them! But I’m well aware that wedding costs can soon ramp up: I had to sell my beloved Suzuki to help pay for our wedding! It’s with that in mind that I’ve just launched a gift voucher scheme that can help couples ease the financial burden of their big day. Take a look at the ‘Gift Certificates' page, under the ‘Weddings’ menu, where there are full instructions.
The vouchers can be used against the photographic coverage of the day, or an already popular option is to help spread the costs for one of my luxury wedding albums.
Speaking of which, I had chance to meet up with my album suppliers this week (the fantastic Loxley Colour) at the annual Photography Show at the NEC. I had a good look at their 2017 album line up, and I can tell you these books are stunning – with really thick lay-flat pages that exude quality and show images at their very best. I have actually altered my offerings slightly since the show, as one of my options included a break between pagesthat stopped images covering a full two-page spread – so I’ve swapped that out for a similar design with a seamless join – perfect for wide shots of all the guests, or a panoramic image of the couple at their wedding venue.
I also had the chance to watch some interesting talks from several photographic luminaries, the likes of Joe McNally (twice!), Clive Arrowsmith, Nick Dunmur and Hannah Couzens – all giving expert advice on technique, equipment, or business. If you’re in to photography at all, it’s well worth a day out and will be back next March. (www.photographyshow.com)
As ever, thanks for reading and if you’ve got this blog update by email but would rather not, just use the unsubscribe link at the bottom, I won’t be offended.
Al.
First Engagment Shoot of the Year!
The first engagement shoot of the year - I'm really looking forward to shooting this weeding in August! Also, I'm gearing up for the Photography Show 2017.
Last weekend I was in North Norfolk for my first engagement shoot of the year. The lovely Max and Megan are getting married there in the summer, and we’d scheduled their engagement shoot for when the worst of the winter weather had passed. What we got was a reasonably bright day – thankfully devoid of rain!
It was a bit of journey down memory lane for me, as I lived in that part of the world when I was of primary-school age (which is clearly a loooong time ago now!). So it was fun to see the old landmarks and streets I’d not seen in many years. Max and Megan had told me they were keen to get some of their wedding shots at the beach, so it made complete sense to go there for the engagement shoot too – I’ve already got some great ideas for on the big day. If you follow me on Facebook or Instagram you may have seen some of these pictures already – but here are a few of my favourites from the day:

The day wasn't completely without incident, I failed to stop one of my flash guns toppling into the sand, which managed to break the radio trigger off it – I think it’s repairable and I spent 30 mins clearing sand out of the flash when I got home (still works though!). I also took the opportunity to shoot some film too, which adds a certain amount of anticipation as of course there isn’t the instant gratification of seeing the image. I’m trying out a new lab in Lincoln for my development so I'll see how they look after a better-quality scan.
Here are some of the film pictures, as you can see they have a slight different 'feel' to them:
This weekend heralds the return of the annual Photography Show at the NEC. I first went a few years as a hobbyist, but now I’m definitely in professional mode! I’m there on Monday for the Pro Conference, and I’ve got a long list of vendors to see, including USB drive makers, album suppliers, my online client gallery hosts, as well as some training providers (there’s always something else to learn.)
Watch out on my Instagram feed for some pictures on Monday!
Thanks for reading – if you received this via e-mail and no longer want them, please use the unsubscribe at the bottom of the email.
Al.
Lets Talk Presentation.
Wedding Albums are now available from Lincolnshire Wedding Photographer A D Hall Photography.
It’s fair to say that up to now, I’ve not concentrated on offering books and albums as part of my wedding packages. This has predominately due to the multitude of options (it really is infinite when you consider sizes, paper types, cover options etc.) which makes it difficult to offer cohesive, balanced, and affordable options.
This is something of a shame, as it really is the best way to present the photographs. Having the digital files is fantastic, as it give you the option to rapidly share those precious memories instantly. However, how often do you actually go back and look at those images? (Apart from FaceBook’s ‘On This Day’ feature of course!)
The truth is, that the best way to appreciate and enjoy a quality photograph is to have it printed, and for a large collection of images that tell the magical story of your wedding day – a luxury book is an absolute must. To deal with the endless options, I’ve approached it as if I were a client wanting to have my own wedding pictures printed, and I’ve sourced two top-of-the-line luxury options, along with a great-value bundle. For the more budget-conscious, I can still offer the standard and large photobooks, which are also ideal as extra books for relatives, bridesmaids and groomsmen.
These beautiful wedding story books are now available (see the Wedding Books page); they’re not cheap by any means, but they really are things of beauty, fantastic for telling the story of your day, and for showing the children (and grandchildren!) way down the line. (I can sort a pay-monthly deal to spread the cost.)
If you are a former client, and would like to have your photos presented in one of these beautiful books, get in touch – I of course still have your files stored safely (in 4 different places no less!)
Thanks for reading - I hope to have more blog posts coming as the wedding season heats up. As ever, if you'd rather not receive these occasional updates, please use the 'Unsubscribe' link below.
Al.
So do you agree?
Happy New Year!
Although the media has presented 2016 in a very dark light, there are always positives to be found. I came across this picture on the home of fake news (Facebook) the other day:

Seemed like good advice to me - what do you think?
Whatever ups and downs 2016 has thrown at you, you can be sure 2017 will have more of the same - so I plan to roll with the punches and make the very best of life (and no that's not a new year's resolution!)
I wish you all success for 2017 - I'm really looking forward to capturing some more magical memories at all of the weddings this year.
Thanks for all the support in 2016!
Al.
Choosing Your Photographer.
As usual, I’ve been slack in updating this blog – life (and luckily work) seems to get in the way too often. What I’d like to talk about this time though, is how to go about choosing a photographer for your wedding day.
You may have spotted some pictures on my FaceBook page and / or my Instagram feed that we exhibited at our first Wedding Fayre recently. What was obvious is amongst the photographers there on the day, all of us had fantastic images on display, and from what I can tell, great-value packages available. The obvious question is: how do you choose? Is it just a case of going with the cheapest? Personally, I don’t see the super-cheap deals advertised out there as either sustainable for the photographer or honest with the couple, needing the addition of lots of extras to bring the package up to a good level.

With our stand at the Wedding Fayre.
What I feel is that your selection should be personality-based; quite simply: do you like the photographer? Did they like you? Did they understand what YOU want to capture on your wedding day? Remember, the photographer is going to be a major part of your wedding. There will always be people that you just don’t ‘click’ with – there can sometimes be no obvious reason, but the match has to work both ways; ie the couple feel comfortable with the photographer, and the photographer has to be comfortable with the couple.
With that in mind, I’m really pleased that we secured several bookings at the wedding fayre, and I truly believe that we made a rapid connection with the couples, and they got the feeling that we were good to work with, that our work was to their taste, and they wouldn’t be distracted by the shine off my increasingly hair-free scalp. I guess it all boils down to trust: do you think you can trust the photographer to capture the memories of your big day? After all, the decorations get taken down, you may not always fit in the dress, you may not remember your distant cousin’s girlfriend’s name, but the pictures will last a lifetime.
Thanks for reading, and please get in touch to discuss your future plans, 2017 is filling up and I’ve got bookings into 2018 already!
Al.
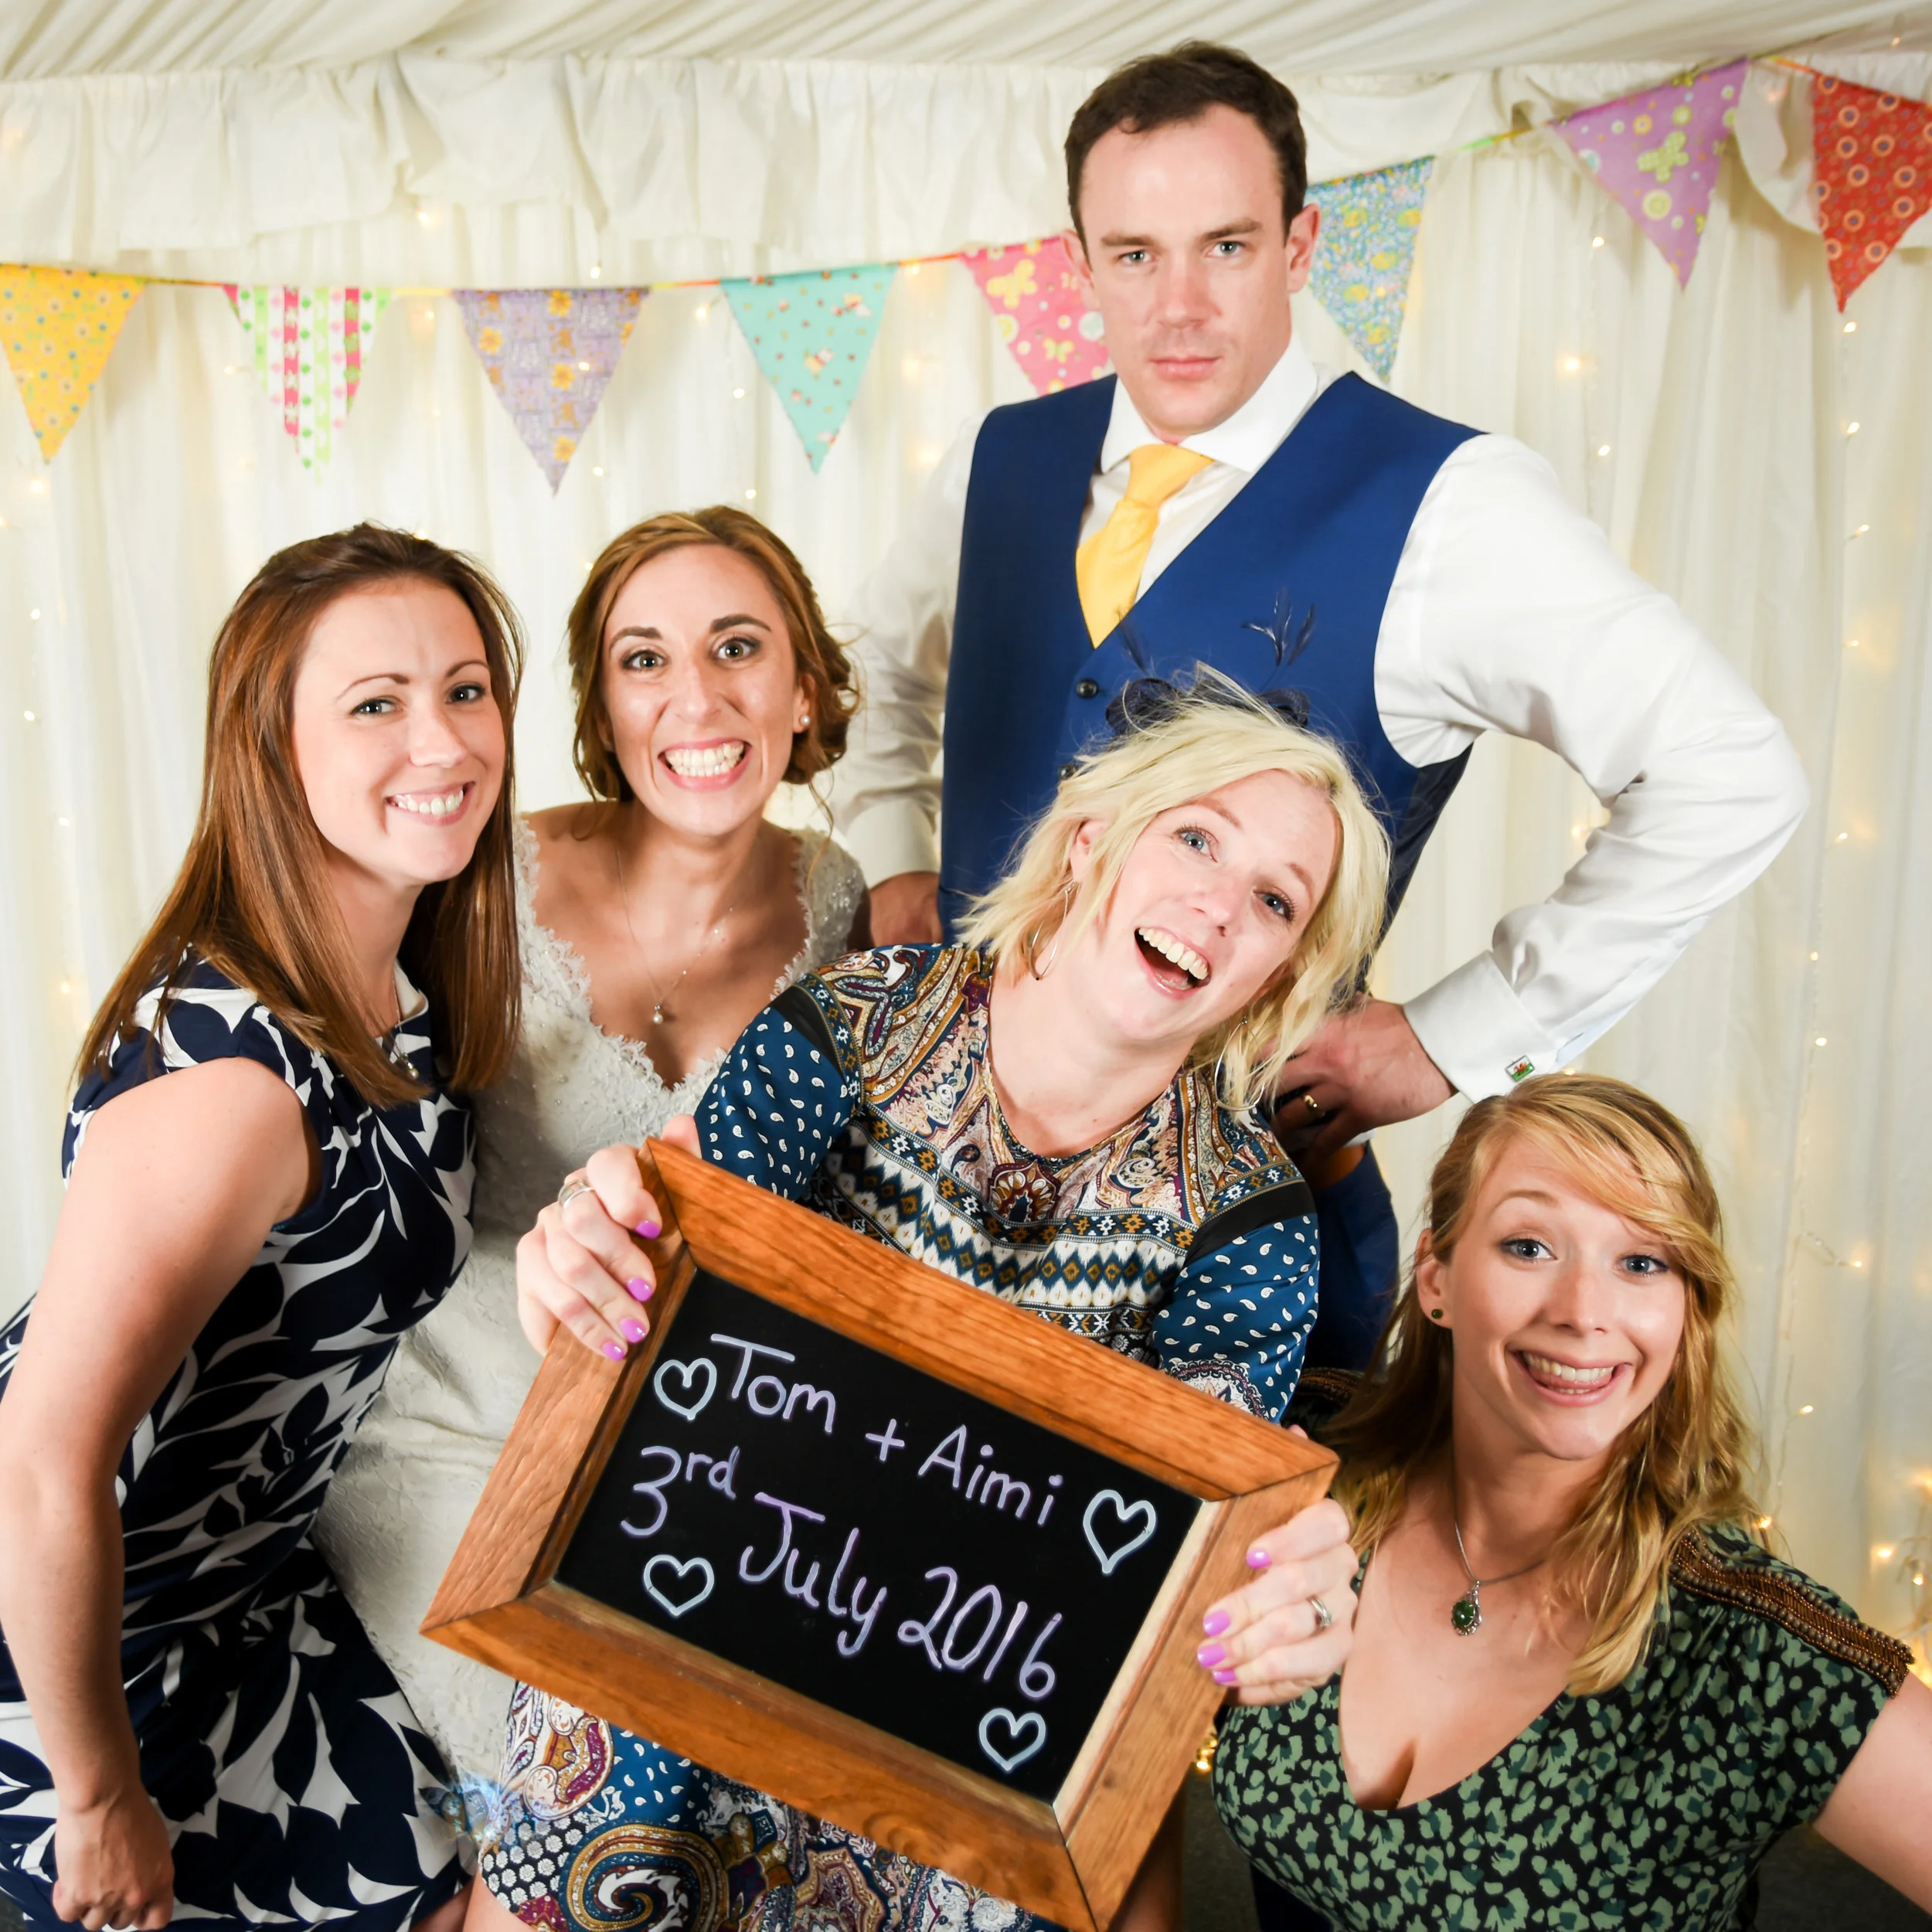
ps – In recent news: I’m really pleased to have had one of my photographs from this year to be selected as ‘Photo of the Week’ by Bride Magazine (LINK) My picture of Tom and Aimi from a wedding this Summer will be their FaceBook cover photo for a few more days, and will be on their website for months to come.

Further Adventures In Film
On a bit of a whim, I recently bought an old (circa 2000) Nikon F80 film camera, in order to force myself into some better habits when it came to taking picture. It’s all too easy to shoot off loads of pictures and adjust or fix later, when if the picture was captured correctly in the first place it wouldn’t need such follow-up!
So a film camera is ideal, as you don’t know what you’ve got until the film has been developed. I chose the F80, as most of my existing Nikon gear is compatible, about half of my lenses, and one of my flash units work with no issues at all (you may see some pictures of it in my Instagram feed.)
So far, so good. Film is available fairly readily via Amazon, ebay and in-store at places like Snappy-Snaps. So I’ve stocked up on various black and white films that I used to use in my youth (Ilford HP5+ and Delta 400) and I’ve also got some Kodak Portra, a colour film that’s perfect for portraits. Taking the pictures has been a real pleasure, with a really satisfying sound coming from the camera (the shutter followed by the film advance) and it really has made me slow down and think about taking a picture. I’ve found that when taking pictures of my daughters at Hartsholme Park, I made sure they were exactly where I wanted them, and looking in the right direction before taking the shot!
As for developing the film, I’ve so far gone back to Snappy Snaps in Lincoln – they can do a 1-hr process and scan service with the colour film, but have to send the black and white away, which can take a week and a half! I may investigate sending black and white away directly to Ilford, to save time. I doubt I’ll gear myself up with developing tanks and chemicals – I just won’t be doing enough to make it worthwhile.
The next problem is how to get the pictures into the computer for further processing, and of course sharing. The obvious answer is to get the negatives scanned when they’re developed. The only issue is that the pictures are relatively low-resolution, and are quite compresses JPEG images – which doesn’t leave a lot of room for further tweaking. But I think I may have hit upon a solution: using a digital camera! Yes, it may seem odd to take a picture with a film camera, and then take a picture of that picture with a digital camera, but I’m finding that this really is the best way.
Here’s the kit I use:
- One of my DSLRs (crop-frame),
- A 20mm extension tube (moves the lens further away from the camera to allow close-up pictures),
- 35mm lens
- Nikon ES-1 slide copying device (which I think dates from the '70s!)
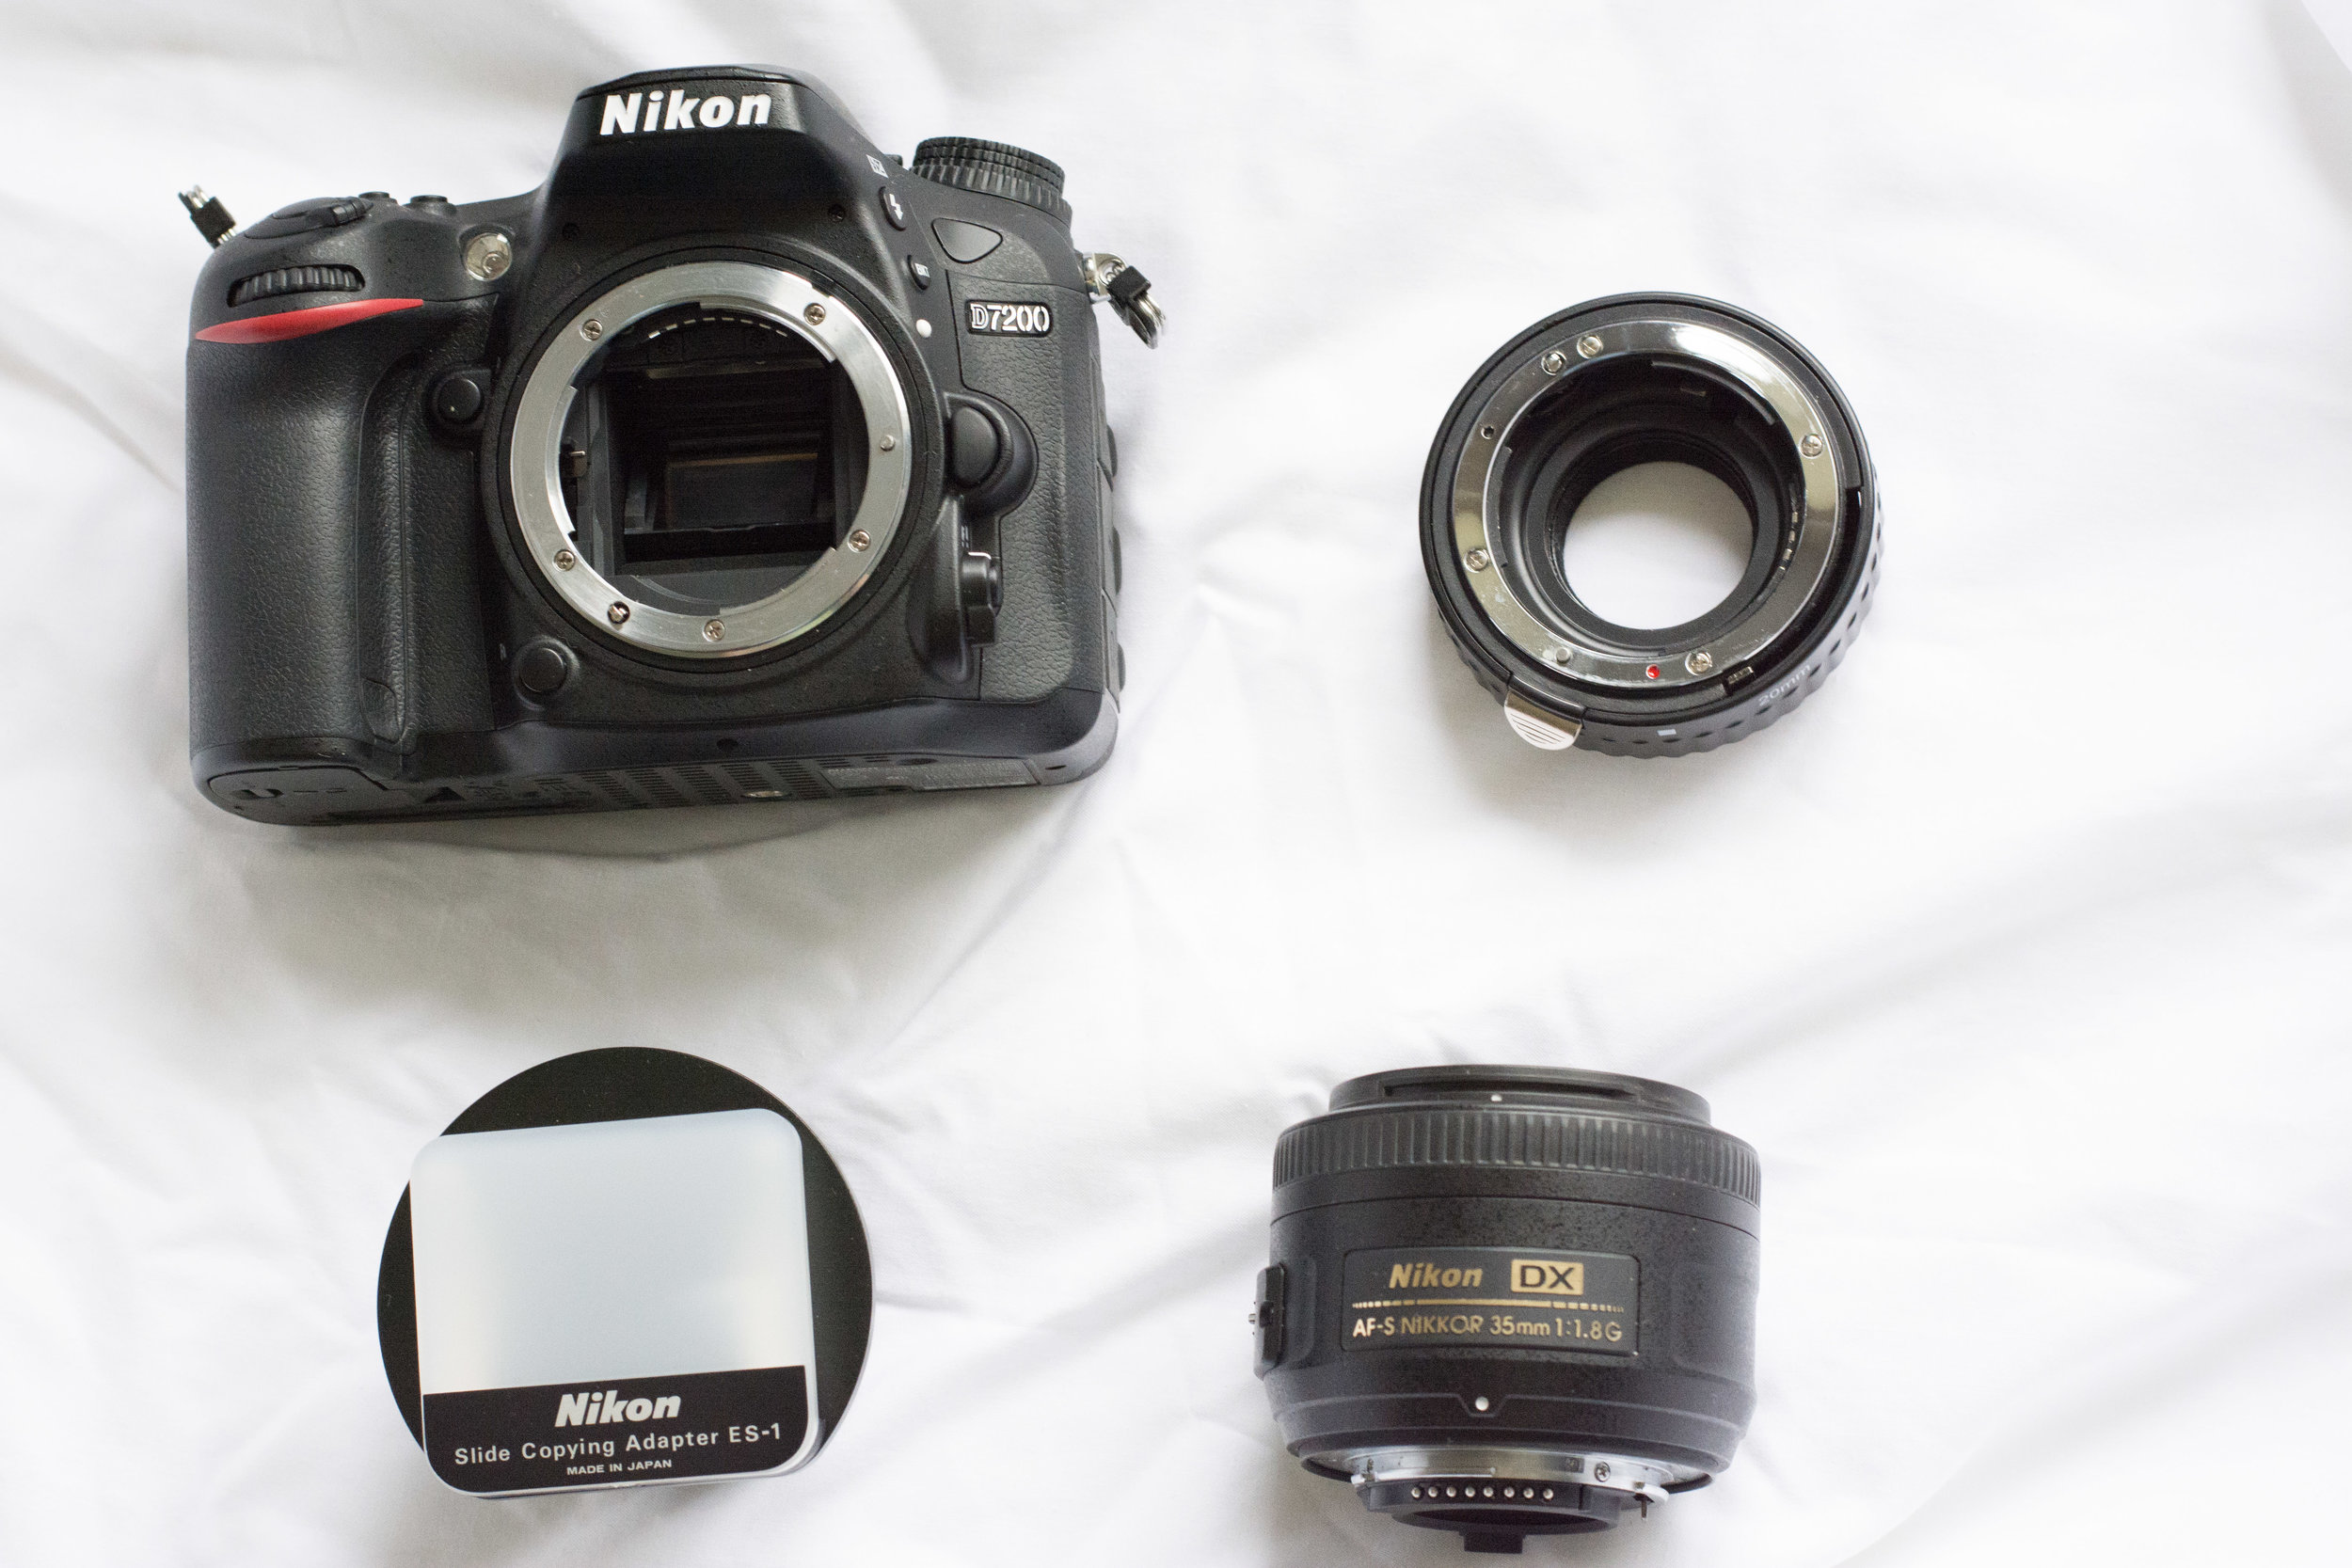
It all goes together like this:
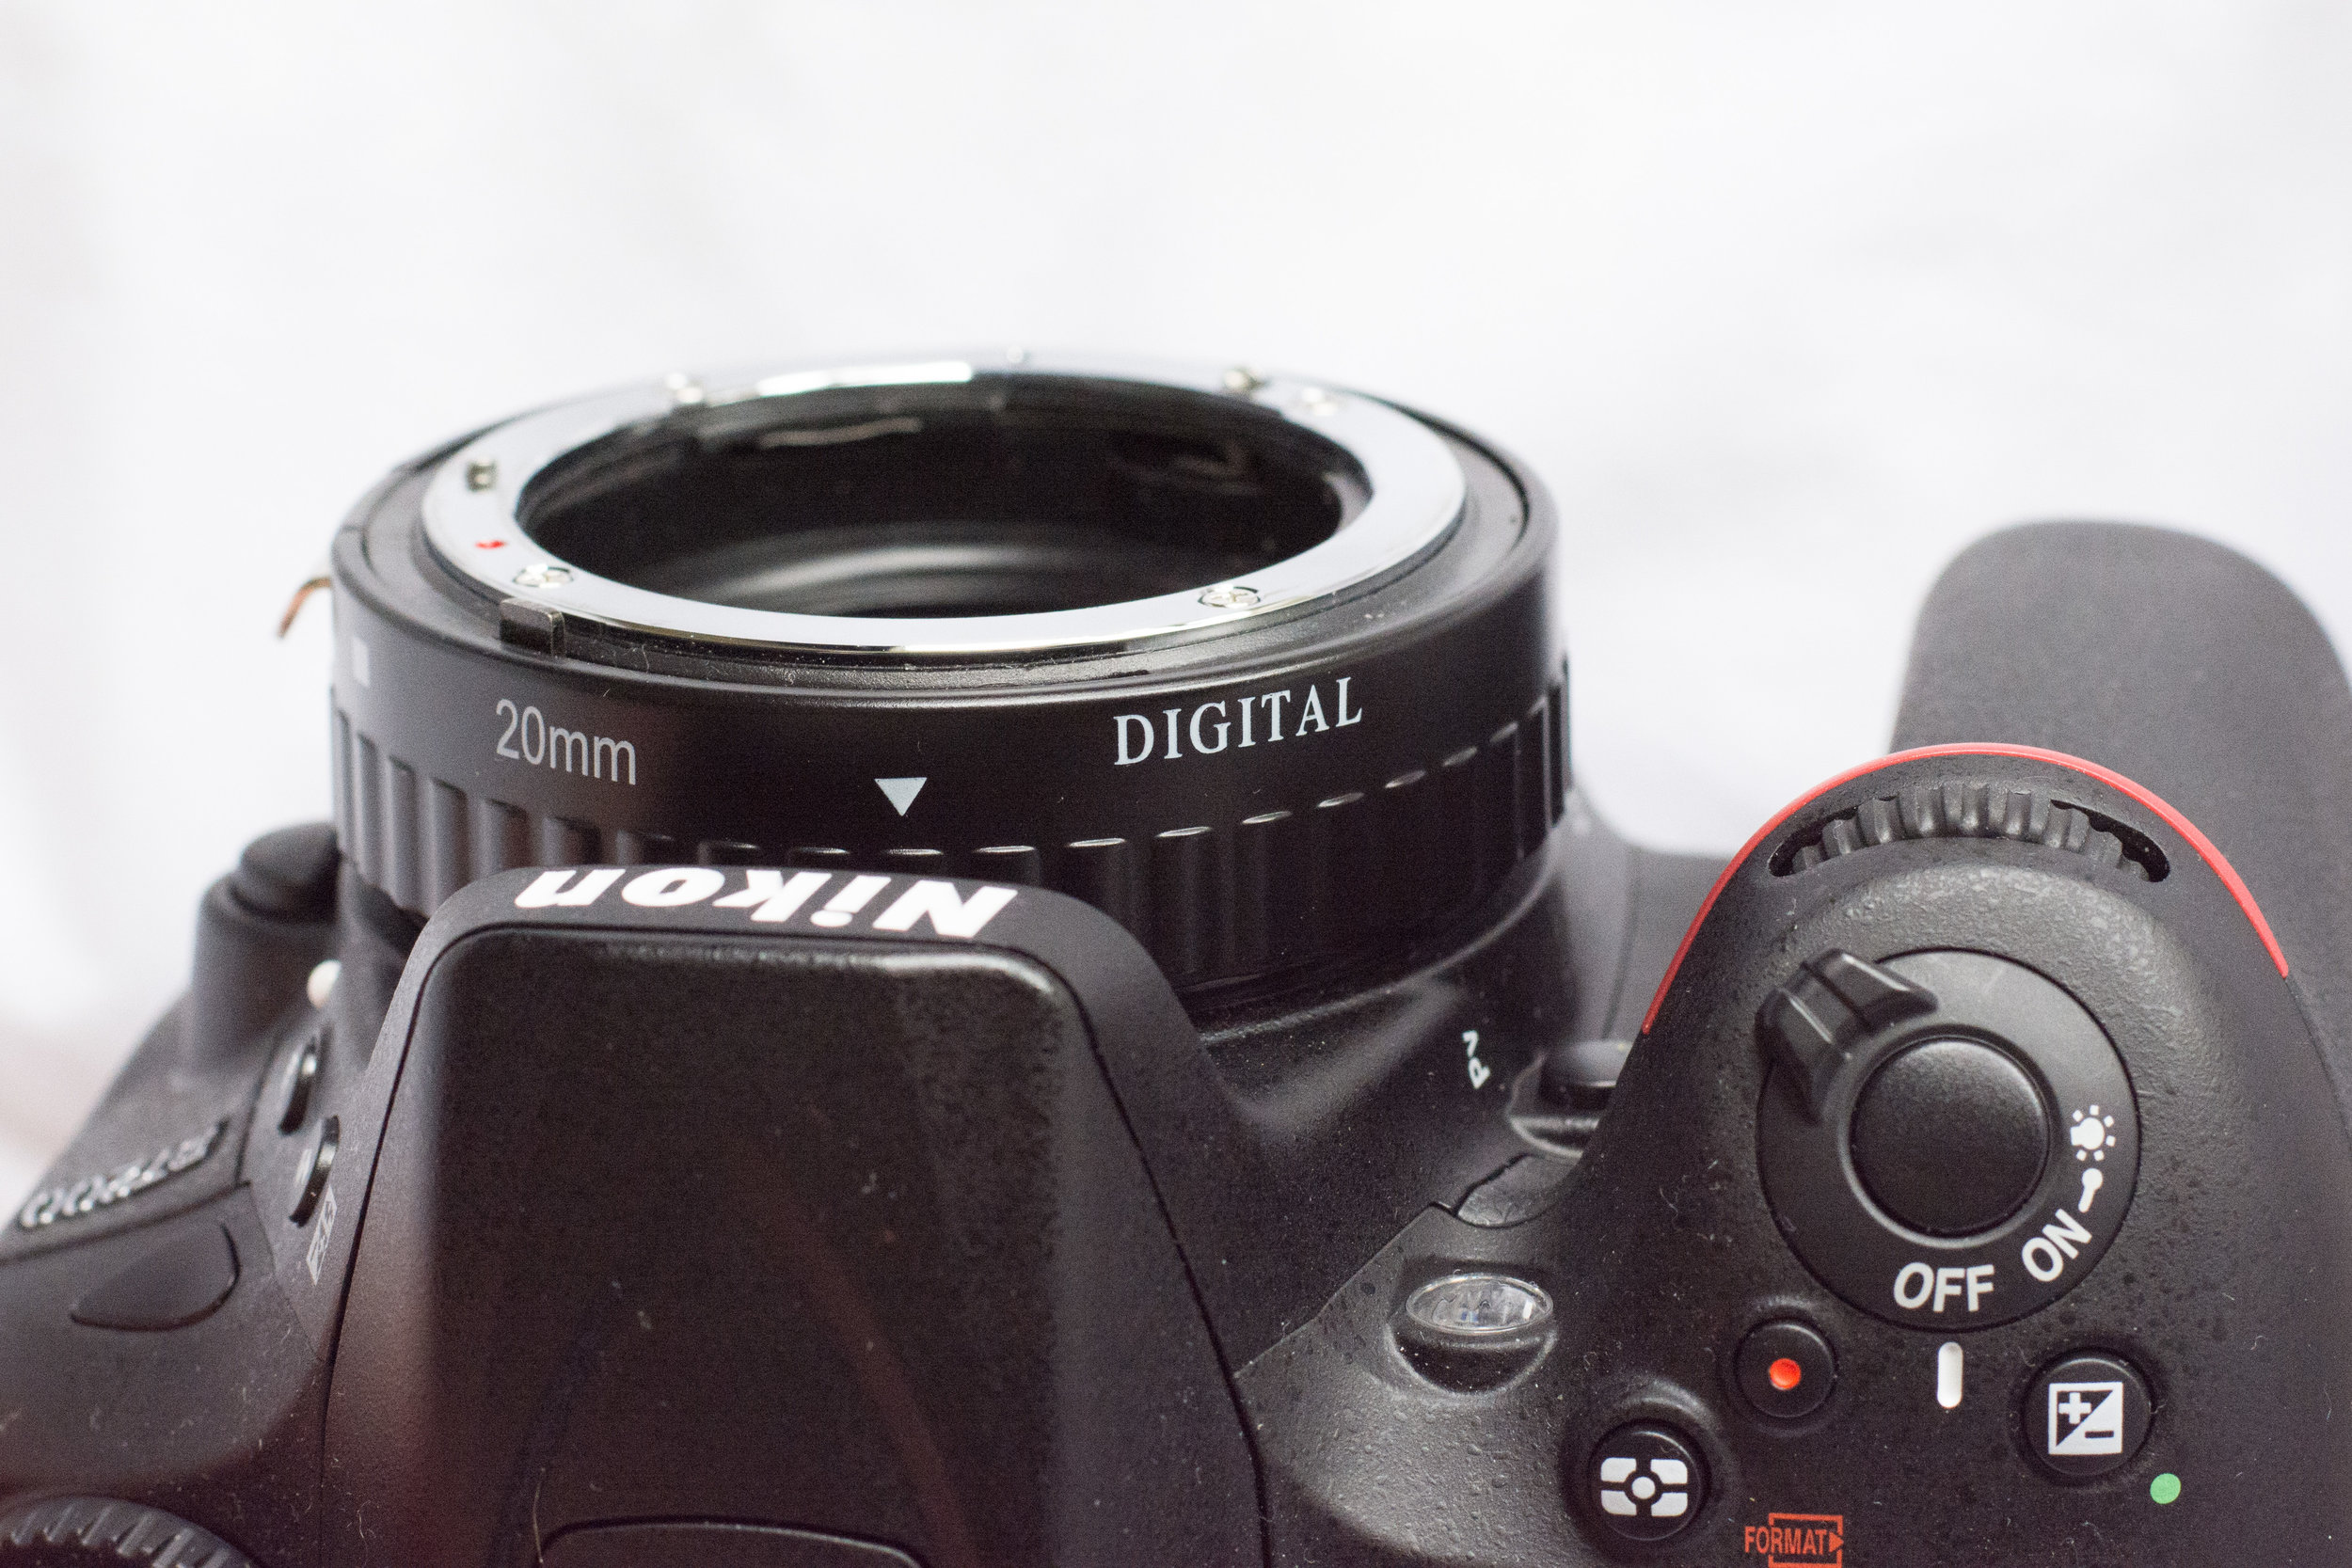


The basic idea is that the film negative is held in the ES-1, and I then take a picture of it at 24 megapixels in full quality. I can then import this into the Mac as usual and edit as required. Clearly, there’s some tweaking to do – turning it from a negative to positive for a start – but it’s actually kind of fun. The ‘look’ you achieve with film is certainly different from digital, so it’s been great to explore a different way of taking and making photographs.
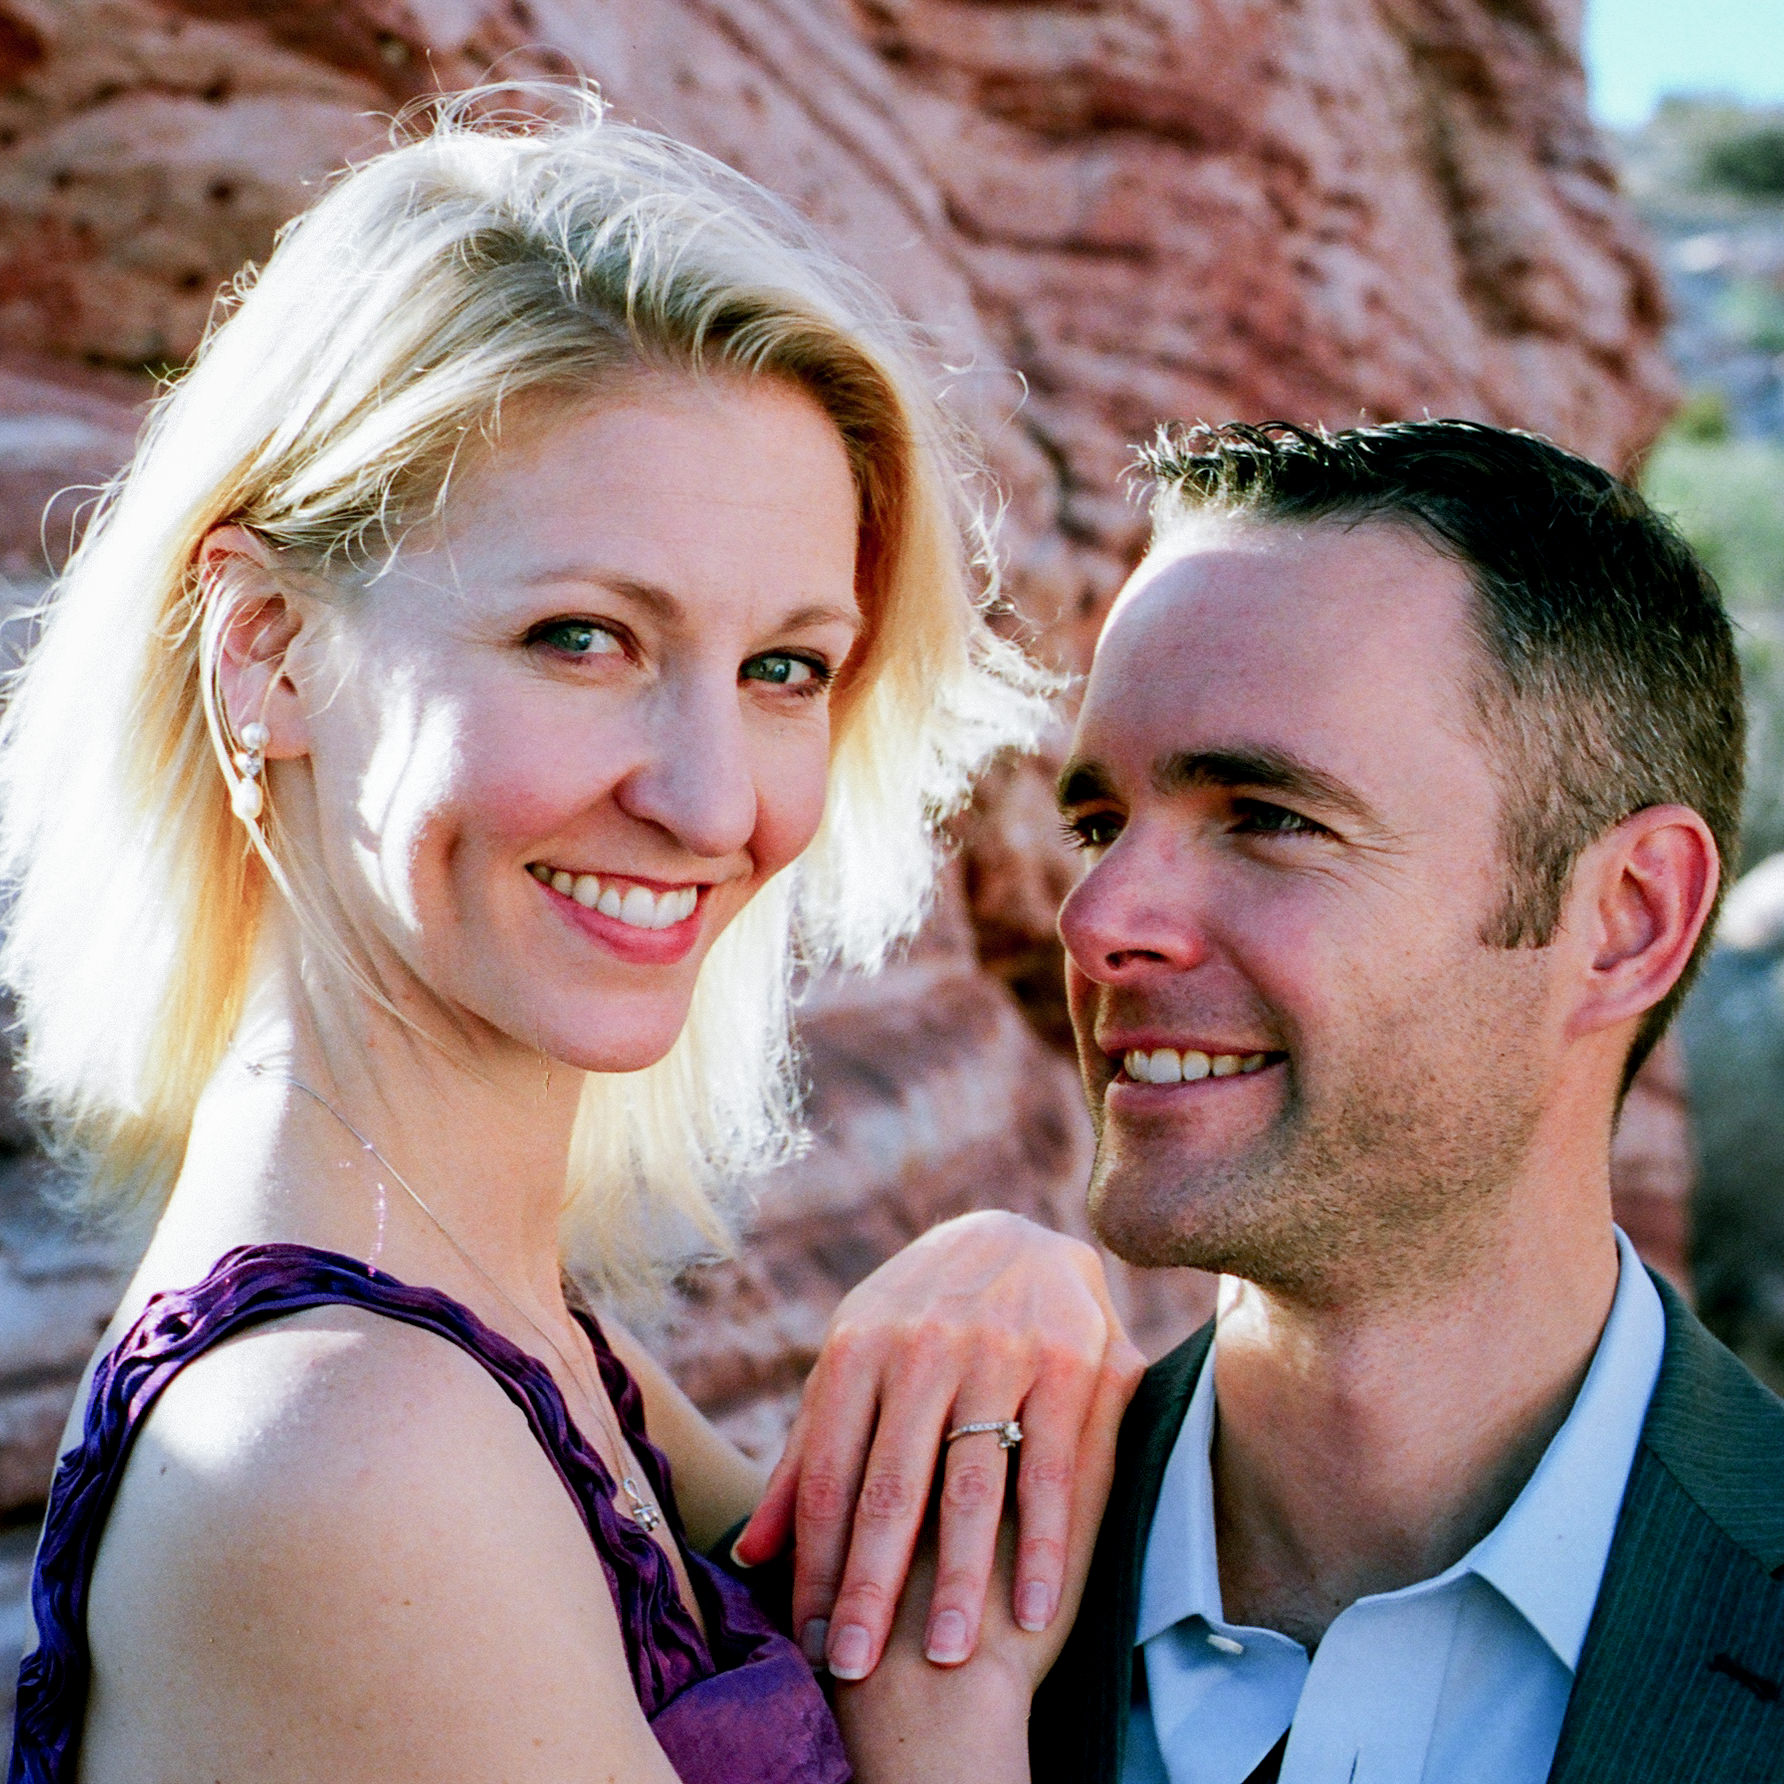
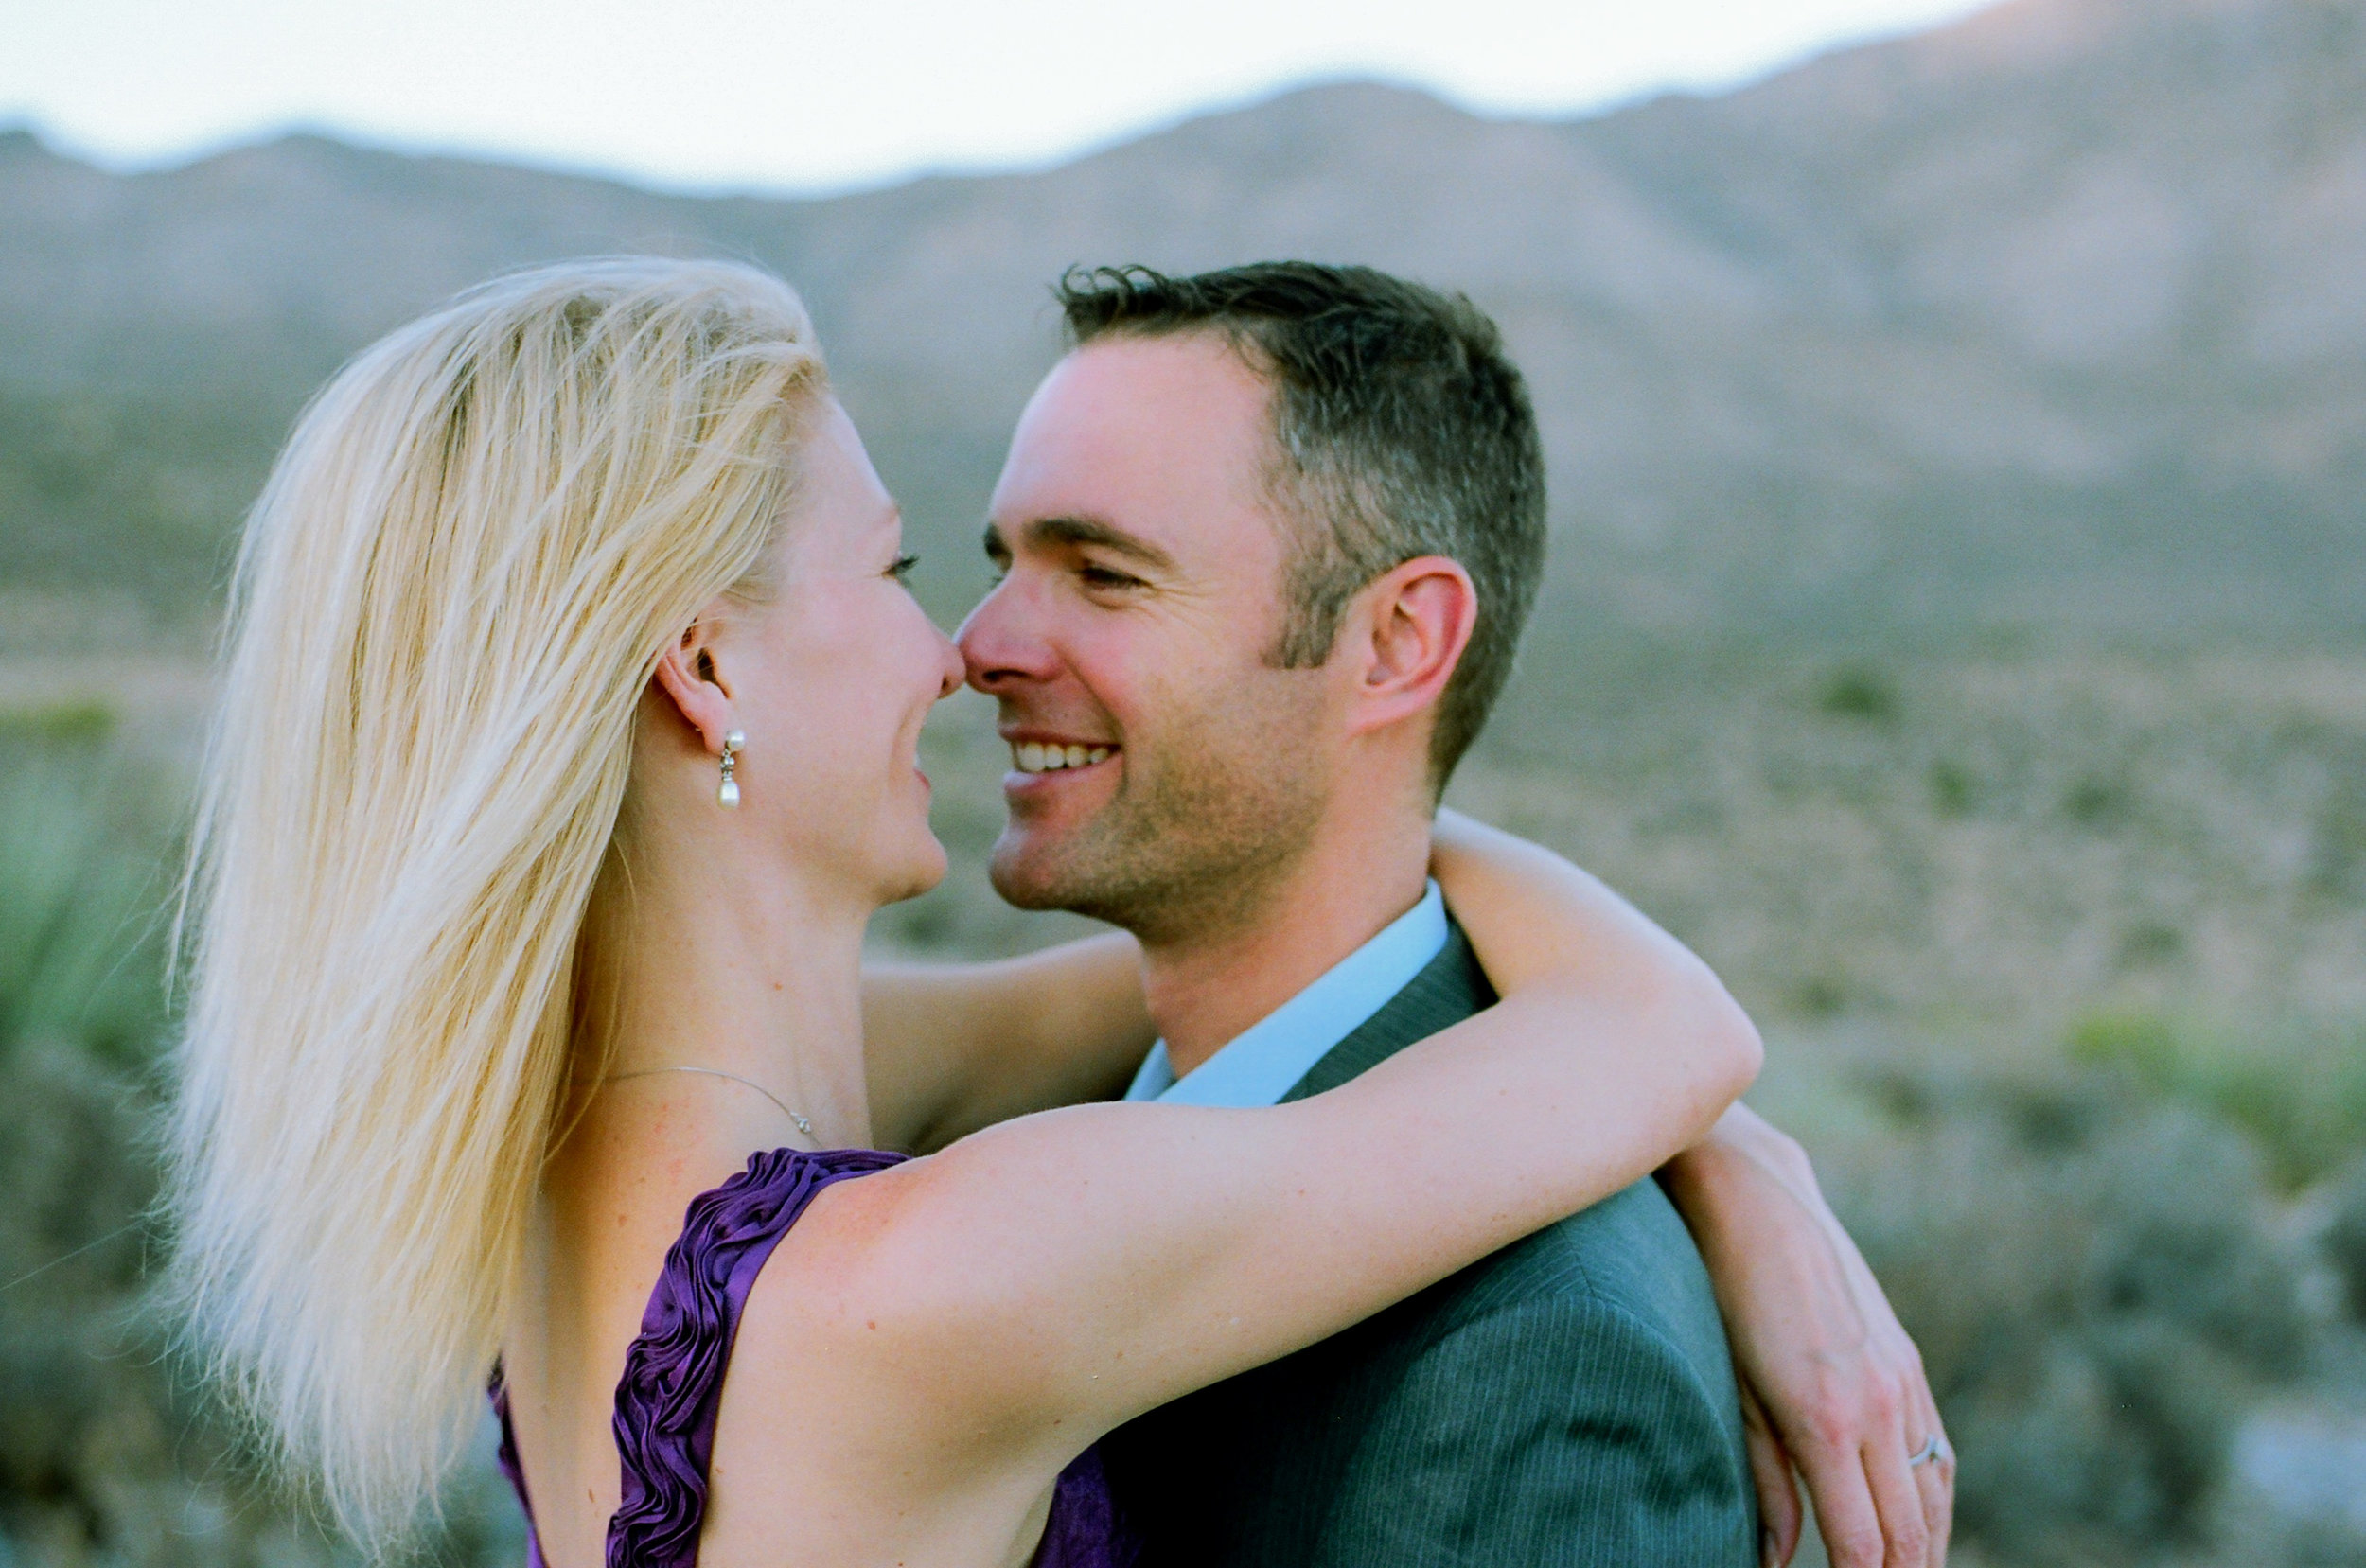
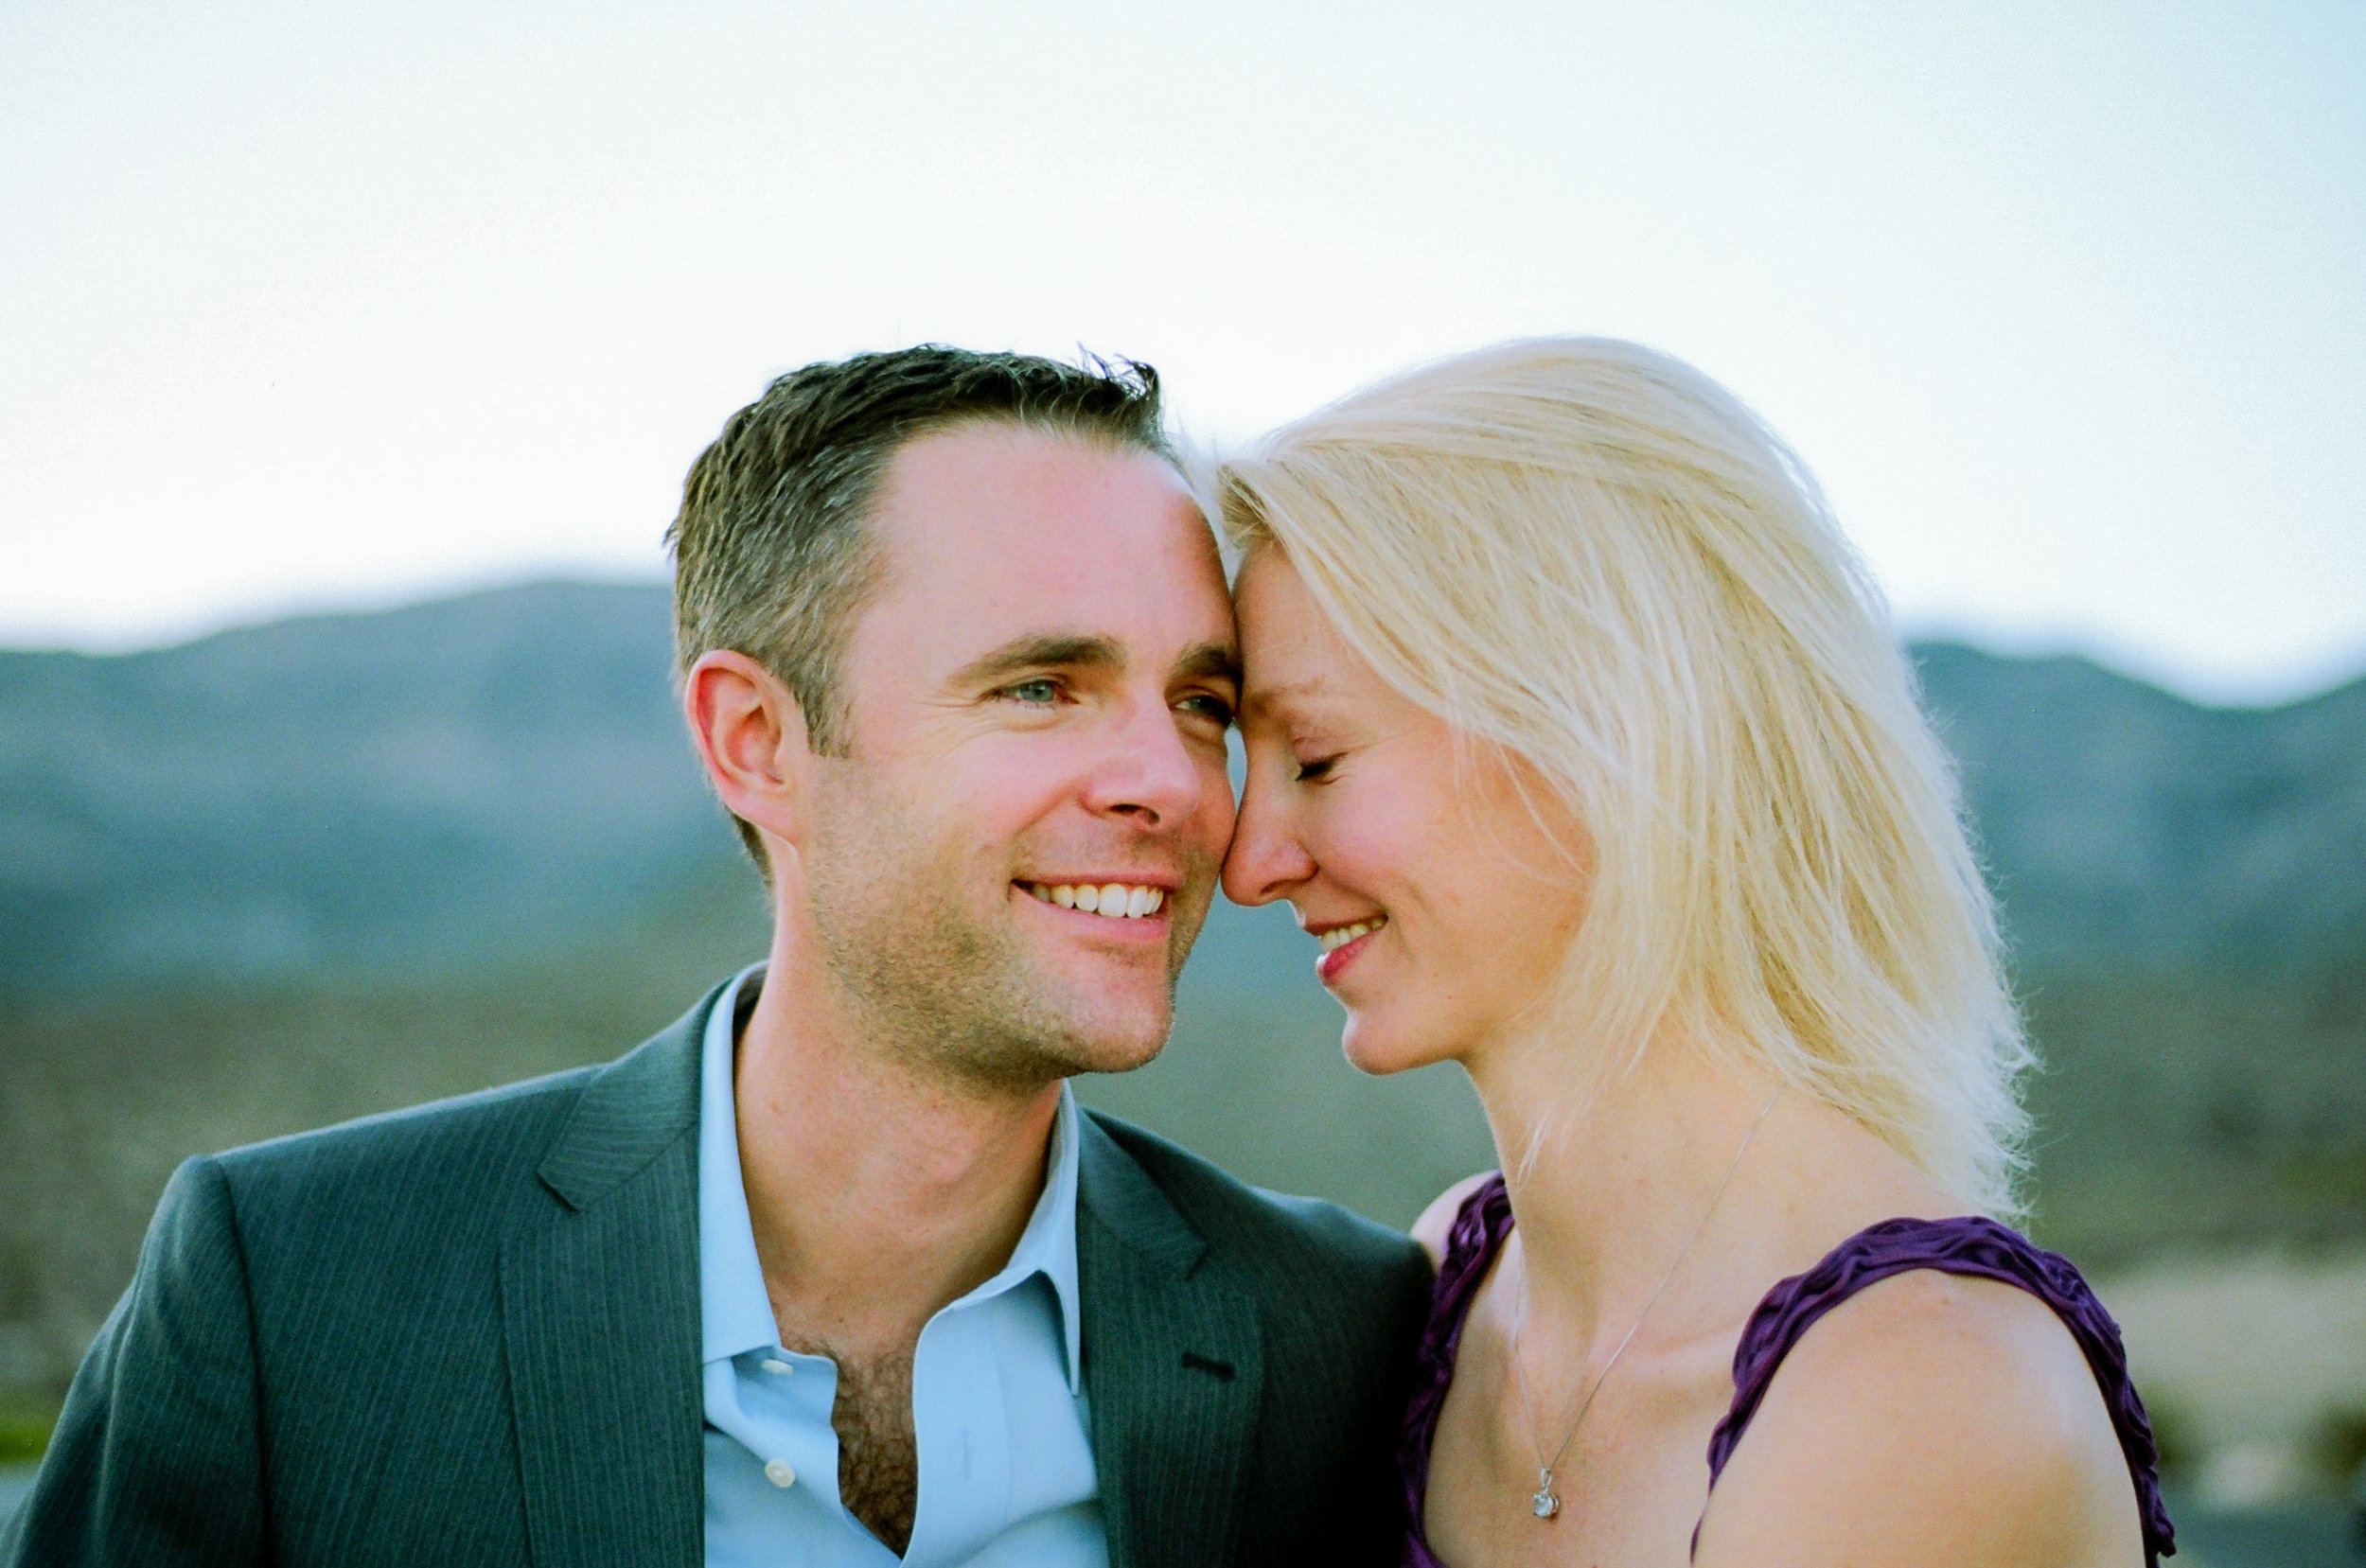
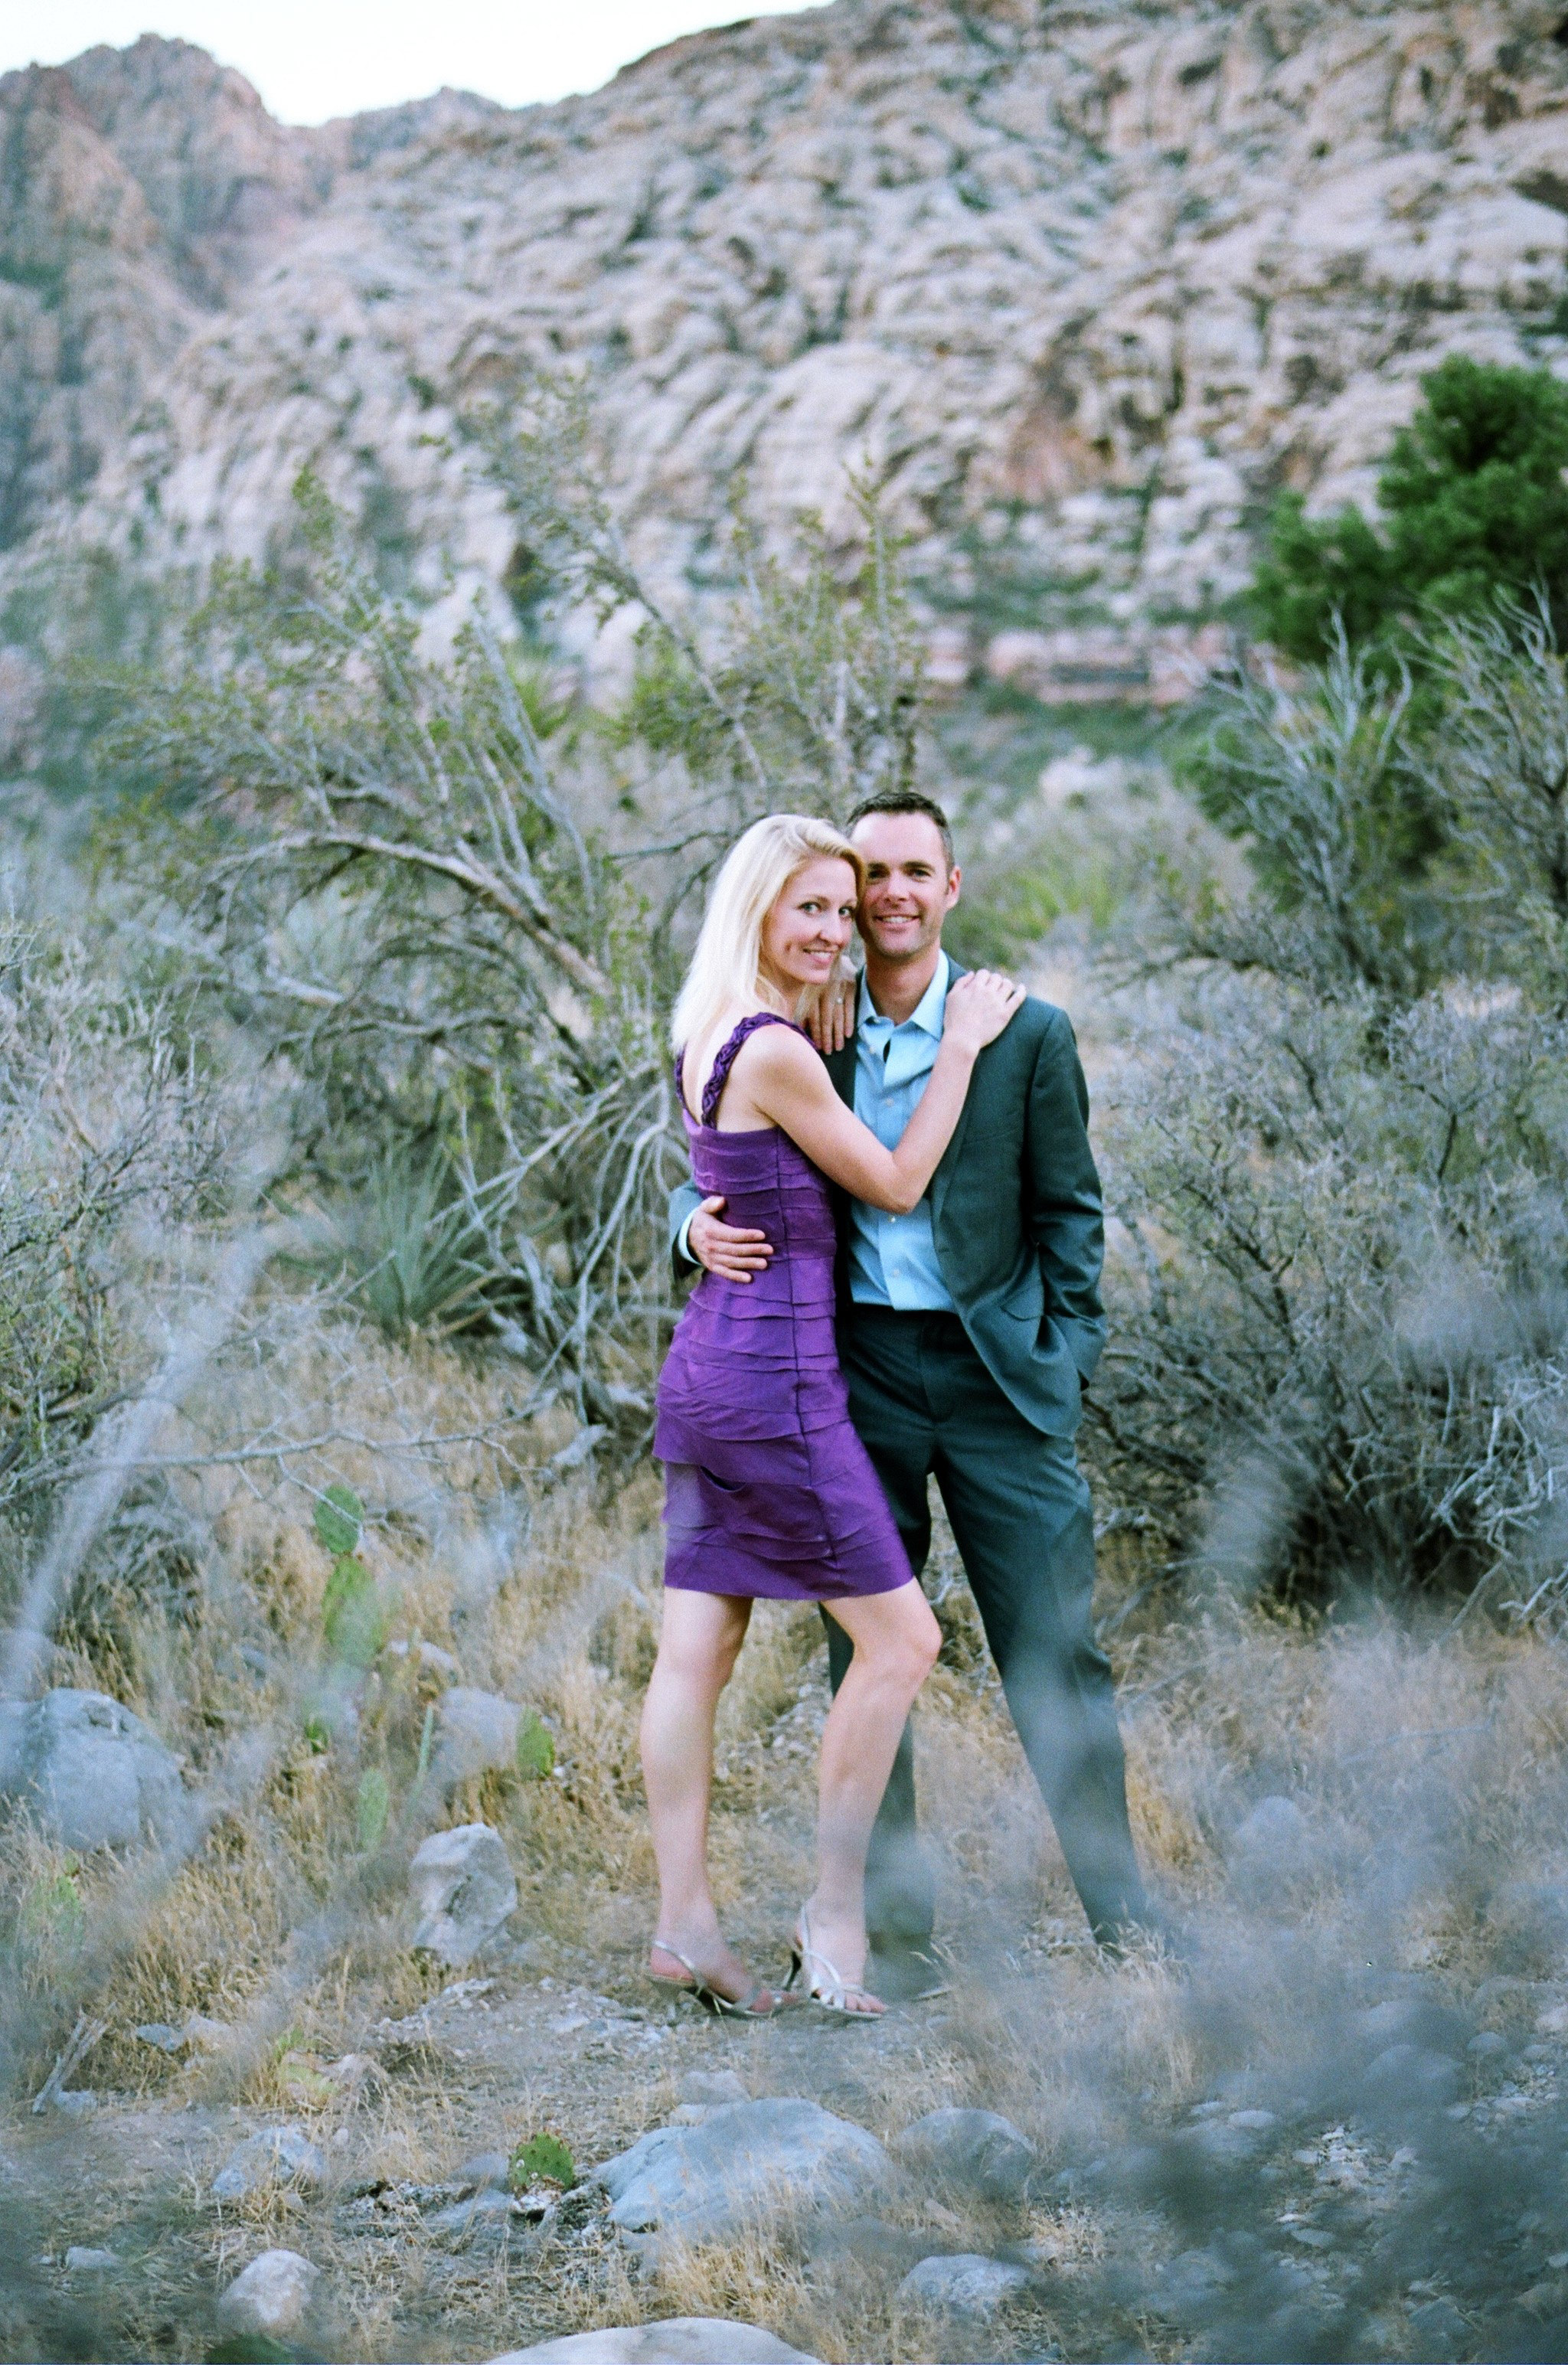
To end, here are a couple of shots from a recent engagement photoshoot – let me know what you think. Would anyone be brave enough to have their entire photoshoot taken on film?
Many thanks
Al.

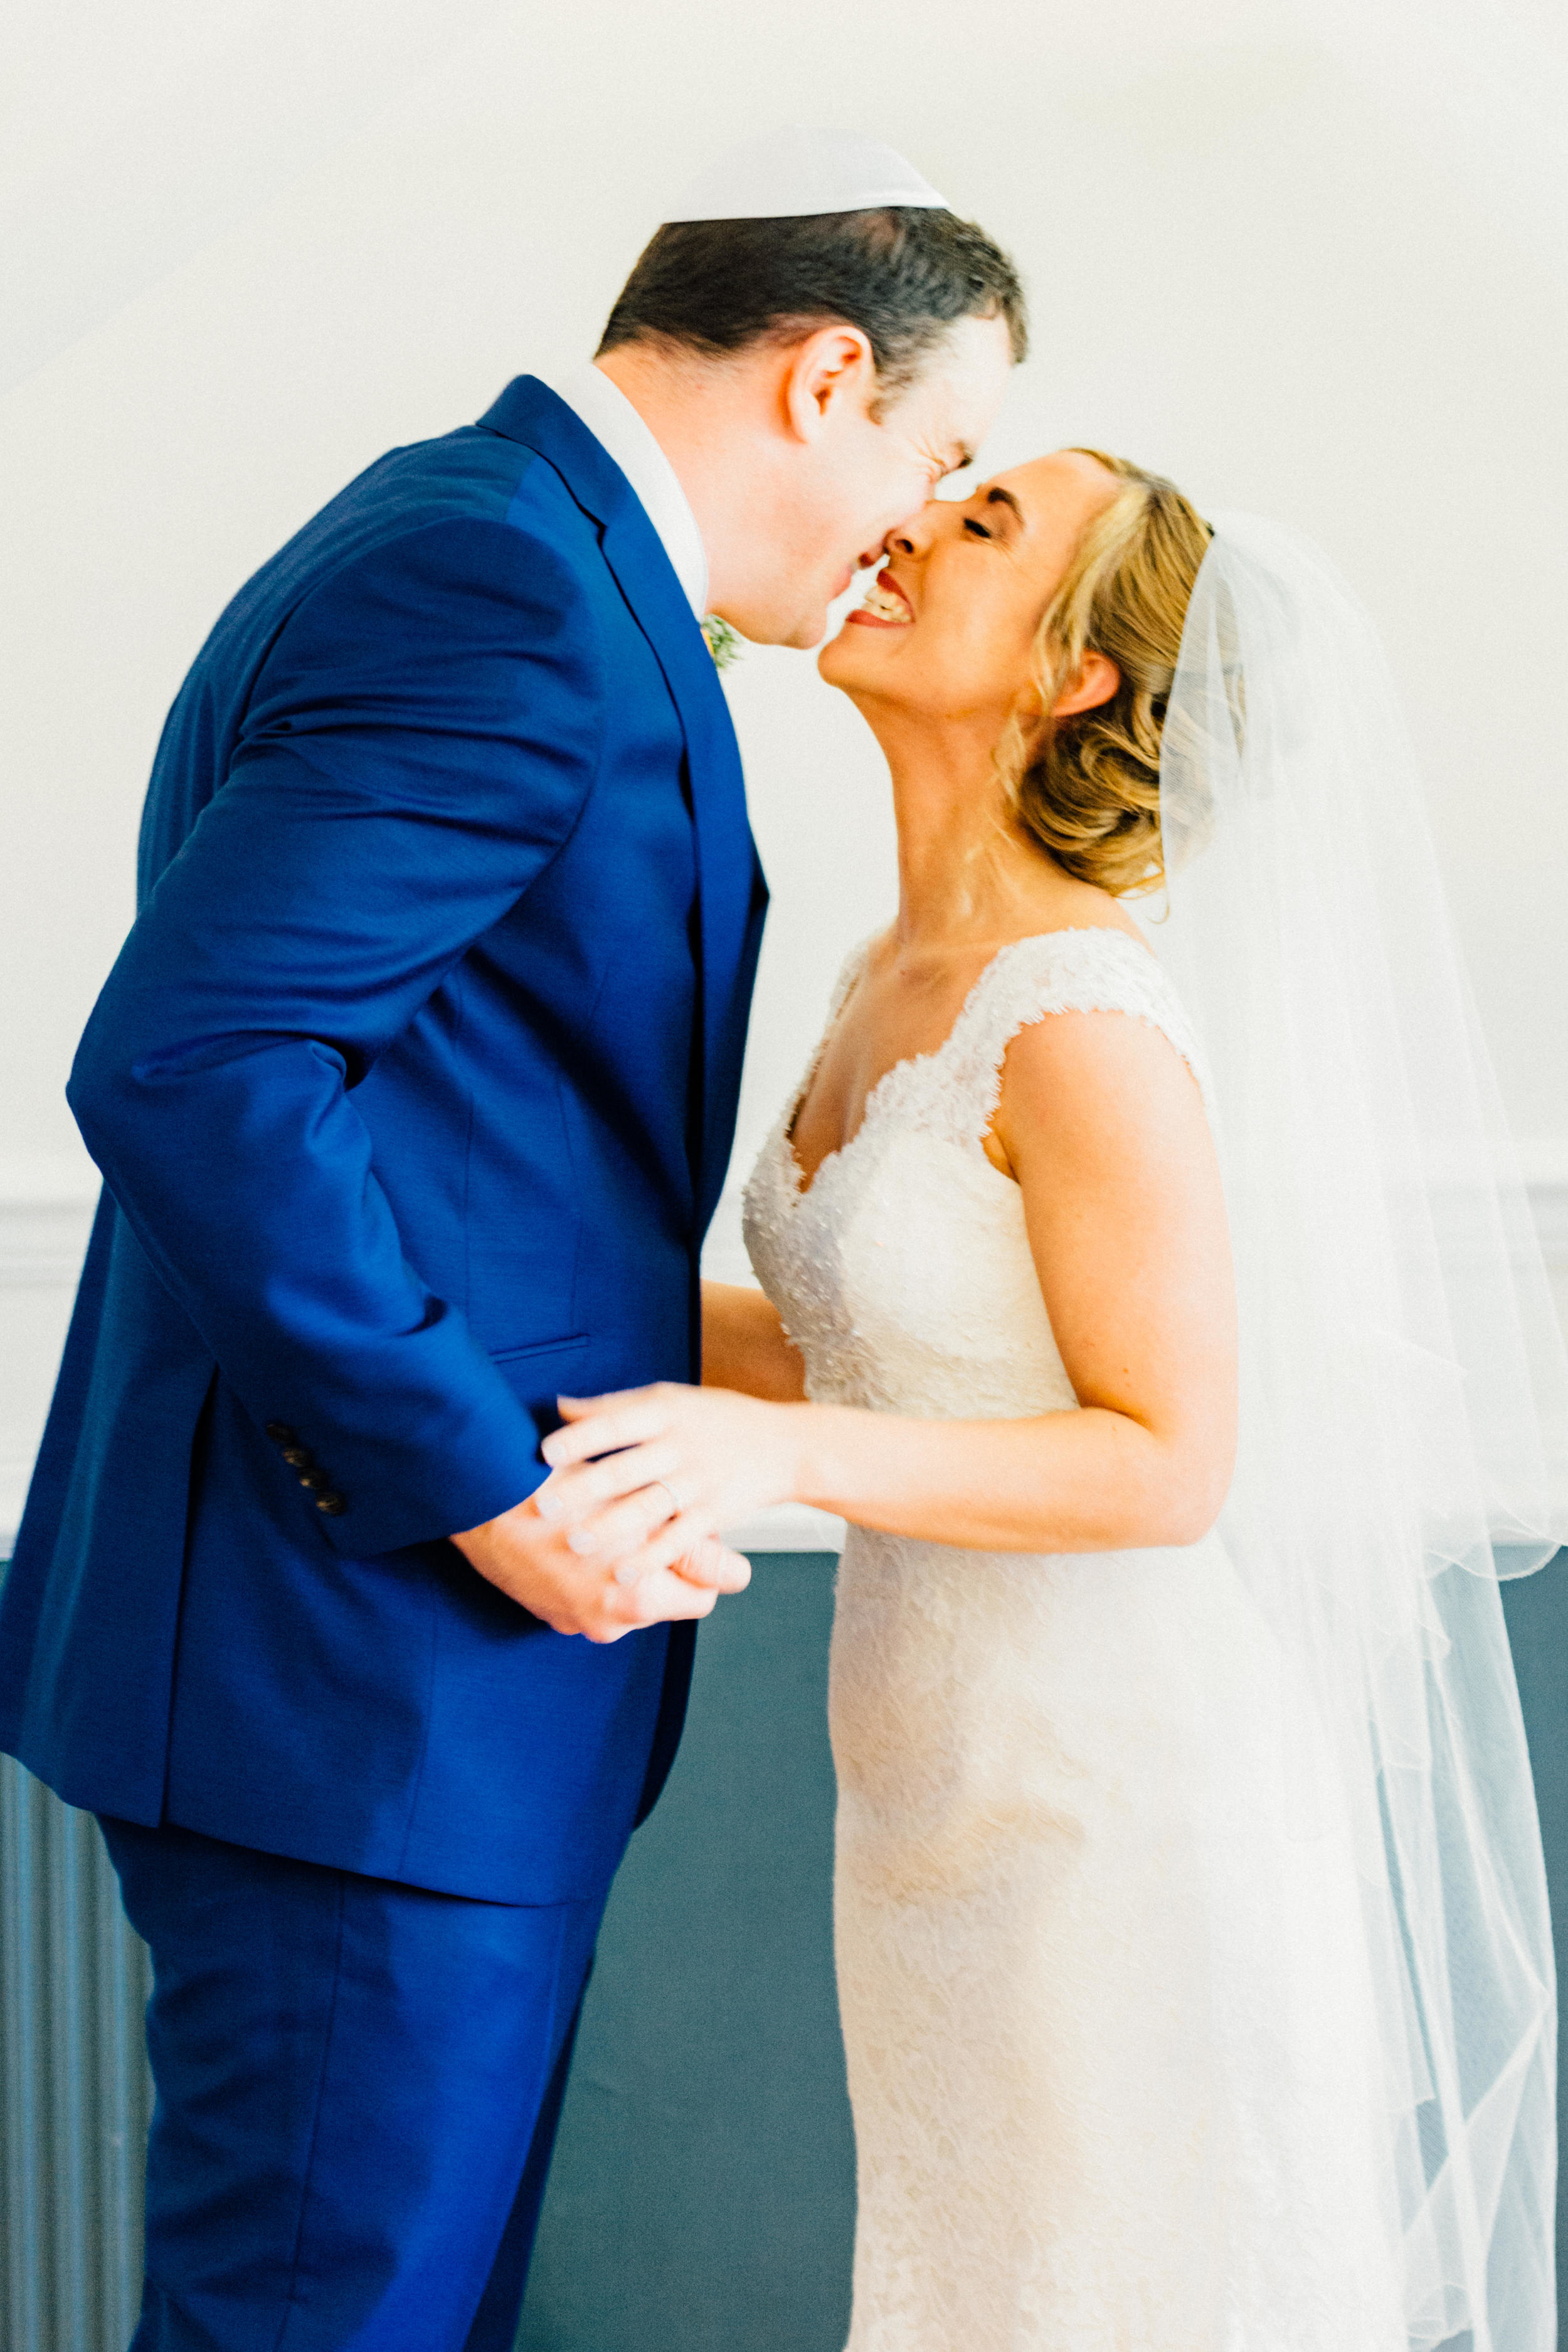
A Beautiful Summer Wedding at the London Shenley Club
At the start of July, I had the great pleasure to photograph the wedding of my good friend Tom and his beautiful bride Aimi at the London Shenley Club. We’d already had an engagement session, so they were both fairly relaxed in front of the camera (aside from the wedding day nerves of course!)
Karen and I started off by setting up the evening ‘photo booth’ at the venue’s marquee, so there wouldn’t be unnecessary faff later in the day. We then headed over to get some pictures of Aimi having her makeup done at the Village Hotel in Watford, before moving back to the venue to do the shots of the groomsmen, and guests arriving. We did some fun shots of the guys and then waited patiently for Aimi to arrive. Truth be told she was early!
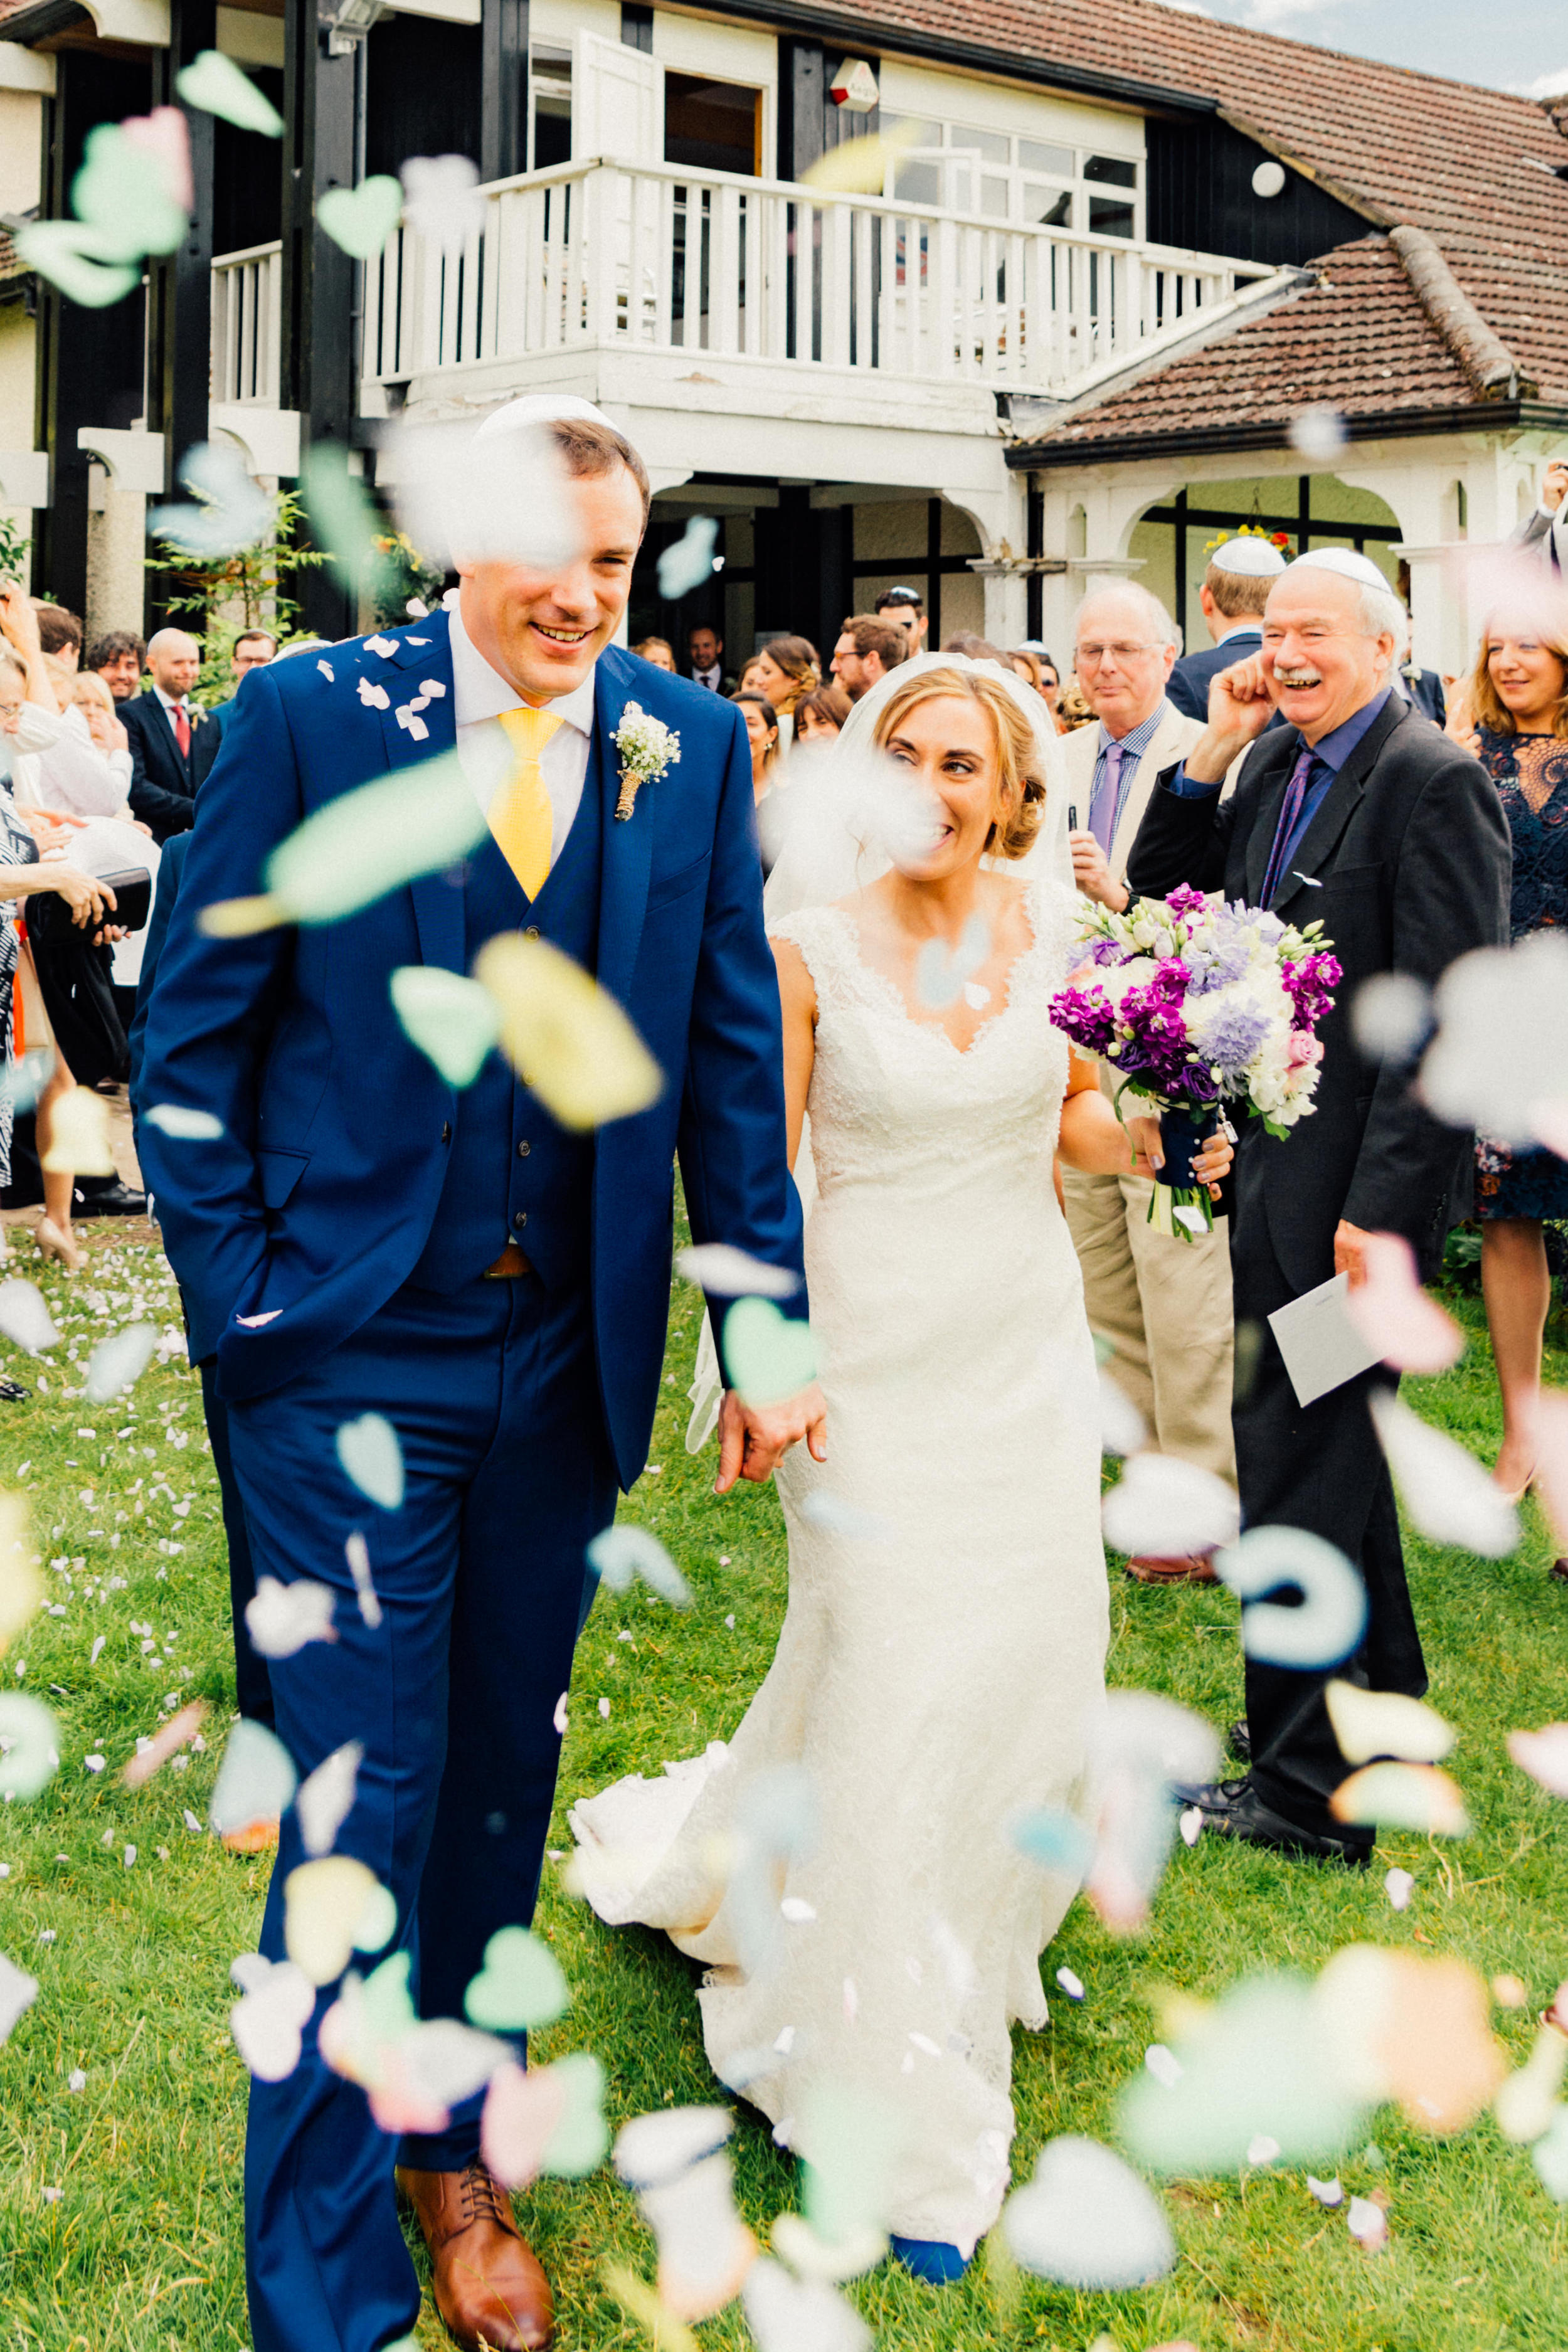
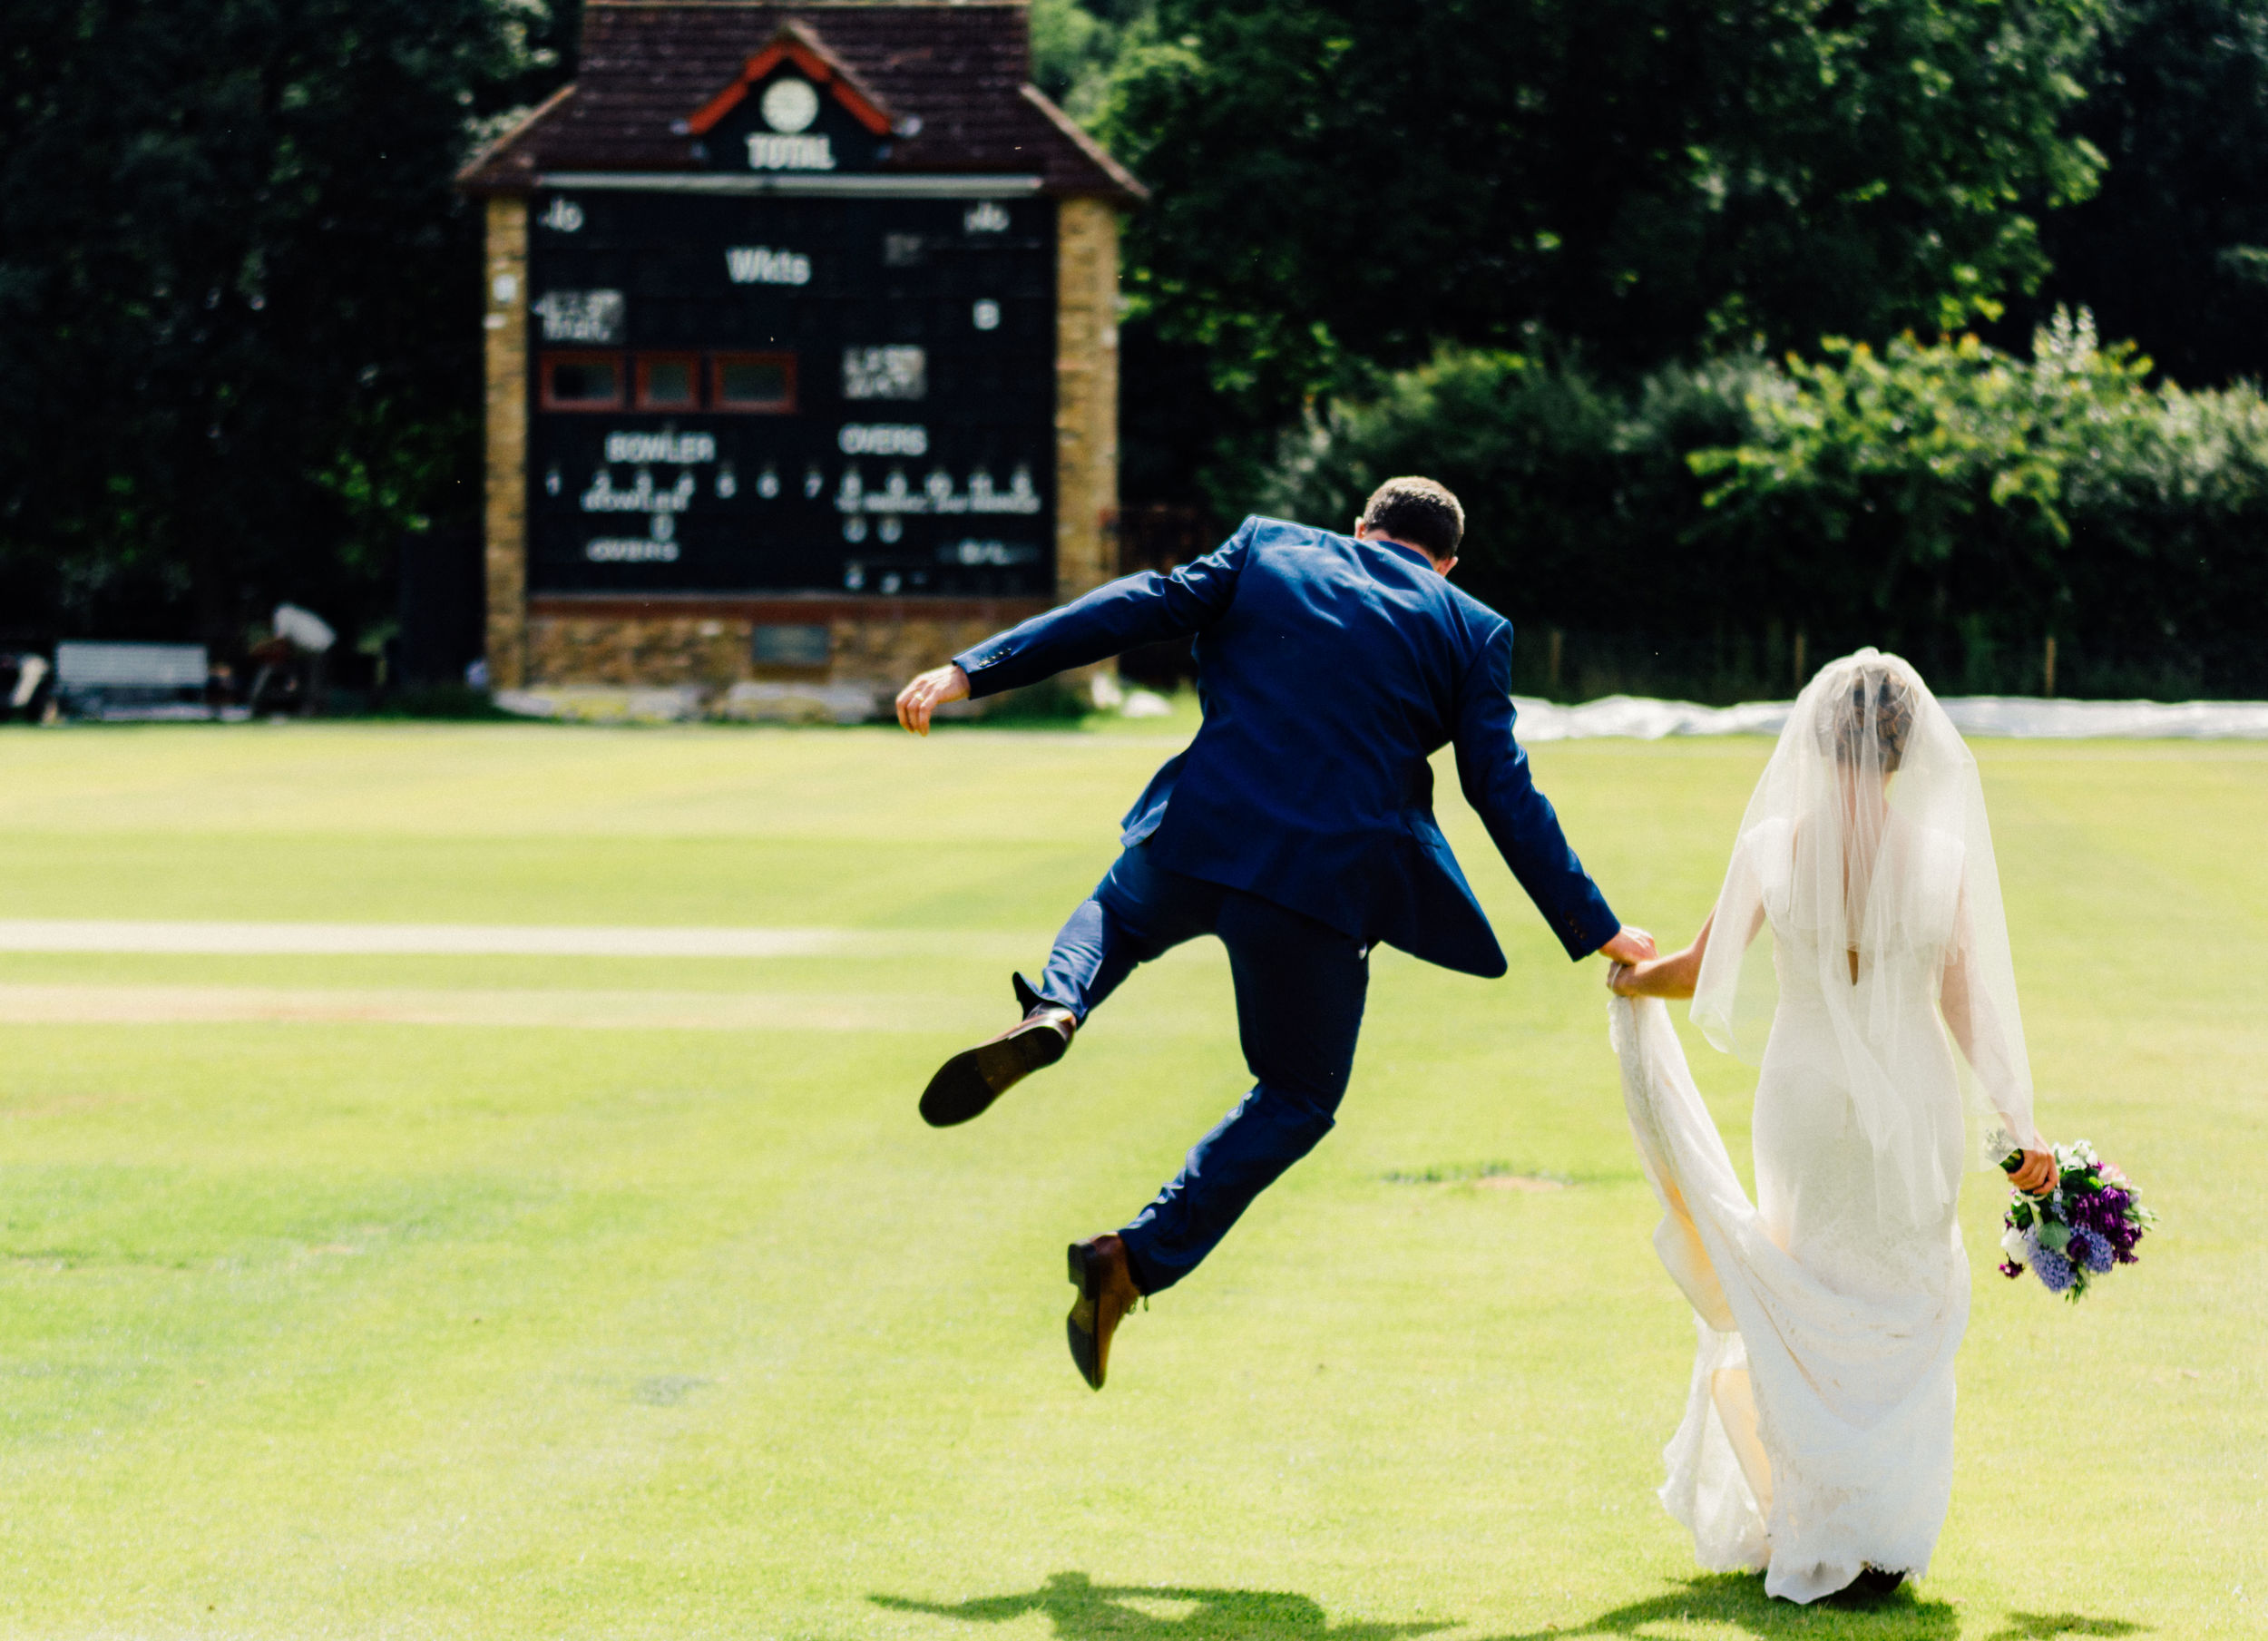
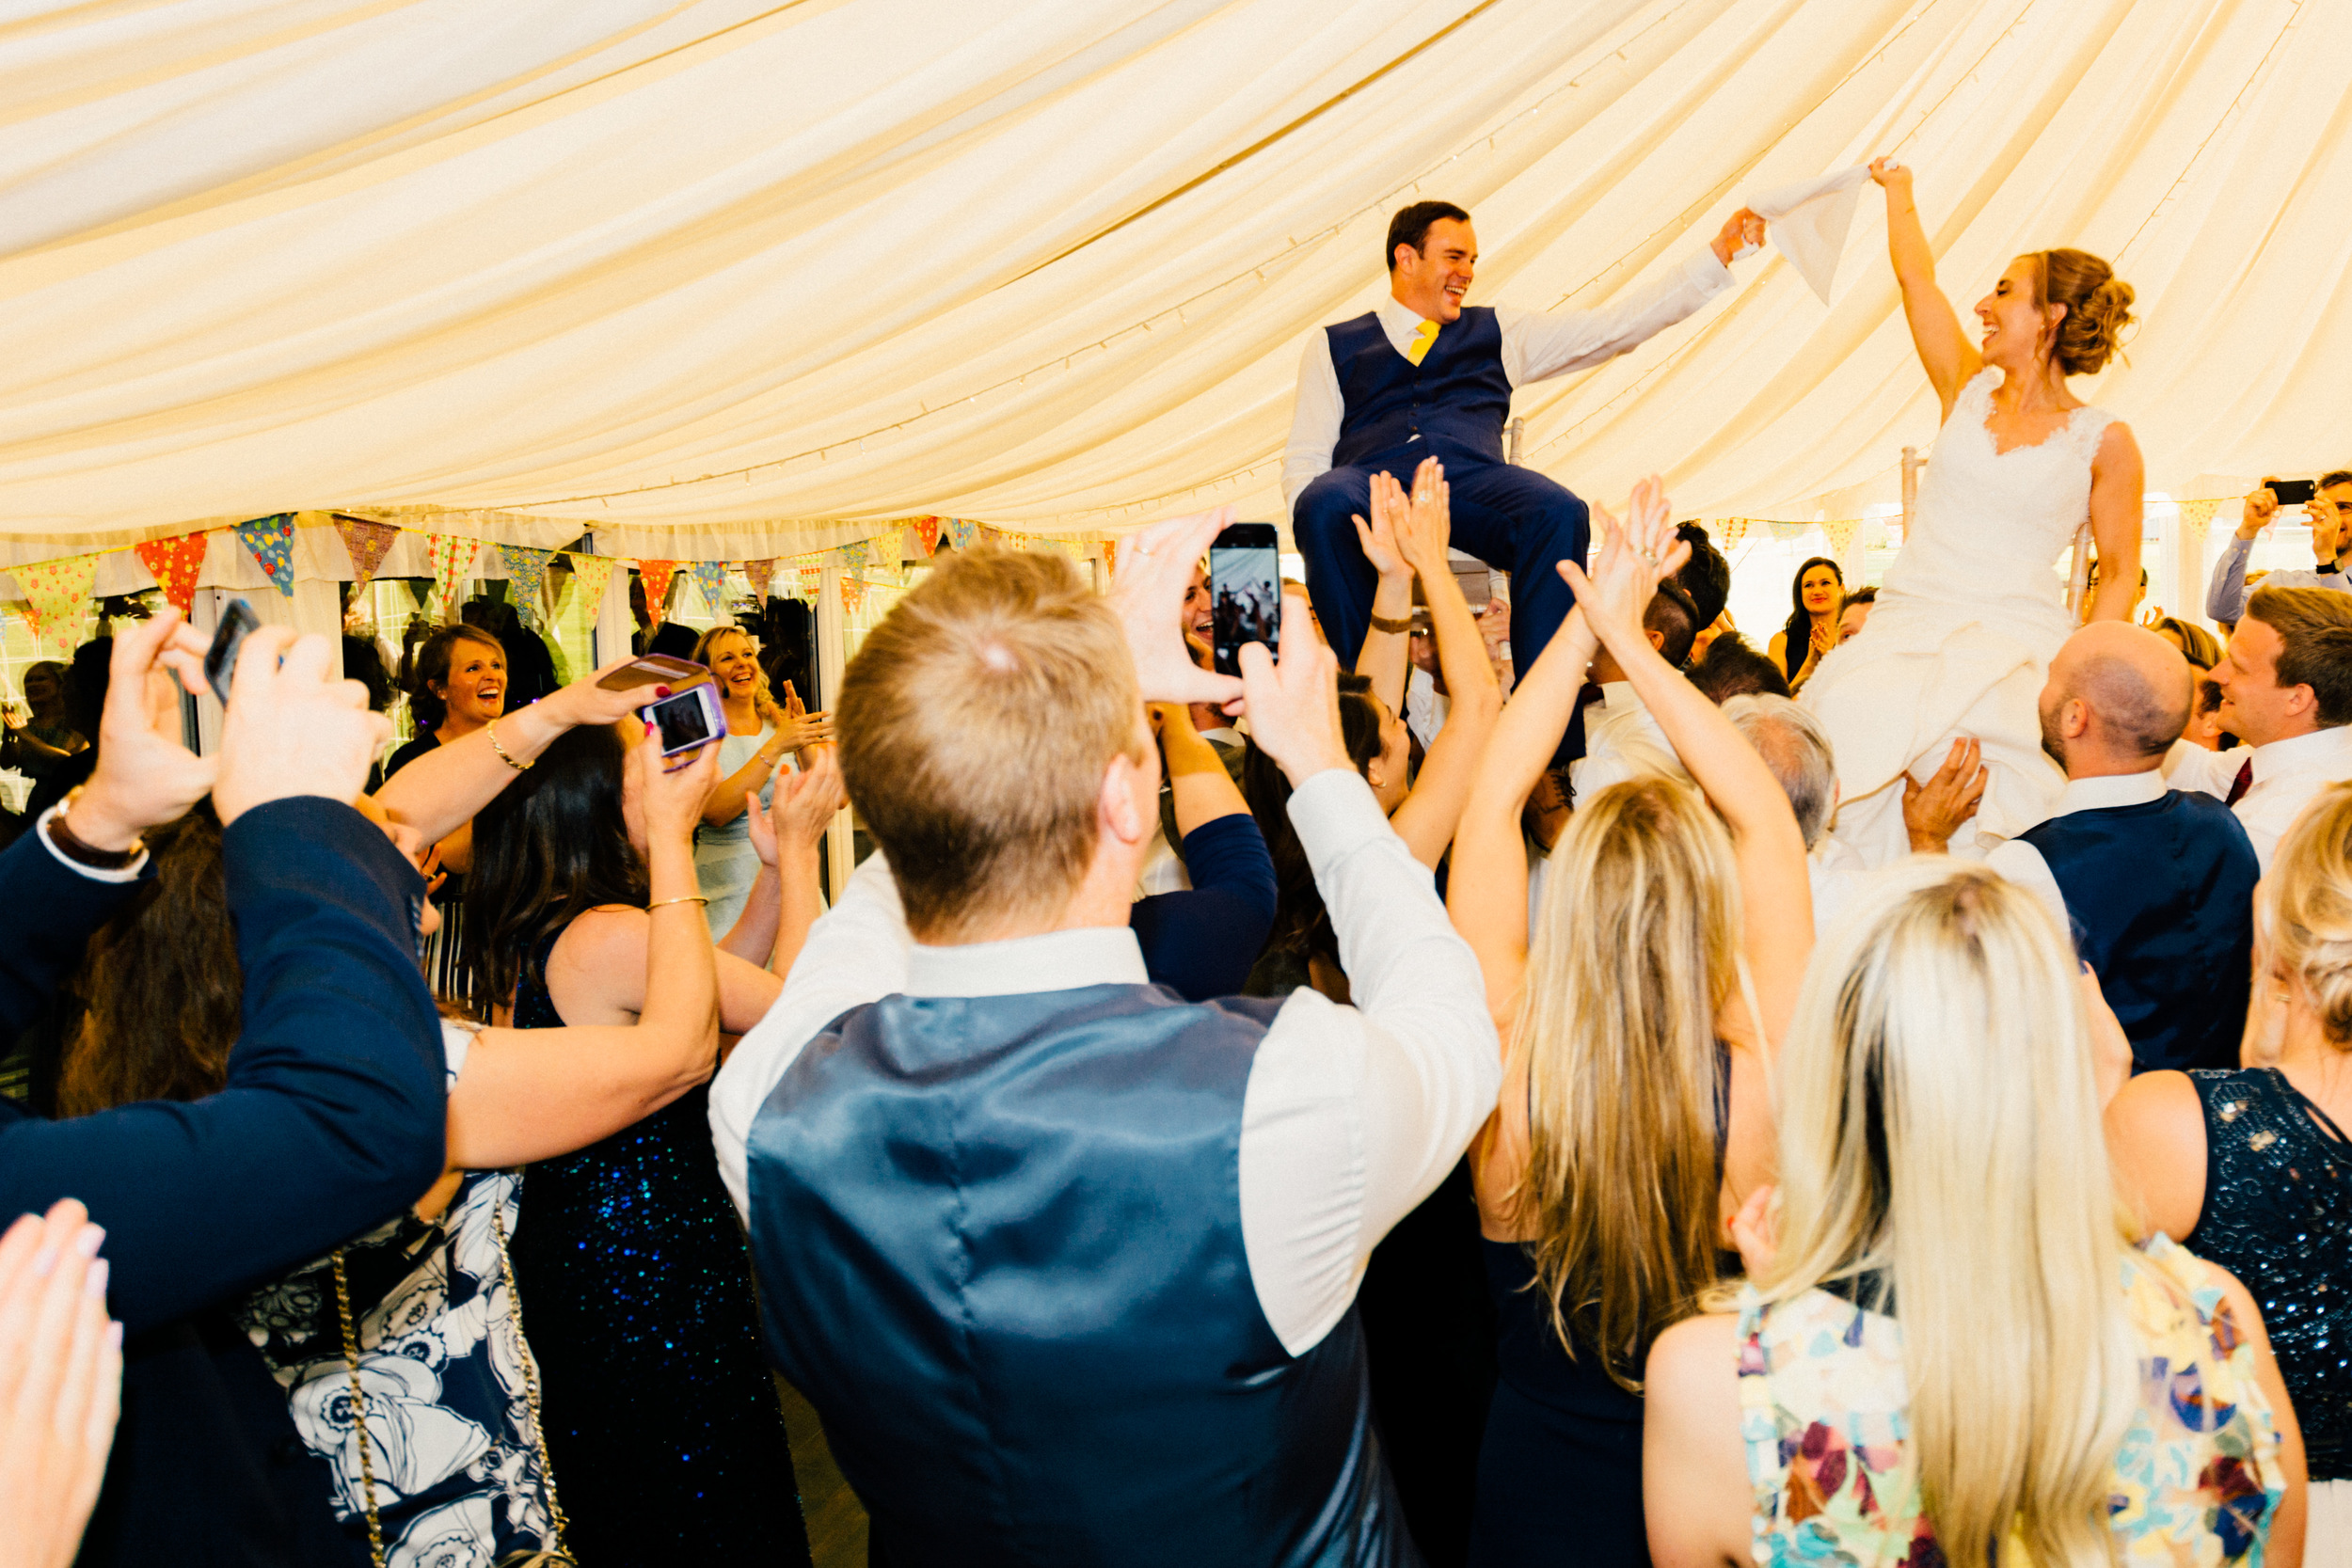
The day followed the well-trodden path of ceremony, confetti, family group shots, and then we whisked Tom and Aimi away to catch a breather and do some intimate couples pictures. Following that, it was into the wedding breakfast and the emotional speeches. We also had some great entertainment with some crooning from a family friend – he was really quite good.
After capturing the first dance, we were treated to some amazing ‘chair dancing’ with the happy couple being held aloft in their chairs!
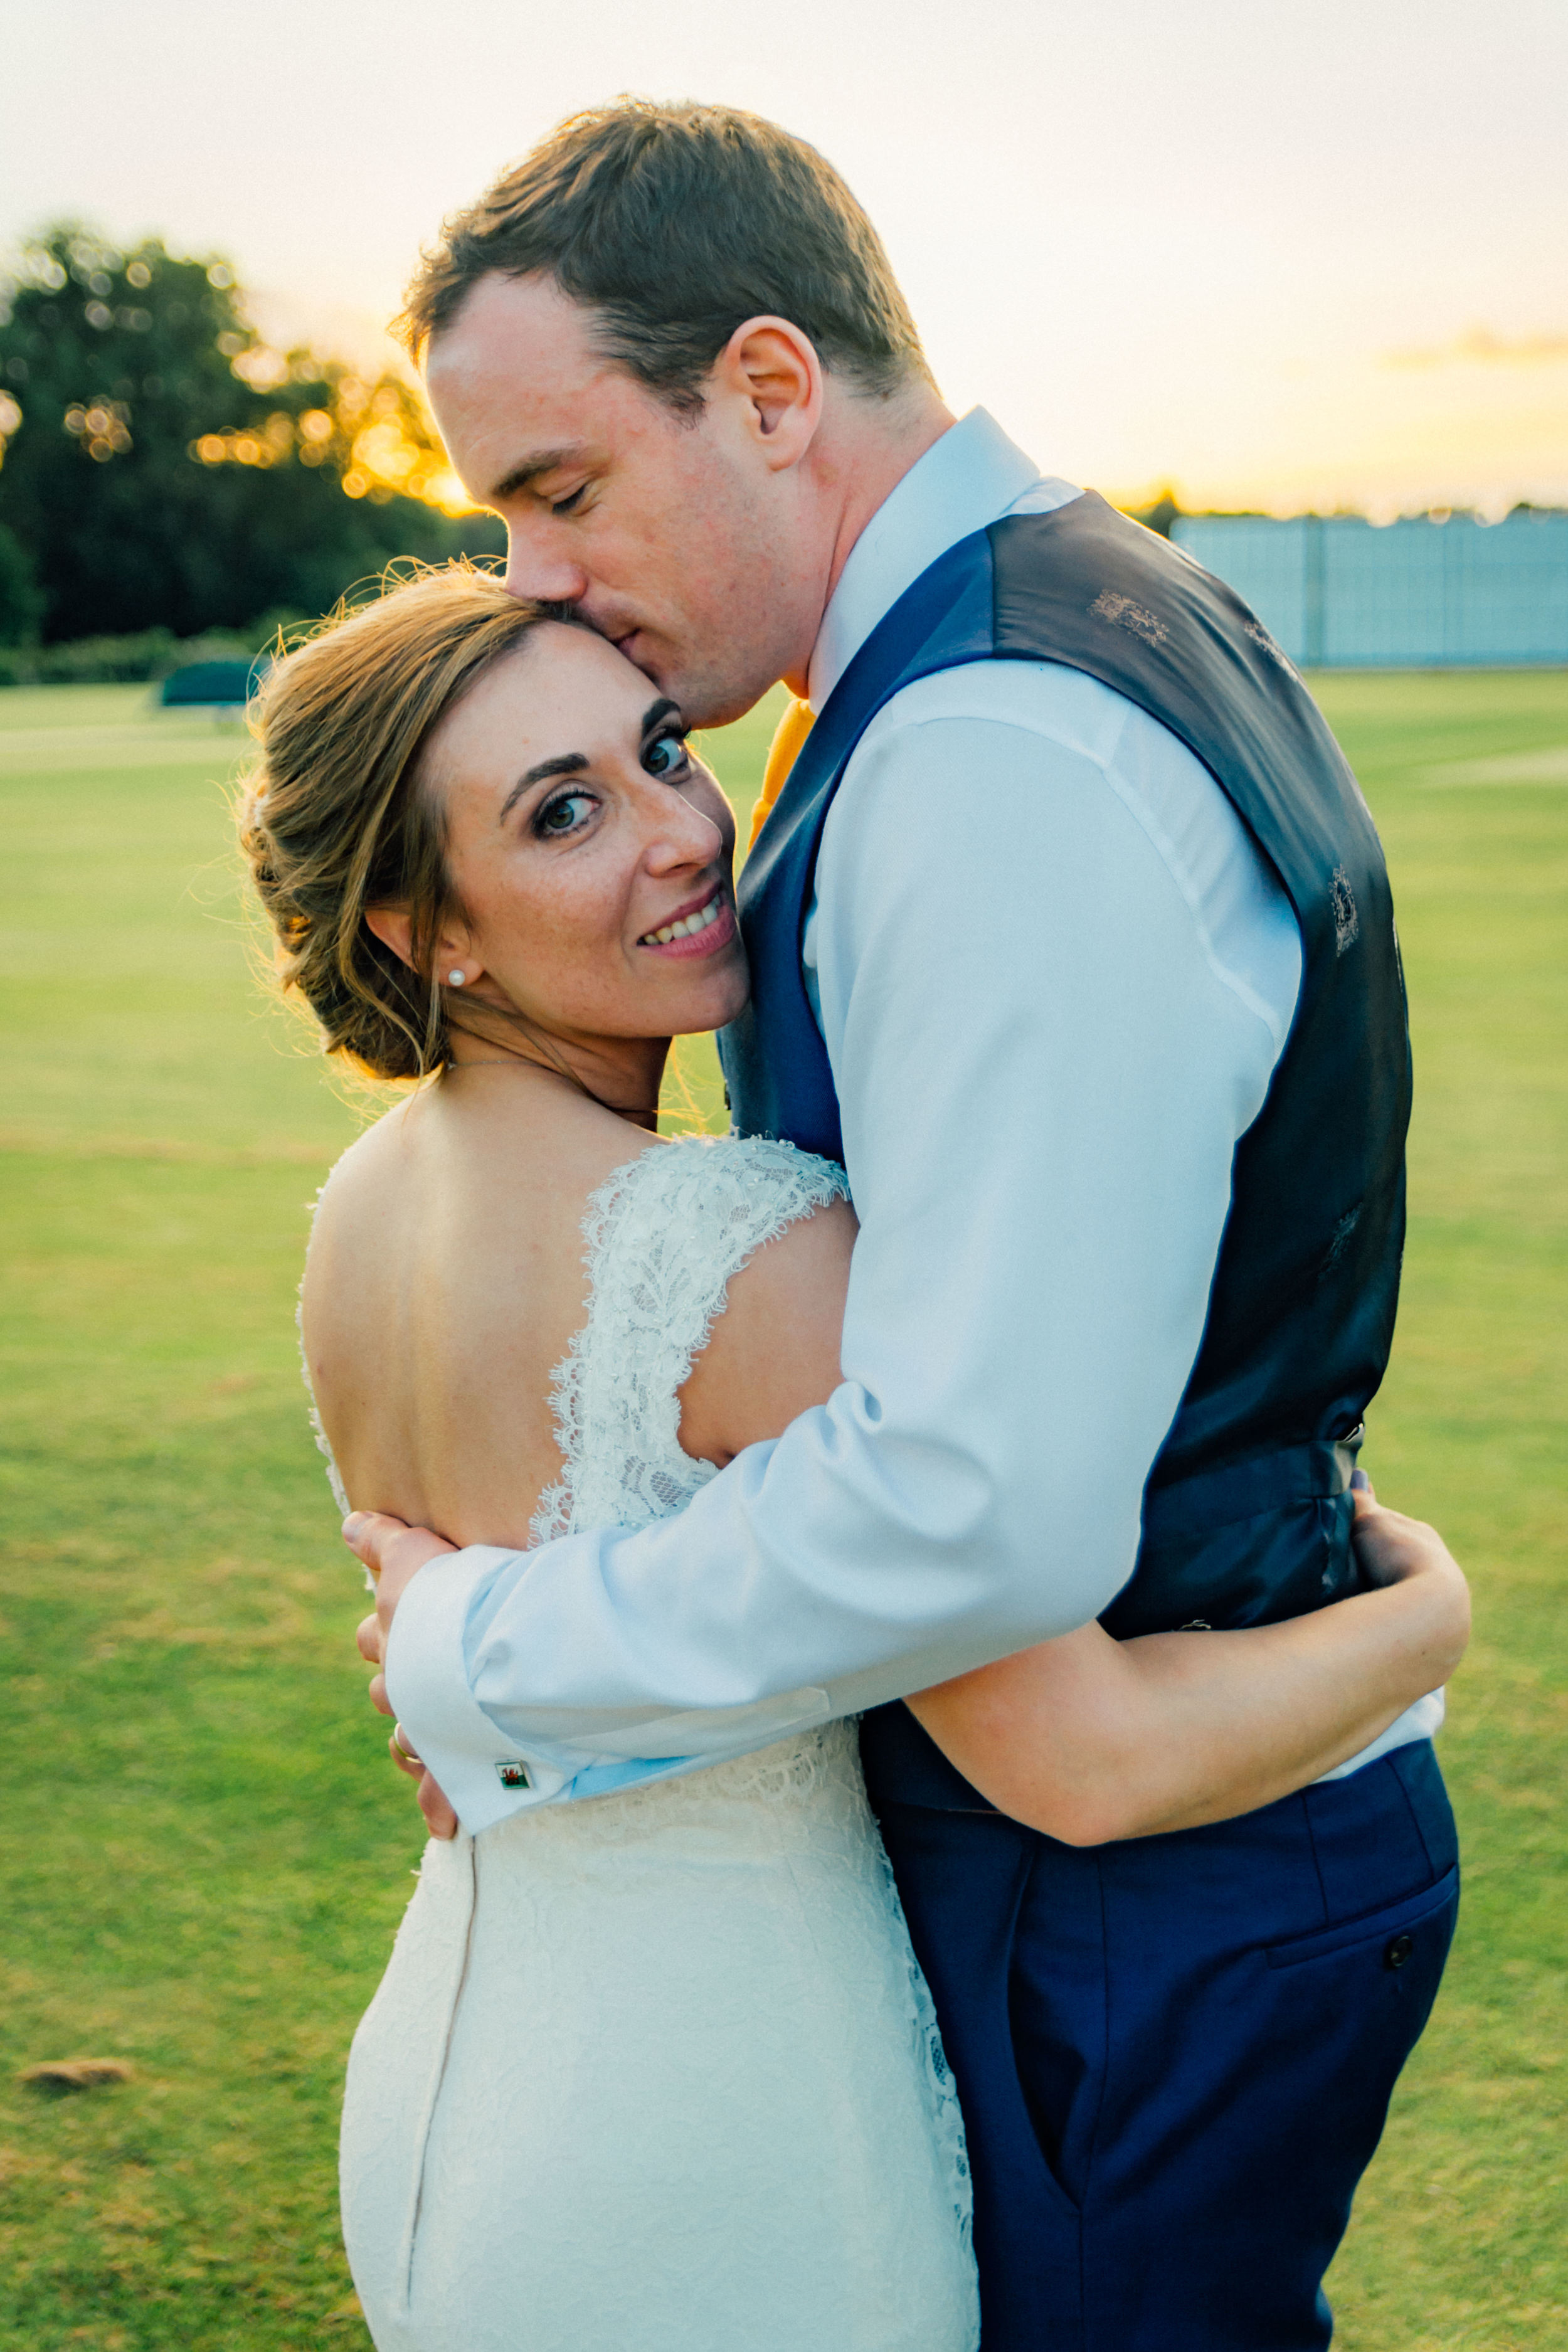
As we’d set up earlier in the day, the photo booth was put straight into action (along with a pile of fun props!) The photo booth was interrupted for a short time as there was a fantastic sunset that we took advantage of, which produced some of my favourite pictures of the day. Once dark, we then had a play with some sparklers, which finished off a long but really enjoyable day! Here are some of my favourite pictures of the wedding.


Event Photography - Wittering Summer Ball
July is proving to be a busy month with weddings at different ends of the country, but I also had the immense honour to be booked as the photographer at RAF Wittering’s Sergeants’ Mess Summer Ball. Their previously-used photographer was already booked, so thanks to some speculative communications on my part, their committee already had my contact details.
If you’ve been following my blog for a while, you’ll see that I’ve done Balls at military bases before – however, this time there was an interesting request: could I do ‘green screen’ and offer a choice of background?
This is something I’d not previously even tried, let alone accepted payment to do. So, wanting to secure the booking, but not leaving myself in a position to fail, I asked for a couple of days to check out the options. Some parts are quite simple, such as buying a plain green backdrop, and shooting tethered to a laptop. However, the actual processing of green screen at a speed and simplicity required at an event was a new proposition. I did the usual Google search and tried out a couple of software trials, before finally selecting an application called ‘Green Screen Wizard.’ As the name suggests, it automates a great deal of the processing, and allows the preview and selection of a number of different backgrounds.
further trial at home in the living room proved that I could create a work-flow that not only ensured I could offer the service, but that it could be done pretty seamlessly and swiftly at the event (guests are quite rightly more interested in enjoying their evening than waiting an age to choose their photos.)
So, on 8 Jul I set up at the Sergeants’ mess, with my eldest Niece acting as my glamorous assistant for the night, in one of their rooms and prepared to see if what worked in testing would work in anger.
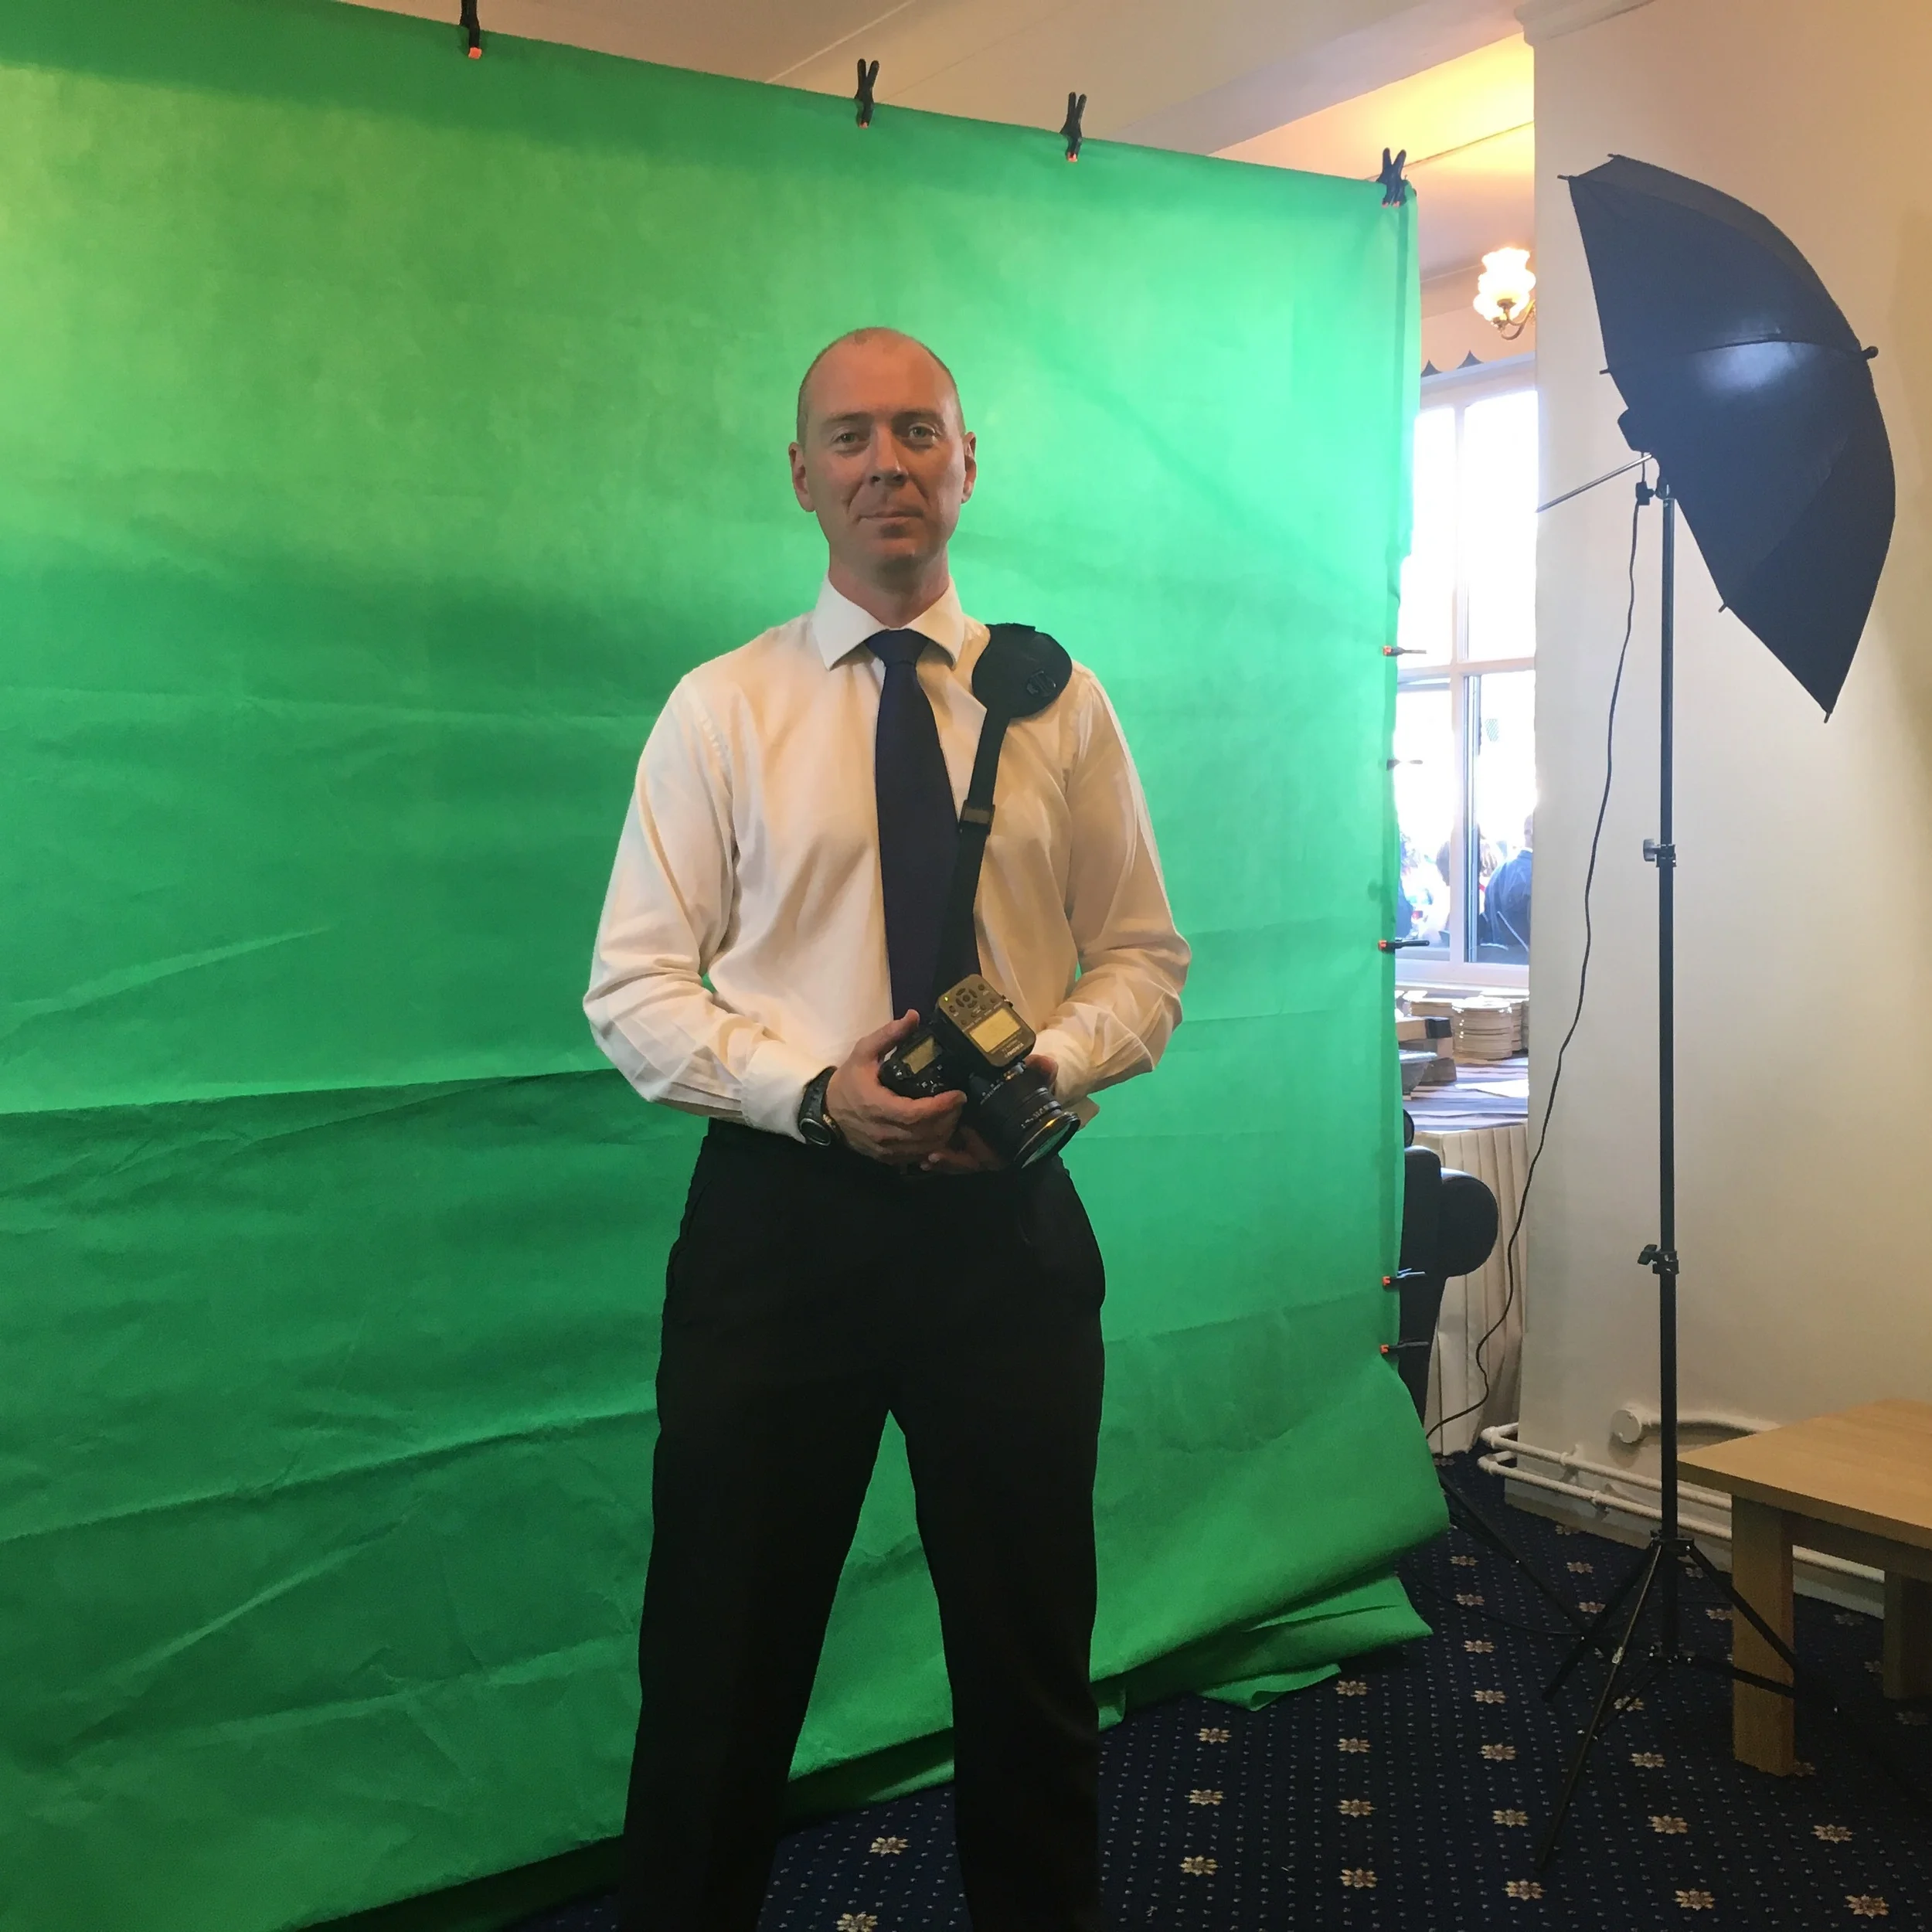
All set for the green screen magic!
In the interests of speed and reliability, I set my camera up to store 2 copies of each picture: a full-resolution, maximum quality file that would stay on the memory card in the camera, and a small, low(ish) quality file that would be sent to the laptop. In this way, the guests could rapidly see a preview of their picture, and choose their backdrop. This actually worked really well, as the preview was of high enough quality for viewing on the screen and allowed the laptop to rapidly process the green-screen with no glitches or slowness. Once back at the studio, I then processed the high quality version, and produced their final image. Also, for the images that included areas of the room outside of the green screen (large groups for example) I could then open the image in Photoshop and fill-in those areas with a green fill, re-import into Green Screen Wizard and produce the final image.

With the green screen.
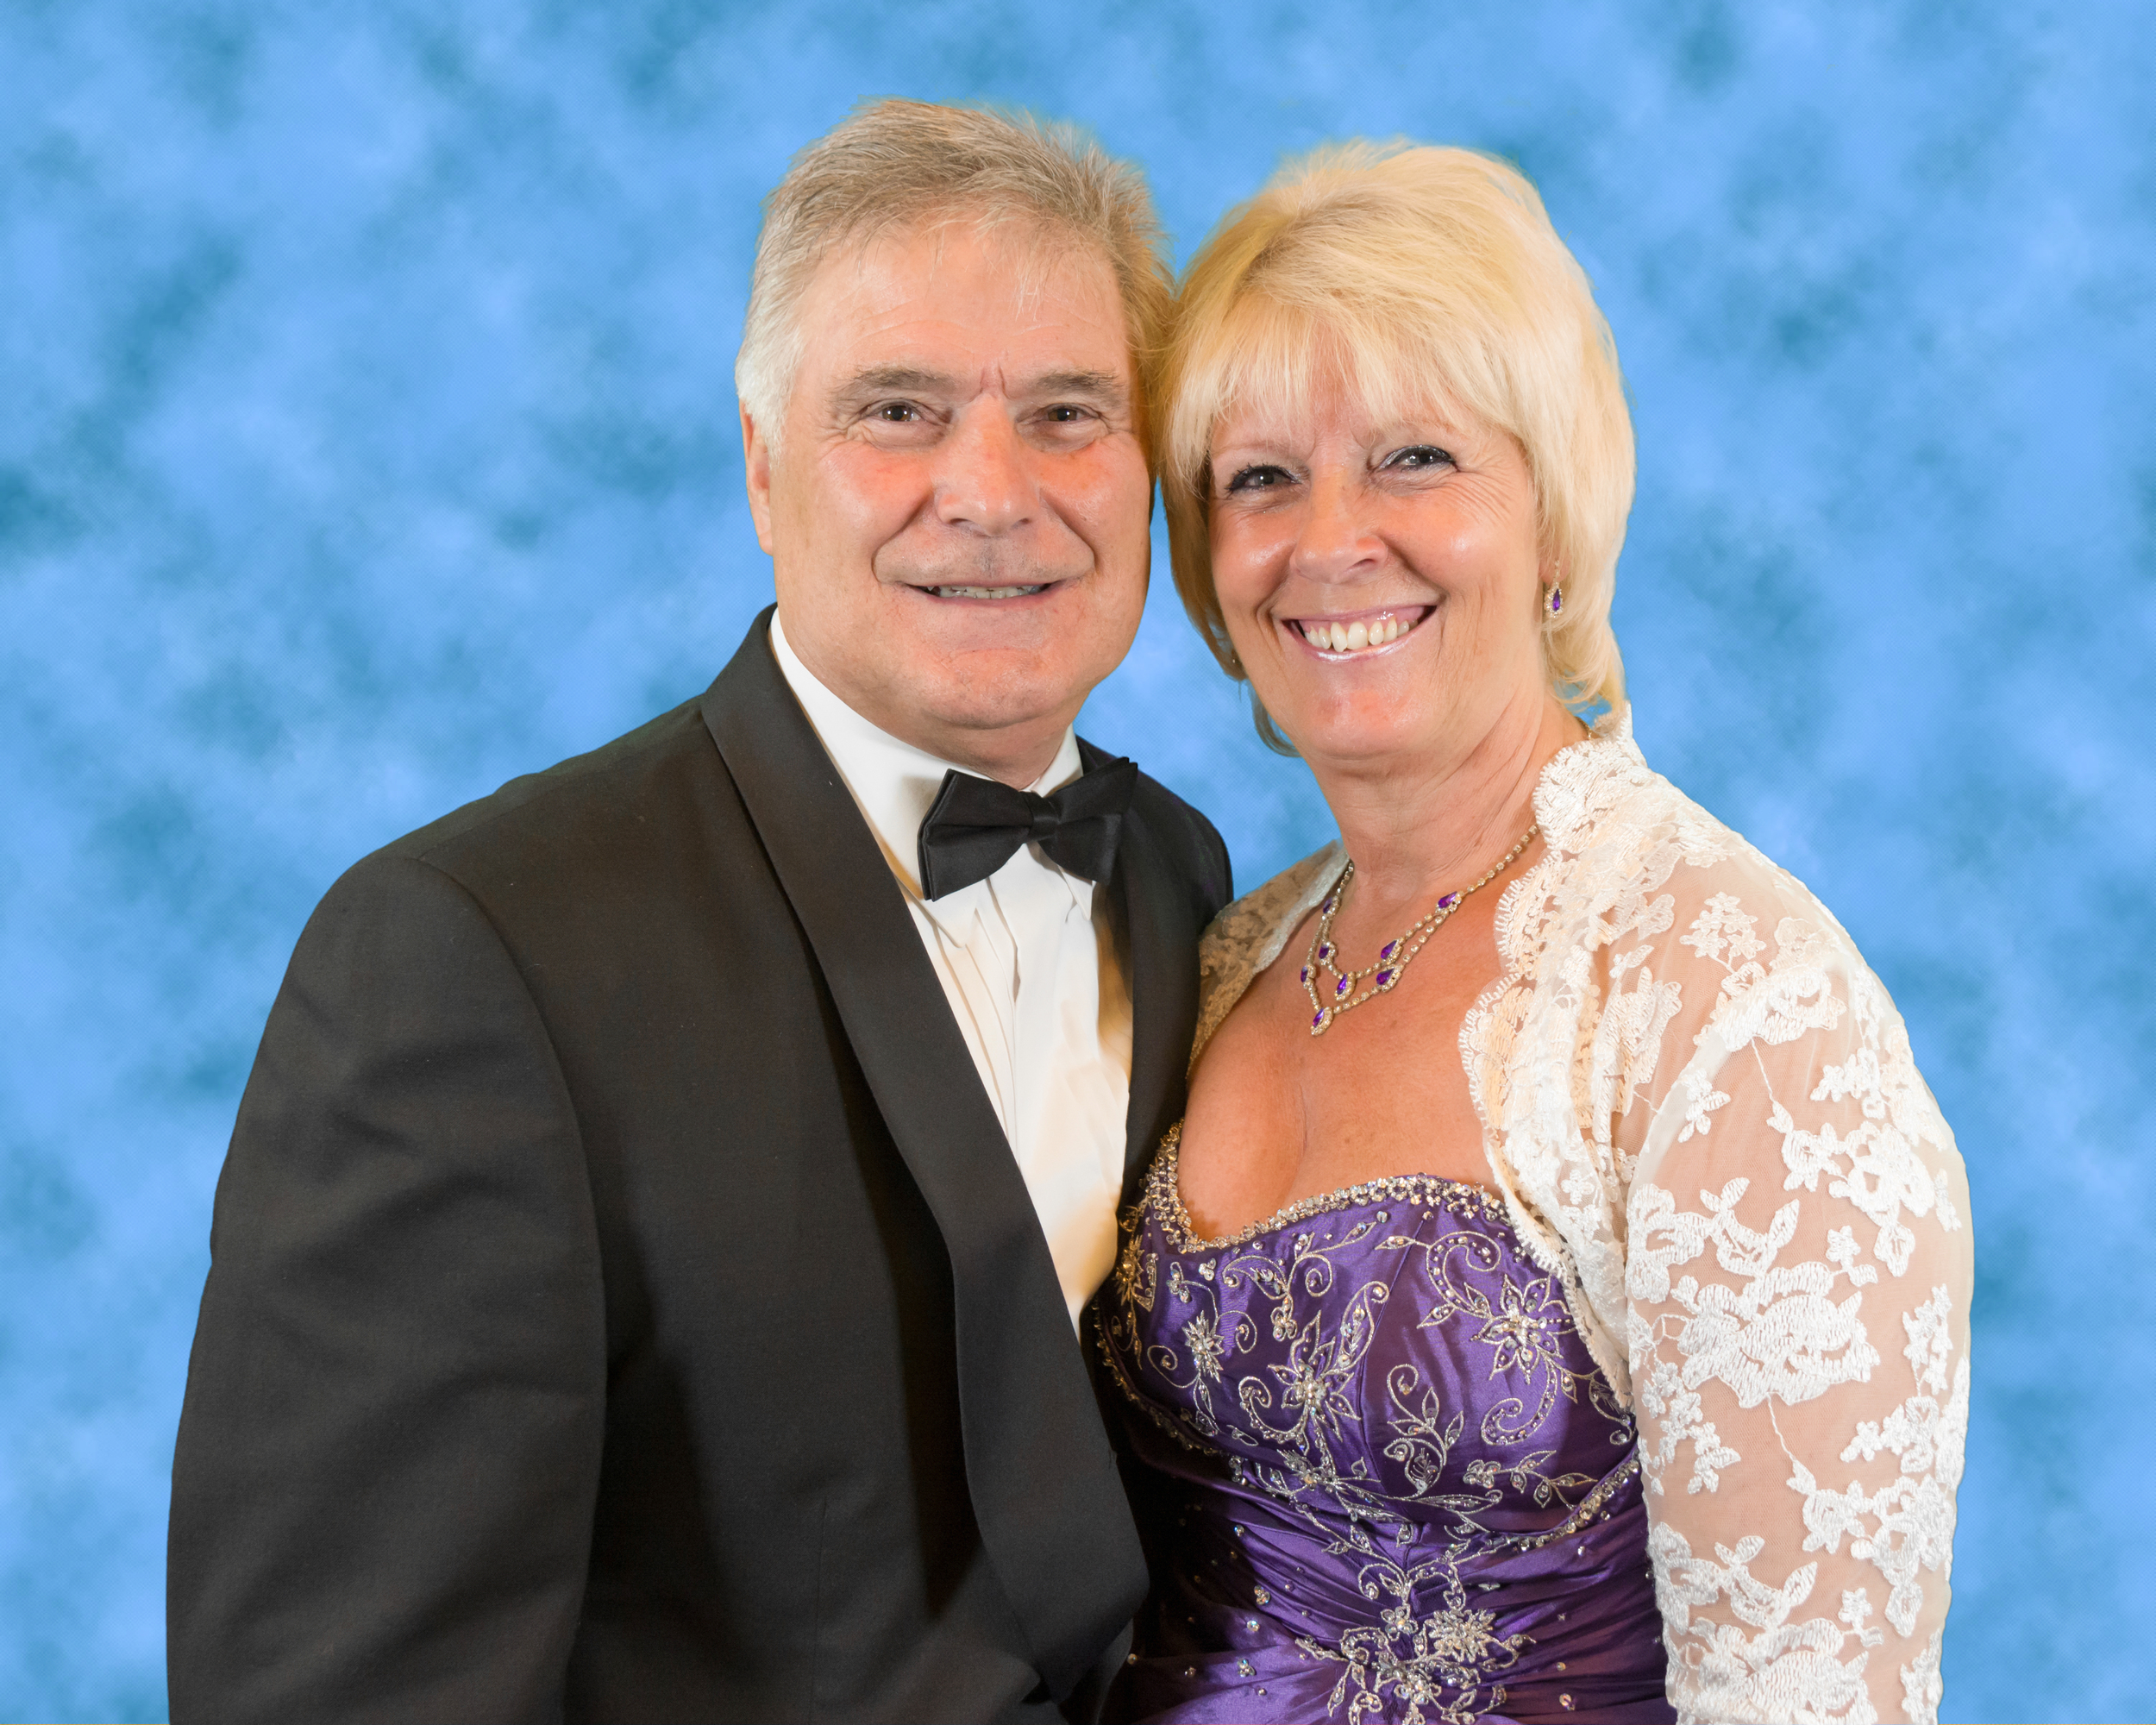
After the background is applied.
If you went to the event, your pictures have been printed by my pro lab (the excellent Loxley Colour based up in Glasgow) and I’m now waiting on the mount frames (from the equally excellent Photovalue) with the correct event info printed on them – I hope to have them this weekend for a bulk delivery to the mess.
How I Got the Shot - Horseshoe Bend
Those of you who kindly follow my FaceBook, Twitter or Flickr pages may have seen this image recently appear:

It’s a shot of Horseshoe Bend in Arizona – the river is the Colorado River, that downstream flows through the Grand Canyon. I’m quite proud of the shot, and I hope you like it. It took me a 4-hr drive through some beautiful scenery to reach, and I must say I wasn’t in the best mood when I got there – I was a tired and hungry bear! A quick MacDonald’s pit-stop sorted me out though.
Once re-energised, I headed to the car park situated near the lookout point on the river, and walked the half a mile or so to the cliff edge. Even though it was mid-week, there were plenty of other people there to see what is an amazing piece of natural history. If you know me, you’ll know I have a certain dislike of heights, and the 1000 foot sheer drop made my pulse beat a touch faster than normal! Nevertheless, I put on my brave face and scouted the site for a good place to set up. I put my trusty Nikon atop my equally trusty (and still pretty new and shiny) 3 Legged Thing Brian tripod, and got as close to the edge as I dare!
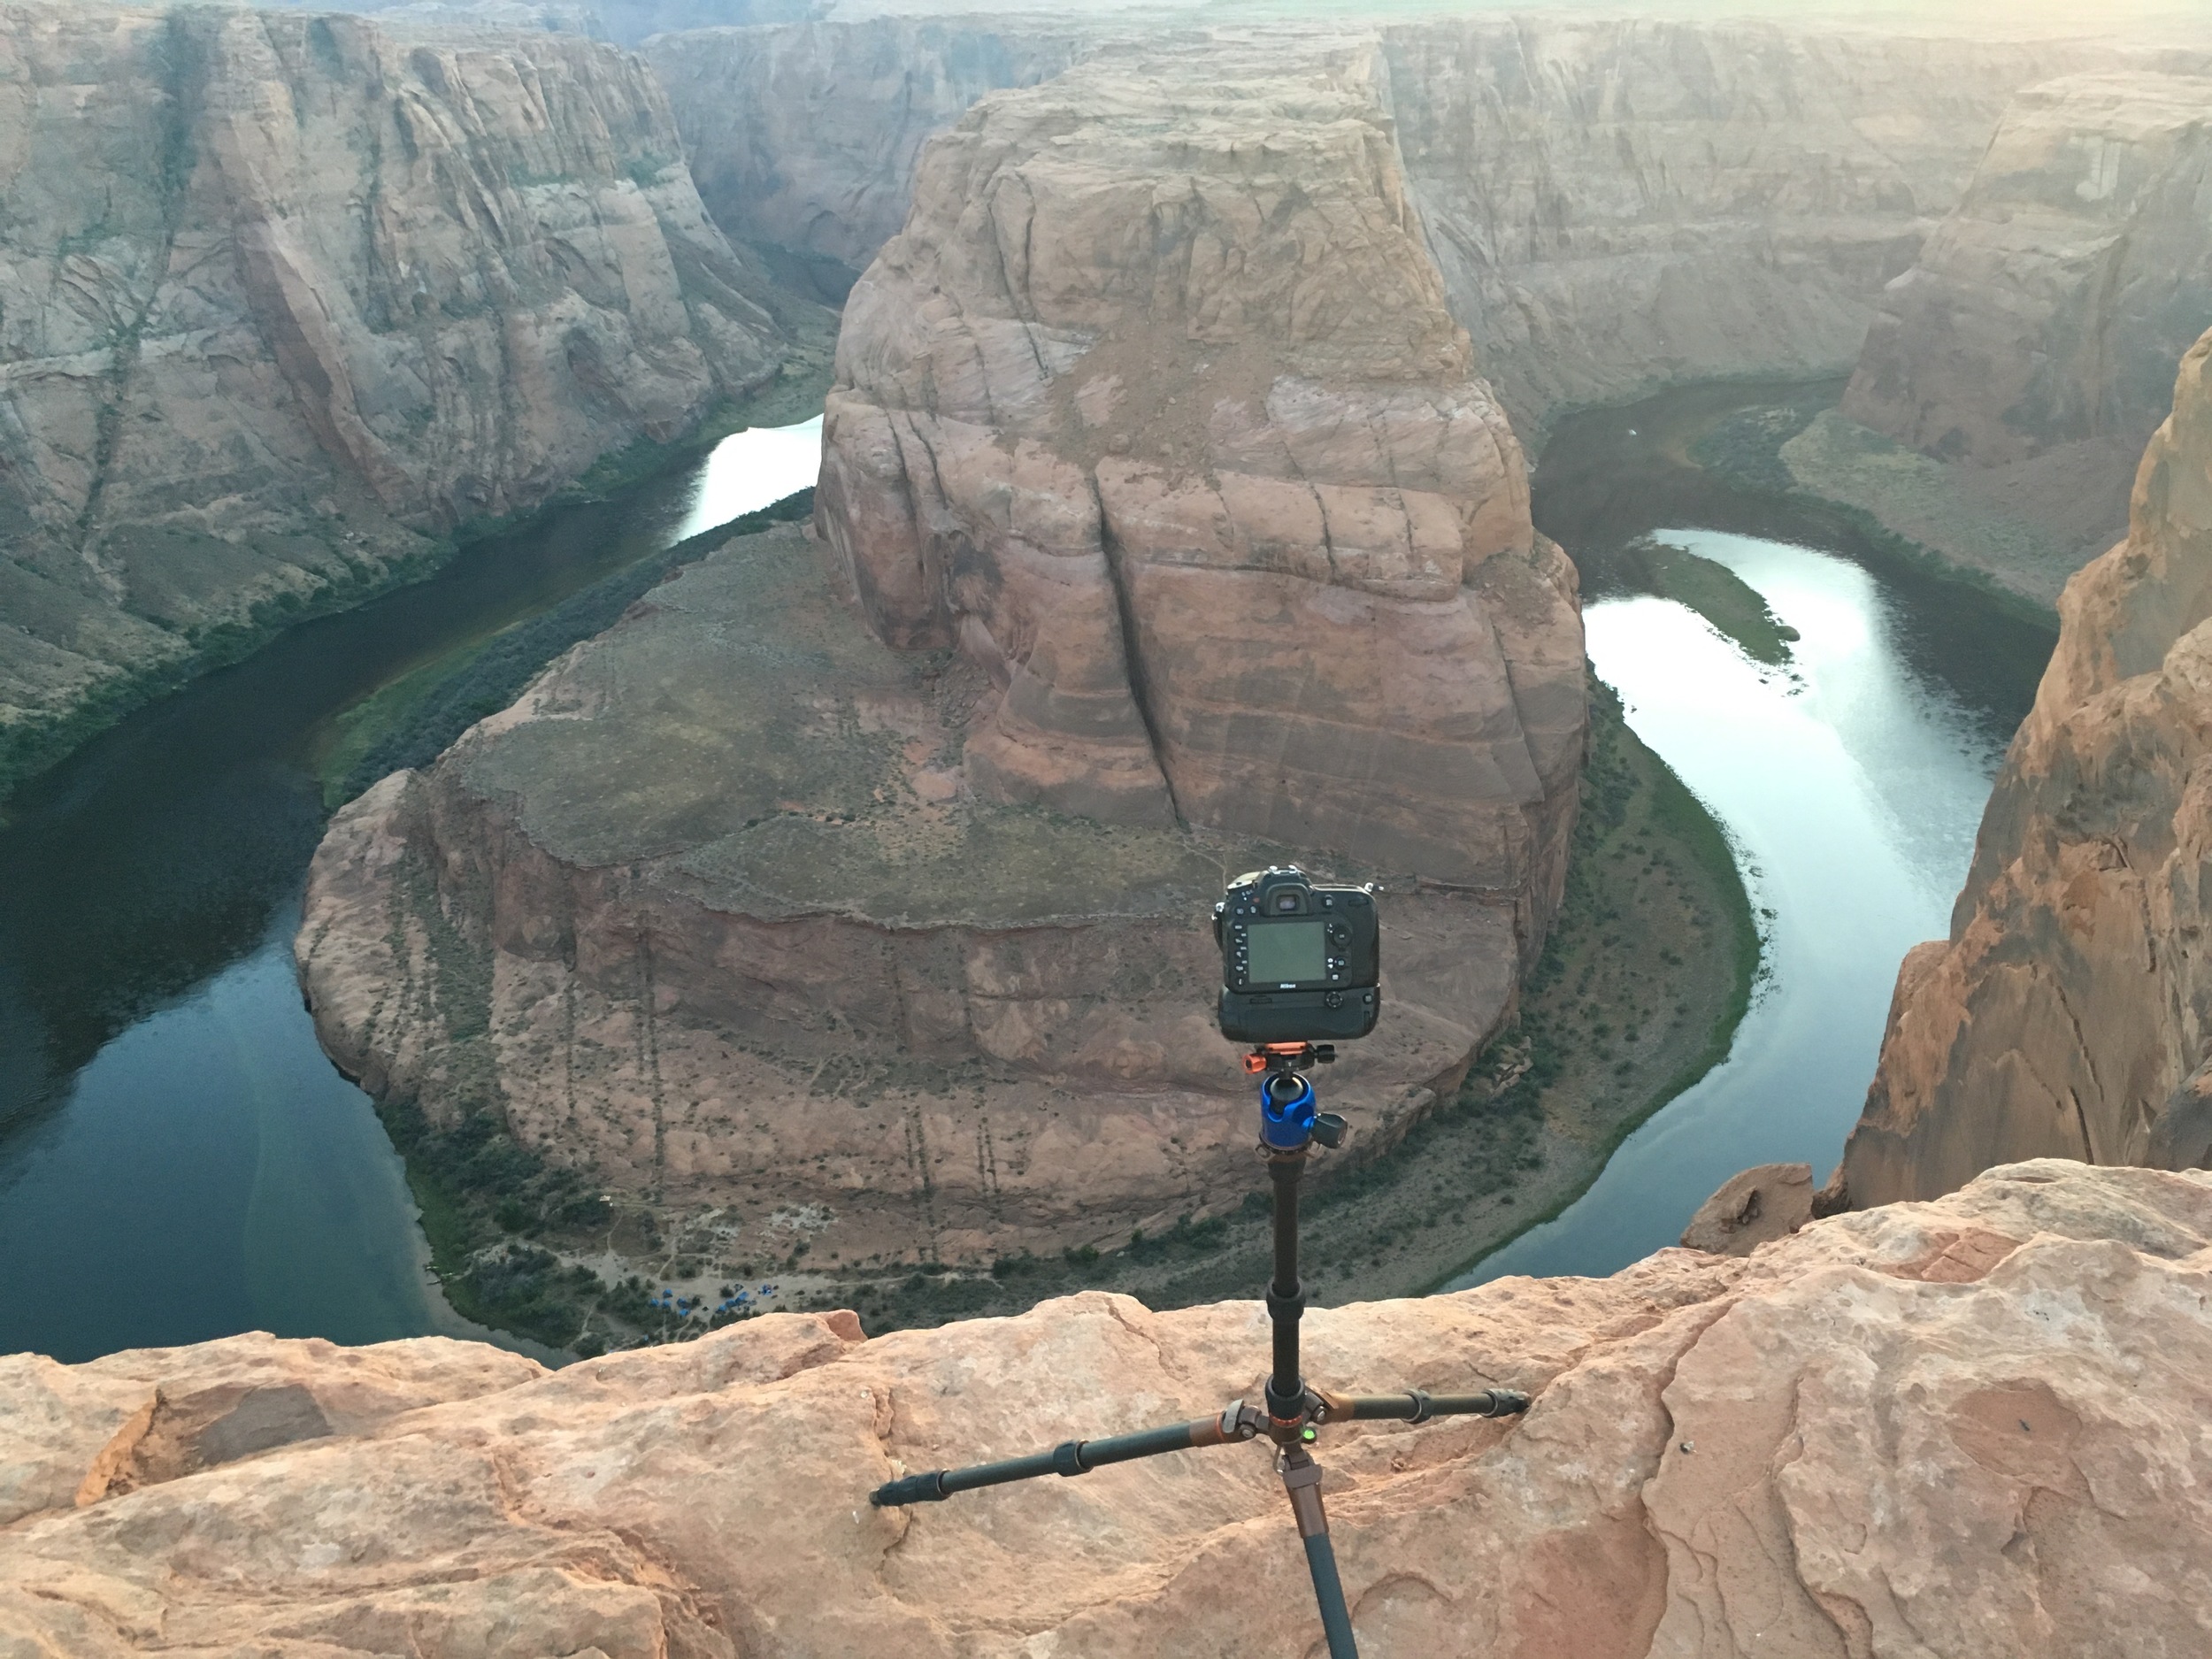
As I hope you can appreciate, creating a great image isn’t (usually) a case of turning up, pointing the lens and pressing the shutter button (although it can sometimes work!) This particular shot was quite tricky, mainly because of the drastic difference in brightness of the sky, and the deep darkness of the river and canyon walls.
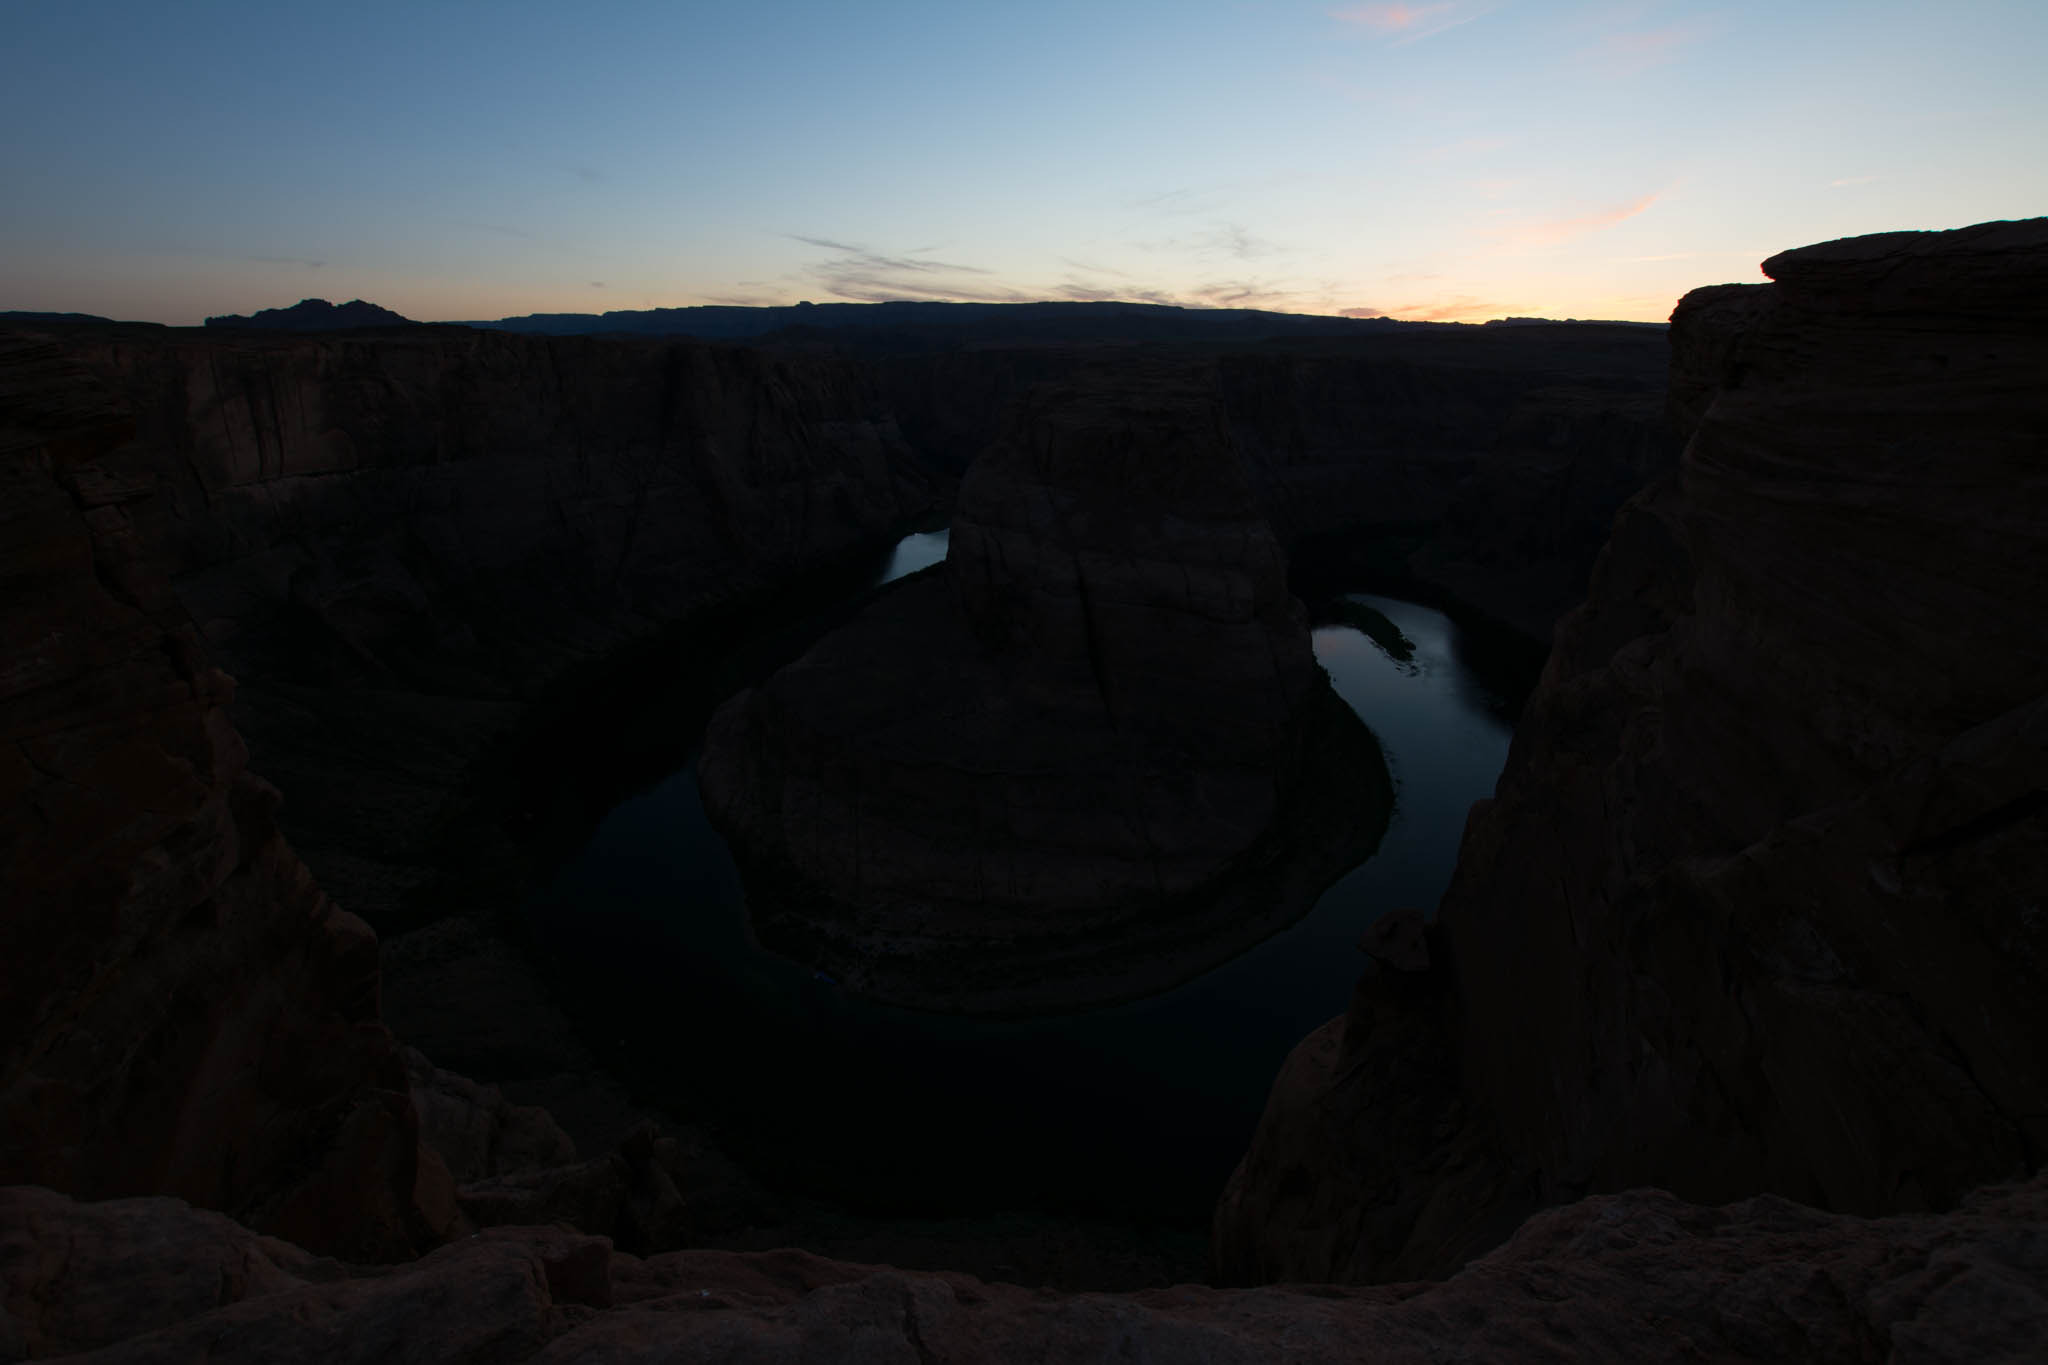
If I exposed for the sky, the canyon is essentially blackness:
If I expose for the canyon, the sky is mostly white with no detail:
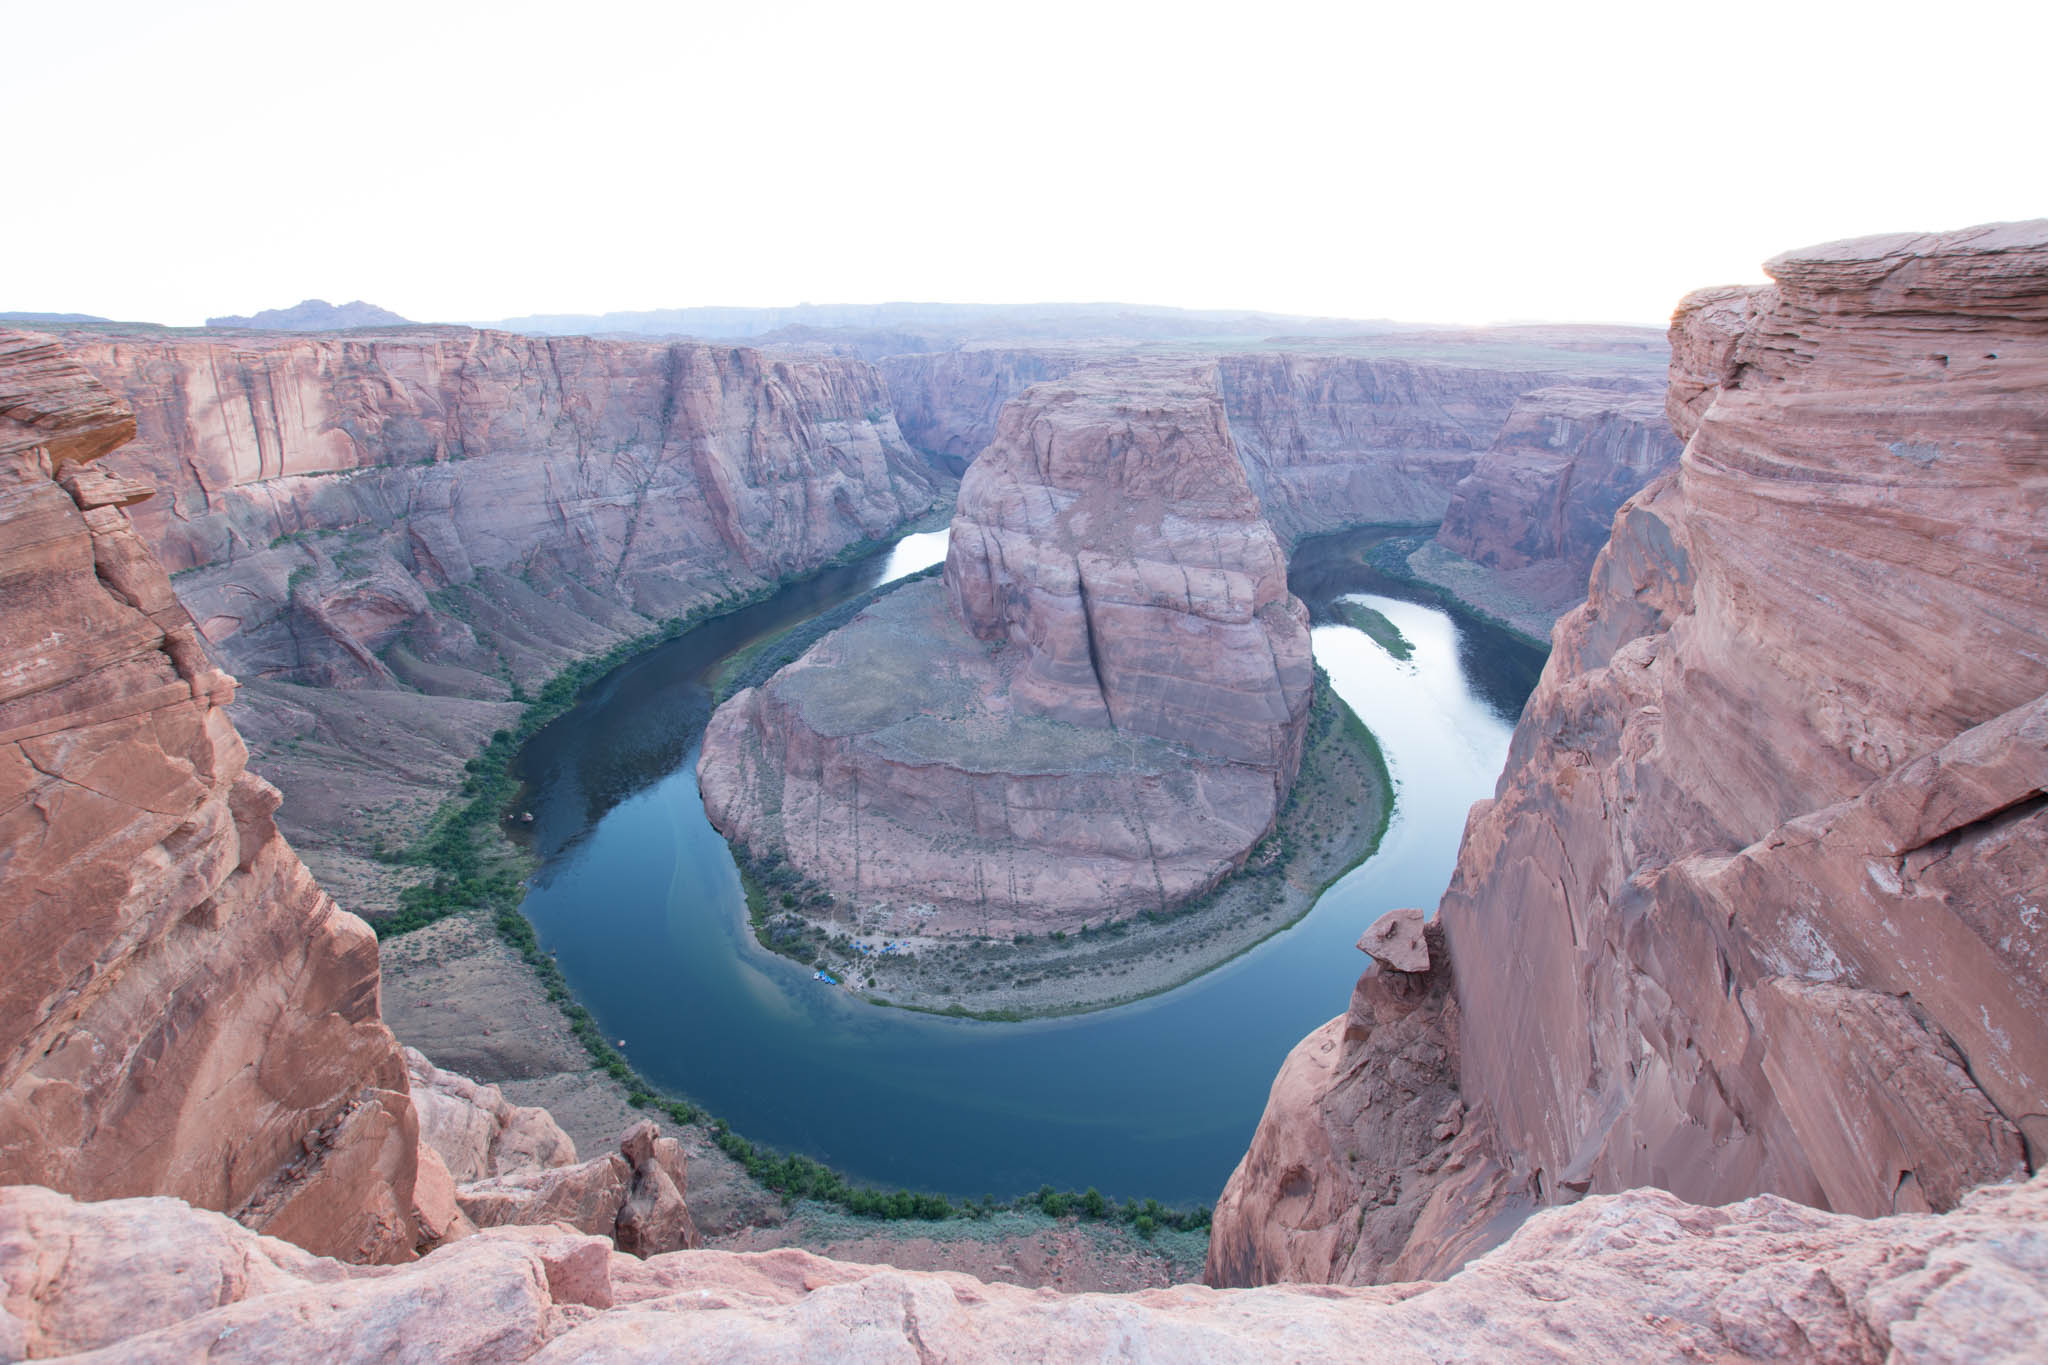
So, what to do? This is where a technique called ‘High Dynamic Range’ comes in. This a technique where you can merge a number of pictures to get a pleasing range of exposure in your subject. It has been over-done a great deal in the recent past, and has got something of a bad name; but if it’s done with restraint, the results can look pleasing and natural. To get the image at the top of this blog post, I took 5 separate exposures of differing shutter speeds (by leaving the shutter open for incrementally longer amounts of time gave me a progressively brighter picture each shot.) Once home and sat in front of my Mac, these 5 images were merged in Adobe Lightroom. From there I could tweak and edit to my heart’s content to bring out the amazing colours and details.
I hope this has been an interesting insight into the additional effort required to create this image.
Thanks for reading!